Lovin' From the Oven

  • Home
  • About Me
  • Recipes
  • FAQ
  • My Lifestyle Blog
  • Disclaimer

Halloween Chocolate Cut-Out Cookies

October 28, 2010 by kim 18 Comments

DSC_2855

Today’s post is inspired by a little gift basket I won at my friend’s baby shower a couple weeks ago. What did I win? This!

DSC_2680

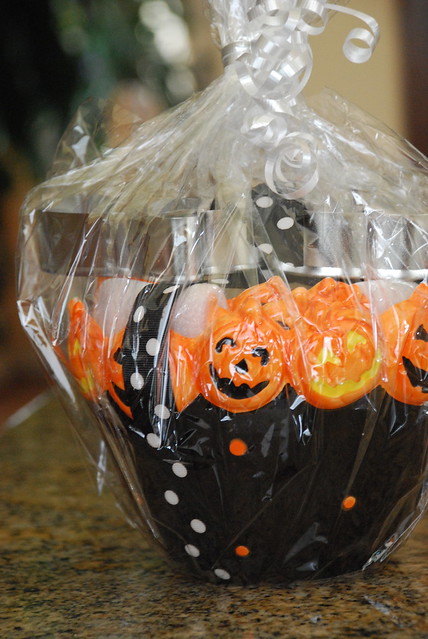
How cute, right? And might I add… perfect for a baker! Three Halloween themed bowls and two cookie cutters. I used the two cookie cutters in the basket plus an assortment that I got from Target’s dollar section last year.

DSC_2693

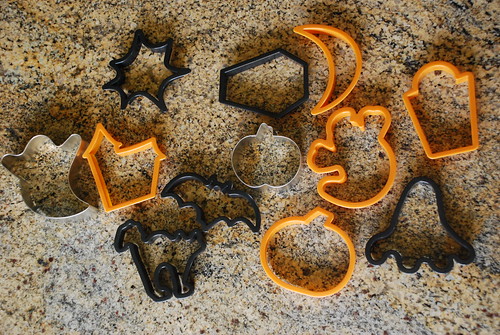
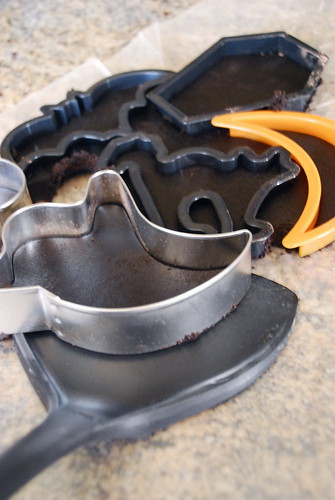
Can someone please tell me what that cookie cutter is in the bottom right hand corner?! I’ve turned it a million ways and I just don’t see it. A deformed foot?
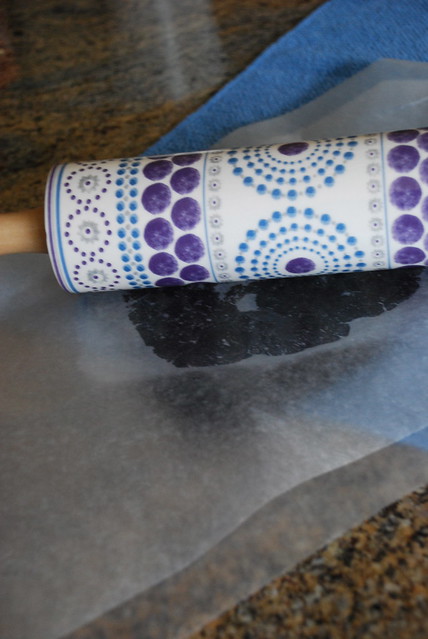
I was also able use my gorgeous rolling pin that I got from some of my friends for my birthday.

DSC_2722

DSC_2726

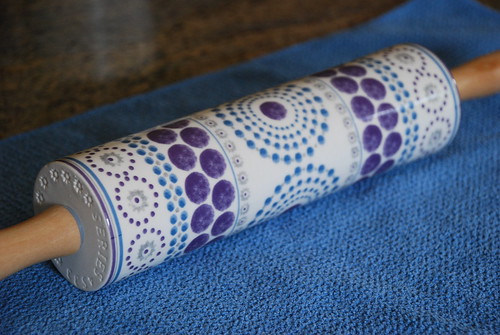
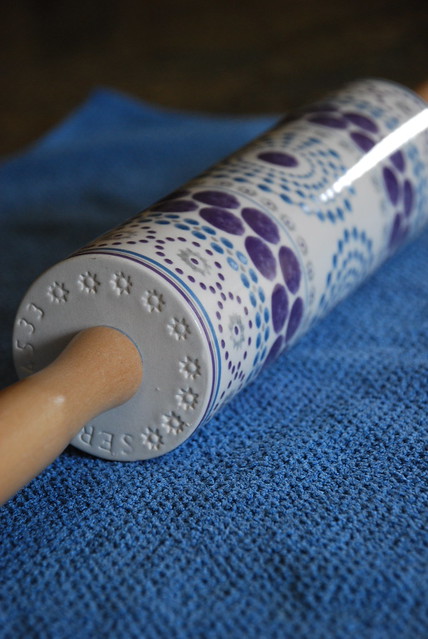
Isn’t she just beautiful? It’s from Anthropologie and I can’t stop staring at it. Look at the detail on the side! I’m in love.

Okay, focus… Roll out the refrigerated dough between two pieces of wax paper.
DSC_2741

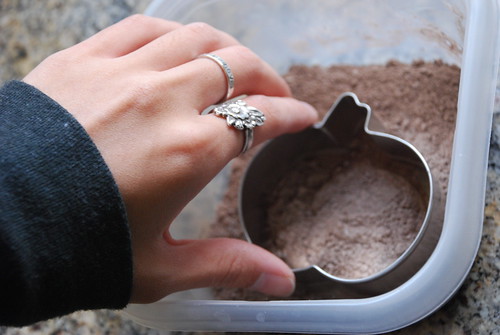
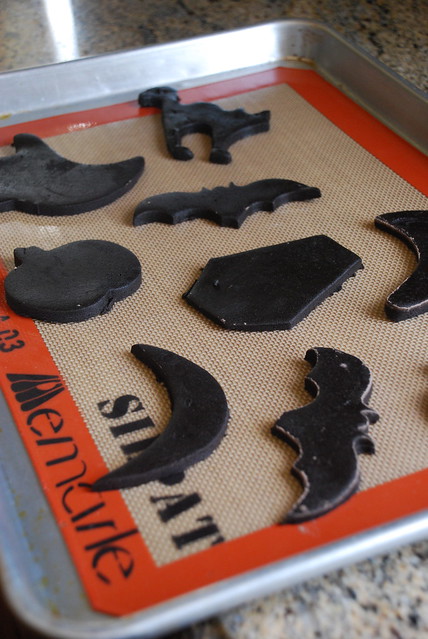
Dip your cookie cutters in a mixture of cocoa powder/flour to keep the dough from sticking to them…
DSC_2705

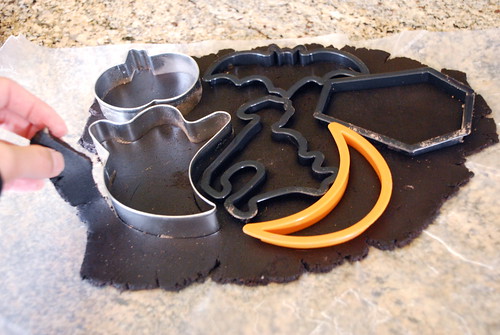
Place your cookie cutters in place and start peeling away the excess.
DSC_2744

Use a spatula to help successfully transport your cookie dough to the baking sheet.
DSC_2751

DSC_2752

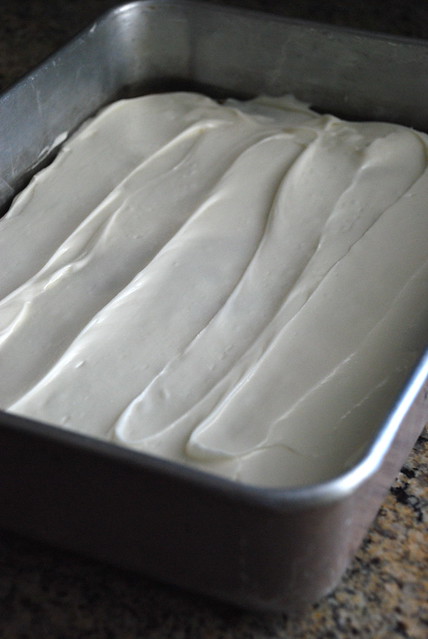
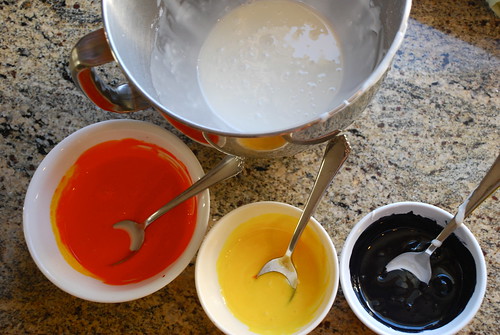
While baking, start making & coloring your icing (I stuck to Halloween colors).
DSC_2829

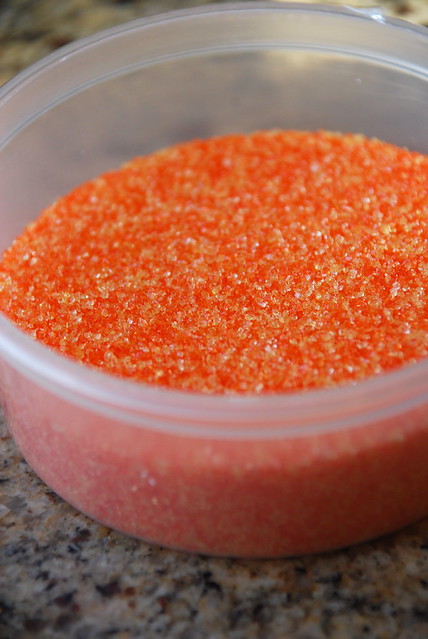
and have plenty of sprinkles to decorate with!
DSC_2841

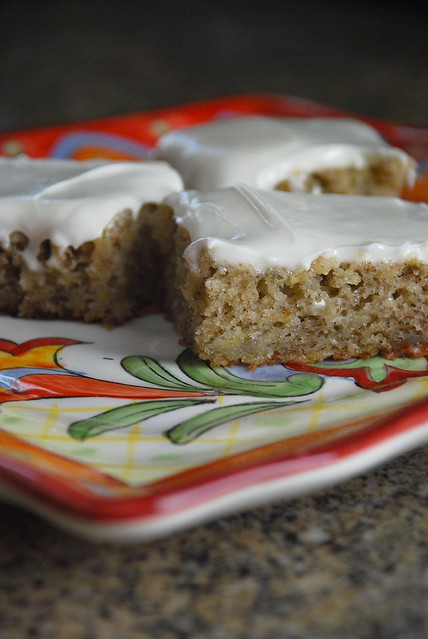
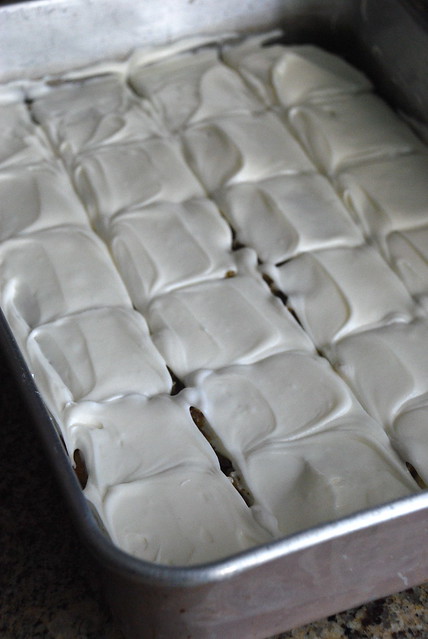
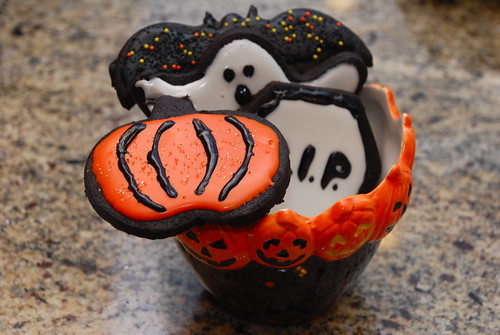
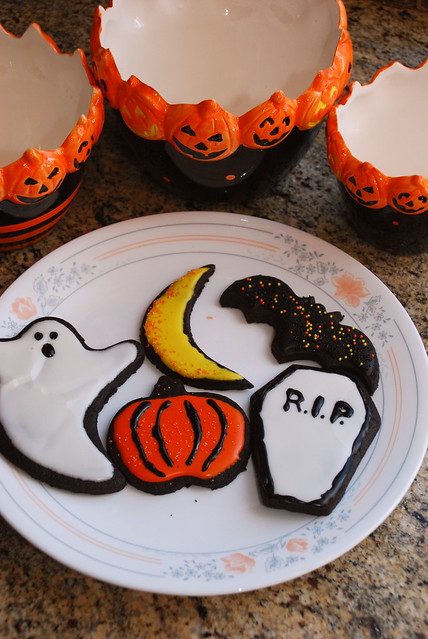
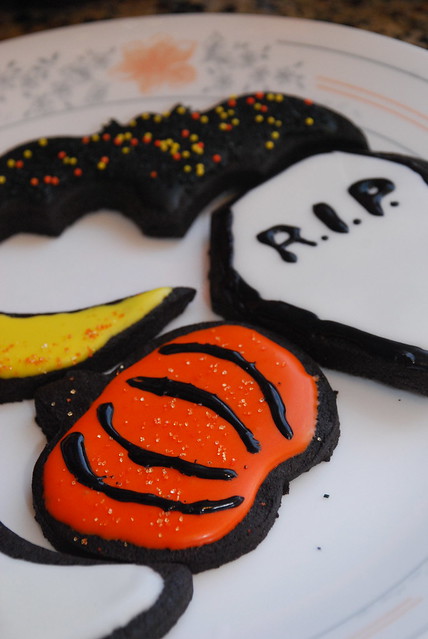
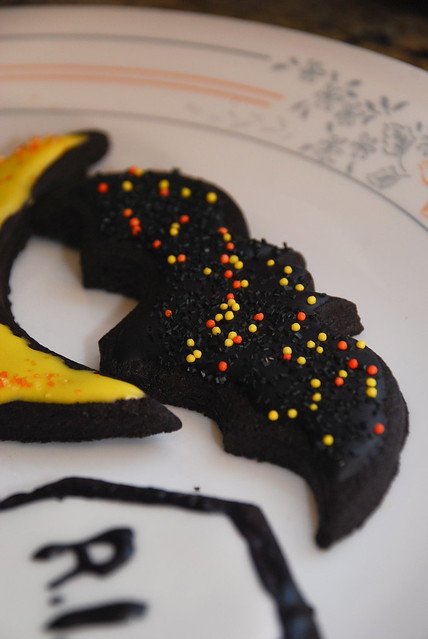
Decorate away! (my poor ghost cracked a little bit because I moved it before it was completely dry)
DSC_2848

DSC_2858

I rarely ever make cut out cookies because 1.) they’re a pain in the butt to make (waiting to refrigerate and then cut out), 2.) they’re a pain in the butt to decorate, and 3.) you’re going to use your entire kitchen space AND a million dishes just to make three decorated cookies. Not cool.
Although I love pretty decorated cookies, I don’t necessarily jump at the idea of making them. I’d rather let the people with the right tools and patience whirl away in their kitchens decorating sugar cookies. I didn’t bust out my Wilton tip set or pastry bags for these… I simply used a spoon and a toothpick. I already spent 3+ hours making the dough, waiting for the dough to refrigerate, waiting for the cookies to cool, and making the icing that I didn’t have the patience to sit another couple of hours to decorate. Plus, I wasn’t going to have anymore sunlight to take pictures by the time I was done! So please excuse my not-so-perfect cookies.
Even though they’re not as pretty as most, they sure tasted deeeeelish! They were sturdy enough to hold their shape and not break apart as I moved them around, yet they were soft as can be when biting into them. I think I loved them so much because I used dark cocoa powder rather than the normal. It really makes a difference! I’m going to start replacing regular cocoa with dark cocoa in every recipe now. This recipe is ever so slightly adapted from Bake Greek.
DSC_2851

  • 1 1/2 (3/4 cup) sticks unsalted butter, room temperature
  • 1 cup sugar
  • 2/3 cup dark cocoa powder
  • 1 egg
  • 1 1/2 tsp vanilla extract
  • 1 1/4 cup flour
  1. Cream butter and sugar until smooth.
  2. Add the cocoa powder, and mix until incorporated.
  3. Add egg and the vanilla extract. Blend together
  4. Finally, mix in the flour until combined.
  5. Wrap and refrigerate the dough in two separate batches for at least two hours.
  6. Roll the dough out between two pieces of wax paper.
  7. Dip cookie cutters in a mixture of equal parts flour + cocoa powder before cutting out the shapes.
  8. Place shapes at least two inches apart on the baking sheet.
  9. In an oven preheated to 350 degrees, bake for 10 mins, 12-15 for larger ones.
Royal icing recipe, as seen HERE (I halved it and still had plenty extra)

  • 6 oz (3/4 cup) of warm water
  • 5 Tablespoons meringue powder
  • 1 teaspoon cream of tartar
  • 1 kilogram (2.25 lbs.) powdered icing sugar
  1. In mixer bowl, pour in the warm water and the meringue powder. Mix it with a whisk by hand until it is frothy and thickened…about 30 seconds.
  2. Add the cream of tartar and mix for 30 seconds more.
  3. Pour in all the icing sugar at once and place the bowl on the mixer.
  4. Using the paddle attachment on the LOWEST speed, mix slowly for a full 10 minutes. Icing will get thick and creamy.
  5. Cover the bowl with a dampened tea-towel to prevent crusting and drying.
  6. Tint with food colourings or thin the icing with small amounts of warm water to reach the desired consistency.

Filed Under: cocoa, cookies, dessert, frosting

Banana Bars with Cream Cheese Frosting & a Giveaway

October 9, 2010 by kim 91 Comments

DSC_2366

DSC_2350

DSC_2357

DSC_2358

Festive plate, don’t you think? I was actually busily snapping away when my mom came up to me, very excitedly may I add, going on about plates. Huh? I had no idea what she was talking about. She went to cupboard and pulled out these rooster plates. Apparently, she bought them just for me for the sole reason of taking blog pictures. Hahaha– My mom’s the best! And apparently a rooster lover? Who knew?

DSC_2376

DSC_2362

Thank you so much for your kind comments and support about my previous post! It’s overwhelming— in a “I can’t believe it, I love you guys!” kind of way. Not only that, but we’ve also just hit 1,000 fans on the Lovin’ From the Oven Facebook page! wahooo!

One of my wonderful followers, Ashley, suggested on the FB page that we celebrate by giving everyone free baked goods by yours truly. As much as I would LOVE to do that if I could, there’s just no way I could do that physically or financially.
Then I got to thinking… well, although I can’t bake for everyone, why not three lucky winners, instead? Perfect!
So here it is, another giveaway to celebrate all the goodness that’s been going on. Just leave a comment on this post with your favorite baby name (boy or girl) and an email for me to reach you by 11:59 PM Pacific Time, Friday, October 15th, 2010. This giveaway is only for US residents since mailing cookies overseas isn’t the greatest idea. The winners will be picked via random.org.
You might be wondering why a baby name? Well, my DB’s sister just had her first boy earlier this week (after having two girls), so I’m in a baby mood! They’re just the sweetest little things.
IMG_0679

These bars are unbelievably moist and a hit at work. To me, they were a bit on the sweet side so I’d adjust the sugar next time I make them. The bars would have tasted fine without the frosting, but cream cheese frosting is my weakness. These bars are adapted from Betty Crocker.

  • 4 mashed very ripe bananas
  • 1 cup sugar
  • 1/3 cup vegetable oil
  • 2 eggs
  • 1 cup all purpose flour
  • 1 teaspoon baking powder
  • 1/2 teaspoon baking soda
  • 1 teaspoon cinnamon
  • pinch of salt
  1. Preheat oven to 350 and lightly grease a 9″ x 13″ pan.
  2. Mash the bananas and then mix in the sugar, oil, and eggs.
  3. Stir in the flour, baking powder, baking soda, cinnamon, and salt.
  4. Pour into the pan and bake, uncovered, about 25 minutes, or until a toothpick comes out clean.
  5. While the bars are cooling, make the frosting.
  • 5 oz cream cheese, at room temp
  • 1/4 cup butter, softened
  • 1/2 tsp of vanilla
  • 2 3/4 cups powdered sugar
  1. Cream the cream cheese and butter together.
  2. Mix in the vanilla and powdered sugar (slowly).
  3. Spread on cooled bars.

Filed Under: banana, bars/brownies, dessert, frosting, personal

Cranberry Bliss Bars

July 30, 2010 by kim 4 Comments


Now, for something that’s even prettier than these bars to look at.. crystallized ginger!:

just look at how the sugar sparkles..

but these don’t look too bad, either. 🙂


I have to say that as a blogger, there’s nothing more I love to do than to blog. I get to share a little snippet of my life by documenting it however I wish. All day, I think about what subject I can blog about next. What pictures can I post? How much posting is too much and how much is too little? What do my readers want to see?

So naturally, it only makes sense that I have so many side projects that I want to do. I want to have a blog for my scrapbooking, for my card making, for my photography, for my food, for my clothes, for my dog, for my silly family, for how my sister and I should have our own reality tv show, etc. Sometimes, I actually get enough motivation to start another blog (see HERE), but they’re never as successful as my main one (which is this one, of course!).

Which leads me to this… some of you may know that I had a style blog with my sister, but she never updated so I deleted it. For the past two days, I’ve been putting my efforts into a new blog, which I’m happy to introduce to you today. This is my very own personal style blog:
A Pile of Style
No more depending on anyone else to update.. just me (and my DB to take the photos)! So if you’re ever bored, feel free to venture over there. I know I won’t be able to update daily, but I hope to update just as much as I do here. Here’s to hoping!

These bars are supposed to be a knockoff of Starbuck’s Cranberry Bliss Bars, but I’ve actually never even tried theirs so I can’t compare. They were very flavorful and the frosting was light enough to not overwhelm the bar, but strong enough complement and tone down the ginger flavor. Next time I make them, I would definitely cut down the amount of ginger used. They’d be the perfect treat for Christmas, just look at how pretty they are! This recipe comes slightly adapted from the Wine Imbiber.

  • 2 sticks (1 cup) unsalted butter, softened
  • 1–1/4 cups brown sugar, packed
  • 3 large eggs
  • 1 teaspoon vanilla
  • 1–1/2 cups all purpose flour
  • 1 teaspoon ground ginger
  • 1/4 teaspoon salt
  • 1/4 cup plus 2 tablespoons Dried Cranberries, minced
  • 1/4 cup plus 1/4–1/3 cup White Chocolate Chips
  • 1/4 cup Crystallized Ginger Slices, minced
  • 4 ounces cream cheese, softened
  • 2 tablespoons unsalted butter, softened
  • 1 teaspoon vanilla
  • 1–1/2 cups powdered sugar
  1. Preheat oven to 350° F. Lightly grease a 9×13 pan or line it with parchment paper for easy removal.
  2. Beat together the butter and sugar. Mix in the eggs and vanilla.
  3. Add the flour, ginger, and salt into the batter. Beat well. Lightly stir in the 1/4 cup cranberries, 1/4 cup chocolate chips and minced ginger.
  4. Pour the batter into the pan and bake for about 20-25 minutes, depending on your oven.
  5. Make the frosting by beating the cream cheese, butter, and vanilla until smooth. Slowly add the powdered sugar and beat until you reach the desired consistency.
  6. Spread the frosting onto the cooled cake.
  7. Cut the frosted cake as desired into bars or triangles. Sprinkle the remaining minced cranberries and chocolate chips on the top.

The Darling Foodie
Facebook Fan Page
Ask me anything on Formspring

Filed Under: bars/brownies, berry, dessert, frosting, white chocolate

  • « Previous Page
  • 1
  • …
  • 10
  • 11
  • 12
  • 13
  • 14
  • …
  • 21
  • Next Page »

hi! i'm kim-- a girl mom, baker, blogger, and ex-flight attendant. welcome!

Search

  • Facebook
  • Instagram
  • Pinterest
  • Twitter

Categories

RODELLE-BABadge


Categories

  • Facebook
  • Instagram
  • Pinterest
  • Twitter

Copyright © 2026 · Foodie Pro Theme by Shay Bocks · Built on the Genesis Framework · Powered by WordPress