Lovin' From the Oven

  • Home
  • About Me
  • Recipes
  • FAQ
  • My Lifestyle Blog
  • Disclaimer

Oatmeal Chocolate Chip Cookies

January 22, 2015 by kim 1 Comment

oatmealchocolate-4

Why is it always so hard to blog the first quarter of the year? I’m the worst. Apologies.

oatmealchocolate

I’ve had a lot of kitchen fails recently with cookies that come out completely flat. I’m talking so flat that I can’t even take them off of the baking sheet without breaking them into a million pieces. We all have our off days/weeks/months(?). I’m no different.

oatmealchocolate-2

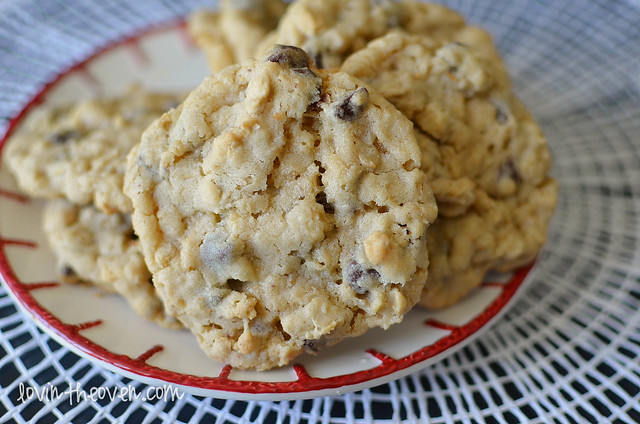
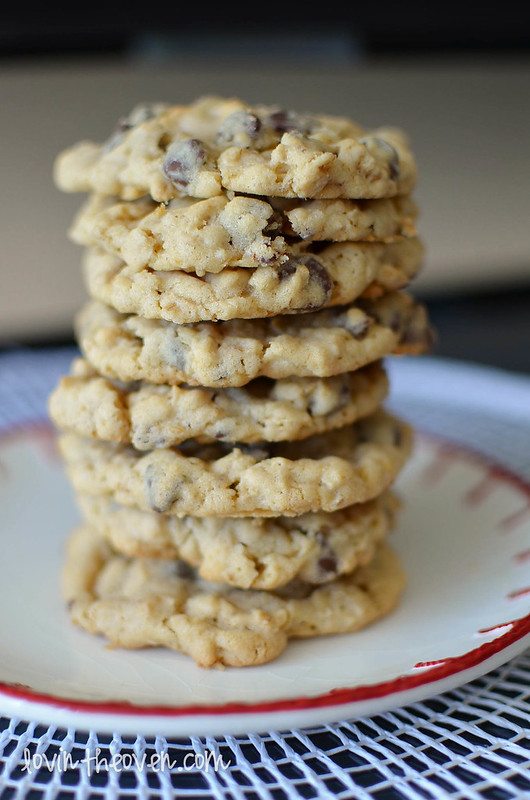
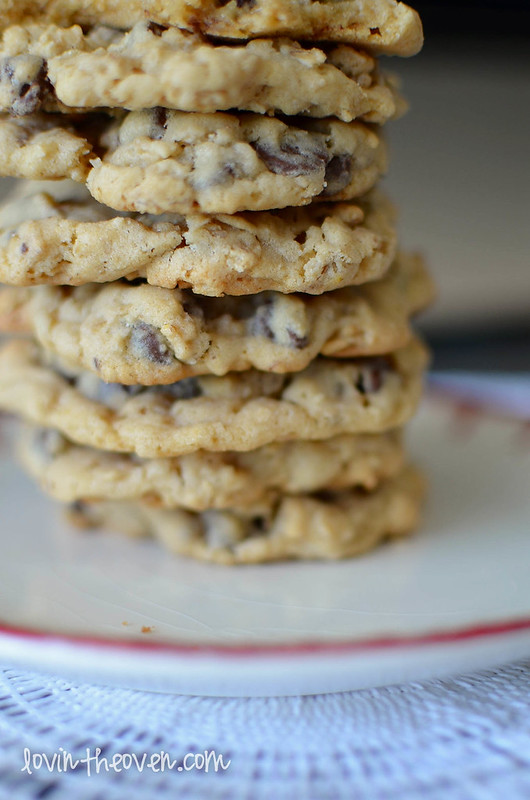
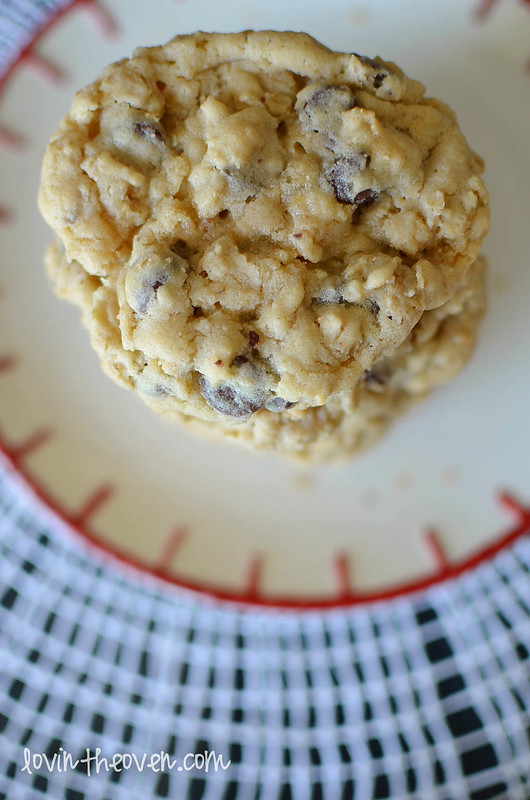
These cookies are still a little flat for my liking, but they still hold their shape. That’s okay because this cookie dough is all sorts of yum.

oatmealchocolate-3

Hopefully this baking slump passes by sooner rather than later!

oatmealchocolate-5

From Aristocrafty (adapted slightly from Favorites cookbook)

Print
Oatmeal Chocolate Chip Cookies

Ingredients

  • 1 cup butter
  • 1 cup sugar
  • 1 cup brown sugar
  • 2 eggs
  • 2 tsp vanilla
  • 1 tsp salt
  • 1/2 tsp baking powder
  • 2 tsp baking soda
  • 2 1/4 cup flour
  • 2 cups oats
  • 2 cups semisweet chocolate chips

Directions

  1. Preheat oven to 350 degrees F.
  2. Cream together butter and sugars. Add eggs and vanilla and mix well.
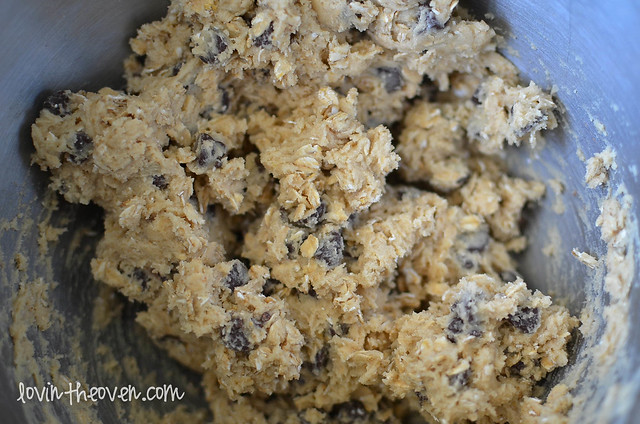
  3. Add salt, soda, powder, flour and mix just until combined. Mix in oats and chocolate chips with a wooden spoon.
  4. Drop rounded balls of dough onto baking sheet and bake for 10-12 minutes.
3.1
https://lovintheoven.com/oatmeal-chocolate-chip-cookies/

Filed Under: chocolate chip, cookies, dessert, oatmeal

Classic French Madeleines

January 6, 2015 by kim 19 Comments

IMG_3621Happy New Year, fellow blog readers! I was a bit ambitious for our New Year’s party and tried my hand at madeleines for the first time. Thanks to this Madeleines book by Barbara Feldman Morse, it was a cinch.

IMG_3661Madeleines are the perfect excuse for having a party. After prepping and baking a couple of different flavors, you can set up a sprinkles/toppings bar for guests to decorate their own madeleines. Kids, especially, would love it!

IMG_3624I chose to try classic french madeleines and dark chocolate espresso madeleines so I could have the best of both worlds. To be honest, my first batch was a disaster. Not because they turned out terrible, but because I thought I could hold the pan with one hand right out of the oven. The corner of the pan just bumped the side of the oven when they came out and the whole batch went tumbling down.

IMG_3639It wasn’t all bad, though. I managed to salvage two and a half madeleines. My DH ate the half and then quickly finished off the other two so I knew they were good. Not to worry, I was planning on making a couple of batches anyway. I only had one madeleine pan to bake with, so I was making twelve at a time (half a batch). The pan that Quick Books sent me is awesome. Nothing stuck, the madeleines shaped wonderfully (assuming you put in just the right amount of batter), and it’s lightweight and heavy duty at the same time.

IMG_3649I enjoyed the madeleines plain, but my DH preferred them dipped in dark chocolate. I threw an assortment of sprinkles on top for the new year. Plus, they’re more eye-catching with bold and bright colors.

IMG_3655

IMG_3659This is the first time that I’ve baked with vanilla bean paste and let me tell you, it’s a game changer. The little specks of vanilla bean laced throughout the layers of each madeleine enhanced the flavor. As for the dark chocolate madeleines, the large amount of coffee added into the batter deepened the cocoa.

IMG_3666From what I’ve learned after my many batches, here are a couple of tips for your first time:

  1. Filling up the pan cavity almost all the way was too much for me. They overflowed. It’s better to start out with a little less than a little too much.
  2. When they say to mix the eggs and sugar together for five minutes, do it! The aerating is necessary for a light and fluffy madeleine. A mixer is your best friend when it comes to making madeleines.
  3. Use top of the line ingredients. Since there are so few ingredients in making a basic madeleine, it makes a huge difference the quality of your butter, vanilla, and chocolate.
  4. Baking spray is your best friend. If you generously cover your pan, those babies will slip out with little effort.
  5. Speaking of getting them out of a pan, I inverted them over a cooling rack and gently tapped the back of the pan to let them fall out. For the ones that didn’t come out out on their own, I used my finger to gently push one corner of the madeleine and they’d just slide out without a problem.
  6. You must let them cool on a baking rack. Leaving them on a flat surface will not cut it because both sides need to cool.
  7. The texture changes dramatically straight from the oven to after cooling. They’ll be a lot more dense after being cooled. I prefer to eat them warm and fluffy, but that timeframe’s very small.

IMG_3669Now, thanks to my friend over at Quirk Books, I’m giving away a copy of Madeleines and a madeleine pan for one reader to bake with this new year! The book has more recipes than you’ll ever need to entertain. There’s sweet, savory, light, heavy, fruity, and indulgent. Enter via the Rafflecopter below.IMG_3678

Print
Classic French Madeleines

Ingredients

  • 8 tbsp (1 stick) unsalted butter
  • 1 cup all purpose flour
  • 1/2 tsp baking powder
  • 3 large eggs
  • 1/2 cup granulated sugar
  • 1 tsp vanilla bean paste or vanilla extract
  • 1 1/2 tsp freshly grated lemon zest (I subbed this with grated vanilla beans)

Directions

  1. Place a rack in the center of the oven and preheat oven to 350 degrees F. Coat two 12-shell pans with baking spray.
  2. In a small bowl, whisk together flour and baking powder.
  3. Place butter in another bowl and microwave on low power for 1 minute, or until melted. Allow to cool to room temperature.
  4. Place eggs and sugar in a 2-quart glass bowl or measuring cup and beat with a hand or stand mixer on medium-high speed until mixture is light and fluffy, about 3 to 5 minutes.
  5. Add vanilla and zest and continue beating for another minute or so. Fold in the flour mixture until just blended, then drizzle the cooled butter over the batter and incorporate completely.
  6. Using a 1 1/2 inch-diamter scoop or a teaspoon, fill shell molds with bater until almost full. Gently press batter to distribute it evenly.
  7. Bake for 10 to 12 minutes, until madeleines puff up and are golden brown.
  8. Remove pans from oven and let cool on a wire rack for 2 to 3 minutes, then invert and tap madeleines onto the rack. You may also use a small offset spatula to remove each one individually. Let cool completely if planning to store and/ or freeze. Otherwise, serving madeleines warm from the oven is best!
3.1
https://lovintheoven.com/classic-french-madeleines/

a Rafflecopter giveaway

This is a sponsored post, but the opinions expressed are my own.

Filed Under: book review, cake, chocolate chip, cocoa, coffee, dessert, food porn, giveaway, lemon, white chocolate

Day 7: Carmelita Cookies

December 10, 2014 by kim Leave a Comment

oatmealcaramelchoco-7

Day 7 of my 12 days of cookies: carmelita cookies. I’ve made carmelita bars before, and now I can cross them as cookies off of my list! Oozy caramel, chocolate, and oatmeal come together to bring you this joyous treat.

oatmealcaramelchoco-4

They even browned just right on the edges. I love when that happens.

oatmealcaramelchoco-3

oatmealcaramelchoco-6

These cookies are so so good. Rolos were made to be in cookies, not eaten alone. That’s silly.

oatmealcaramelchoco-5

Can you imagine biting into a cookie and having soft caramel spill out of the sides? It’s a nice and welcoming surprise to most cookie monsters.

oatmealcaramelchoco

oatmealcaramelchoco-2

Recipe from from Cookies and Cups

Print
Carmelita Cookies

Ingredients

  • 1 1/4 cups butter (2 1/2 sticks) room temperature
  • 1 1/2 cups brown sugar
  • 2 eggs
  • 1 tsp vanilla
  • 1 1/2 cups flour
  • 1 tsp baking soda
  • 1 tsp salt
  • 3 cups quick oats
  • 2 cups chocolate chips
  • approx 40 unwrapped Rolo candies, frozen

Directions

  1. Cream together the butter and brown sugar. Mix in the eggs and vanilla.
  2. Gradually add in flour, baking soda, salt and oats until just combined. Stir in chocolate chips.
  3. Chill dough for at least an hour. During this time freeze your Rolo candies.
  4. When dough is ready preheat oven to 350° and line baking sheets with parchment paper.
  5. Wrap about 1 1/2 tablespoons of cookie dough around a frozen Rolo, forming a ball. Place your dough balls about 2 inches apart on lined baking sheet.
  6. Bake for 10-12 minutes until edges are golden and tops have just set.
  7. Let cookies cool completely before moving.
3.1
https://lovintheoven.com/carmelita-cookies/

Filed Under: candy, chocolate chip, cookies, oatmeal

  • « Previous Page
  • 1
  • …
  • 12
  • 13
  • 14
  • 15
  • 16
  • …
  • 71
  • Next Page »

hi! i'm kim-- a girl mom, baker, blogger, and ex-flight attendant. welcome!

Search

  • Facebook
  • Instagram
  • Pinterest
  • Twitter

Categories

RODELLE-BABadge


Categories

  • Facebook
  • Instagram
  • Pinterest
  • Twitter

Copyright © 2026 · Foodie Pro Theme by Shay Bocks · Built on the Genesis Framework · Powered by WordPress