Lovin' From the Oven

  • Home
  • About Me
  • Recipes
  • FAQ
  • My Lifestyle Blog
  • Disclaimer

Day 4: Andes Peppermint Cookies

December 7, 2016 by kim Leave a Comment

IMG_3577

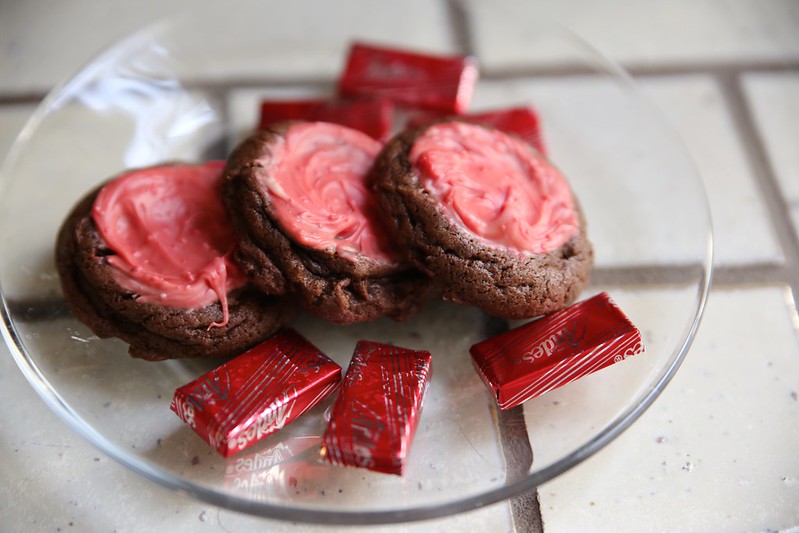
Day 4 or my 12 days of cookies: Andes Peppermint Cookies. This one is a spin on an old Andes mint cookie that I like. I just changed it to peppermint candies instead of mint. You can even use both candies to make shades of red and green for Christmas!

IMG_3575

I will admit, I’m still partial to the green ones. Regular mint overrules peppermint, in my opinion.

IMG_3582

This cookie is a staple in my kitchen, thanks to my cousin. She’s the one that first introduced me to them! Recipe on AllRecipes.

Print
Day 4: Andes Peppermint Cookies

Ingredients

  • 3/4 cup butter
  • 1 1/2 cups brown sugar
  • 2 tablespoons water
  • 2 cups semisweet chocolate chips
  • 2 eggs
  • 2 1/2 cups all-purpose flour
  • 1 1/4 teaspoons baking soda
  • 1/2 teaspoon salt
  • 1 package Andes Peppermint Chocolates

Directions

  1. In a saucepan over medium heat, cook the sugar, butter and water, stirring occasionally until melted. Remove from heat, stir in the chocolate chips until melted and set aside to cool for 10 minutes.
  2. Pour the chocolate mixture into a large bowl, and beat in the eggs, one at a time. Combine the flour, baking soda and salt, stir into the chocolate mixture. Cover and refrigerate dough for at least 1 hour.
  3. Preheat oven to 350 degrees F (175 degrees C). Grease cookie sheets. Roll cookie dough into walnut sized balls and place 2 inches apart onto the prepared cookie sheets.
  4. Bake for 8 to 10 minutes in the preheated oven, be careful not to overbake. When cookies come out of the oven, Press one mint wafer into the top of each cookie and let sit for 1 minute. When the mint is softened, swirl with the back of a spoon or toothpick to make a pattern with the green filling of the mint wafer. For smaller cookies, break mints in half.
3.1
https://lovintheoven.com/day-4-andes-peppermint-cookies/

Filed Under: candy, chocolate chip, cookies, dessert

Day 2: Triple Chocolate Toffee Bars

December 4, 2016 by kim 1 Comment

fullsizeoutput_44a5

Day 2 of my 12 days of cookies: Triple Chocolate Toffee Bars. You know how I like to mix things up with some cookie bars in my countdown. This was made especially for National Cookie Day, December 4th!
fullsizeoutput_44a3

Krusteaz helped me celebrate this wonderful day with some cookie mixes. I used one of the recipes on their site to spruce it up a bit and added some chopped toffee chocolate bars.
fullsizeoutput_44af

Easy peasy. I also added some chocolate sprinkles on top for good measure. img_6197

This recipe is a good one for the kiddos to help out with and get in the holiday spirit since it’s made using a pre-made package. fullsizeoutput_44ad

If you think forming cookies is too much work from a boxed mix, you could follow these directions and omit the toffee to make triple chocolate chunk bars. It’s easier to throw the entire batter into one pan than roll balls of dough, right? But c’mon, that’s just too easy.
fullsizeoutput_44aa fullsizeoutput_44ae

Krusteaz has a variety of other boxes available to bake with if chocolate chunk isn’t your cup of tea. fullsizeoutput_44ac

This recipe comes from Krusteaz.

Print
Triple Chocolate Toffee Bars

Ingredients

  • 2 (1.4 oz each) milk chocolate English toffee bars
  • 1 package Krusteaz Triple Chocolate Chunk Cookie Mix
  • 1 egg
  • 1/2 cup butter, softened

Directions

  1. Preheat oven to 350°F.
  2. Chop English toffee bars into approximately 1/4-inch pieces. Place in medium bowl. Add Krusteaz Triple Chocolate Chunk Cookie Mix, egg and butter. Stir together until dough forms, hand kneading if necessary. Press dough into a lightly greased, 8x8x2-inch pan.
  3. Bake 23-28 minutes or until light golden brown. Cool completely and cut into bars.
3.1
https://lovintheoven.com/day-2-triple-chocolate-toffee-bars/

This is a sponsored post, but the opinions expressed are my own.

Filed Under: bars/brownies, candy, chocolate chip, dessert

Simply Chocolate Cupcakes

October 24, 2016 by kim Leave a Comment

fullsizeoutput_3eea

Can I tell you how much better the holidays are when you have kids? Or in my case, a kid? I’m SO excited to dress Ellie up for her first Halloween, eat tons of food for her first Thanksgiving, and wrap presents to leave under the tree for her first Christmas! I know she’s not even one yet so she won’t remember any of these events, but I’m going to go all out anyway.

Let’s start with Halloween. I bought Ellie her costume before she was born (hellooooo 80% off-after-Halloween-sale! How could I resist?). She’s a little too young to help me in the kitchen right now, but I’m counting down the days until she can wear a mini apron and stand beside me watching cupcakes rise through the oven glass door. img_5053
img_5064

When that day comes, I’ll have Pillsbury’s Purely Simple mixes to help me out. With a toddler on hand, it’ll be difficult to bake things truly from scratch. I’ll need a little help to get me started and that’s where these mixes come in. It makes everything a little homemade, while giving me more time to spend with family.

Plus, there is so much you can do with these mixes! I love using them in the kitchen. For these simply chocolate cupcakes, I doctored up the normal recipe by adding a couple of my finishing touches. From there, I used Halloween candy to dress up the tops.

Kids will love choosing their favorite Halloween candy to put on top of their very own dessert. Cupcakes are the perfect size for tiny hands to hold and devour. I played it safe with chocolate and peanut butter based candies, but you can be adventurous with taffy, gummies, or even hard candies.
fullsizeoutput_3eeb

I like using Pillsbury’s Purely Simple mixes because they’re free of preservatives and they don’t use any bleached flour. It’s easy to make them at home and it tastes like every ingredient was thoughtfully mixed in, one by one. img_5117

You can always use the recipe on the back of the box, but if you have a little extra time, you can use this recipe to make it even more personal.
fullsizeoutput_3ee9

I made the buttercream exactly as listed on the package. Believe it or not, you only need to add butter and water to the mix. That’s it! Just two ingredients that are almost always readily available in your refrigerator.img_5135 img_5146 fullsizeoutput_3ee7

The result is this deliciously moist, fluffy, and tasteful cupcake. It took me less than half an hour total to make these cupcakes. Yes, that even includes the baking time! That’s faster than doing a load of laundry, going grocery shopping, or running the dishwasher.

Use up that leftover Halloween candy and turn it into gold!

Print
Simply Chocolate Cupcakes

Ingredients

  • 1 package Pillsbury Purely Simple Chocolate Cake Mix
  • 1 package (3.9 oz) instant chocolate pudding mix
  • 2 tbsp dark cocoa powder
  • 1 1/2 cup half and half
  • 1/4 cup vegetable oil
  • 2 eggs
  • 1 package Pillsbury Purely Simple Buttercream Frosting Mix, prepared using the directions on the package

Directions

  1. Preheat the oven to 350 degrees. Line a muffin pan with 18 cupcake liners.
  2. In a large bowl, mix all of the ingredients together until smooth.
  3. Evenly distribute the batter into the 18 cupcake liners.
  4. Bake for 20 minutes, or until toothpick comes out with only a few crumbs.
  5. Wait until cool and then frost with the buttercream. Top with chopped candy.
3.1
https://lovintheoven.com/simply-chocolate-cupcakes/

You can check out more Pillsbury ideas here:

  • Website – http://www.pillsburybaking.com/
  • Facebook – https://www.facebook.com/PillsburyBaking
  • Pinterest – http://www.pinterest.com/pillsburybaking/
  • Instagram – https://instagram.com/pillsburybaking/

This is a sponsored post, but the opinions expressed are my own.

Filed Under: cake, candy, cocoa, cupcake, dessert

  • « Previous Page
  • 1
  • 2
  • 3
  • 4
  • 5
  • 6
  • …
  • 35
  • Next Page »

hi! i'm kim-- a girl mom, baker, blogger, and ex-flight attendant. welcome!

Search

  • Facebook
  • Instagram
  • Pinterest
  • Twitter

Categories

RODELLE-BABadge


Categories

  • Facebook
  • Instagram
  • Pinterest
  • Twitter

Copyright © 2026 · Foodie Pro Theme by Shay Bocks · Built on the Genesis Framework · Powered by WordPress