Lovin' From the Oven

  • Home
  • About Me
  • Recipes
  • FAQ
  • My Lifestyle Blog
  • Disclaimer

Matcha Green Tea Avocado Smoothie

April 27, 2014 by kim 1 Comment

matchablender-14

With summer coming up, I’m all about making and drinking ice cold smoothies. I was thrilled when Tribest sent over a mason jar personal blender for me to use. Talk about perfect timing! Since we’re limited on space in our kitchen, this personal blender wasn’t too big for me to store in my cabinets. It’s small, yet powerful.

matchablender

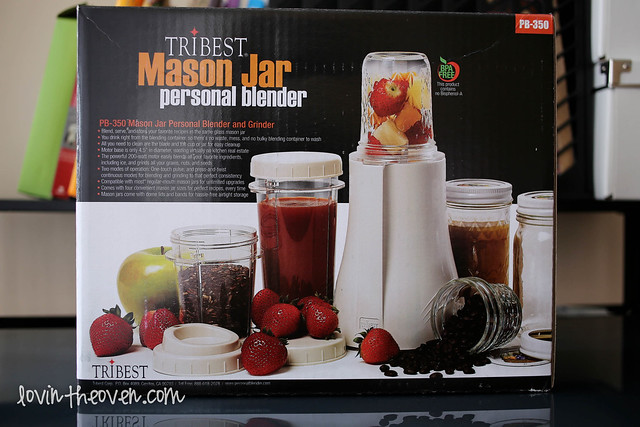
Not only that, but it’s quite versatile! It comes with lots of jars and lids for you to store your drinks in. You can blend them directly in your cup so there are less dishes to wash.

matchablender-2

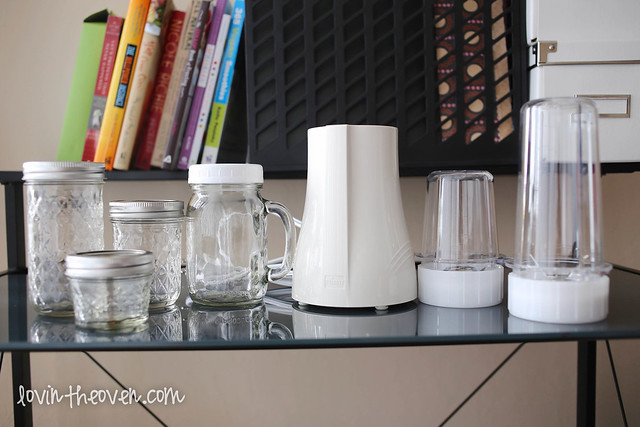
I’m still in shock at how all of these pieces fit into that one box.

matchablender-5

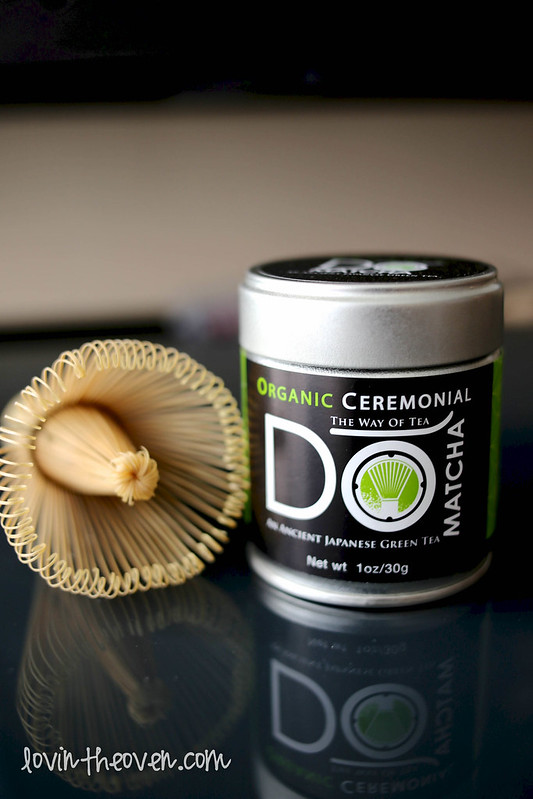
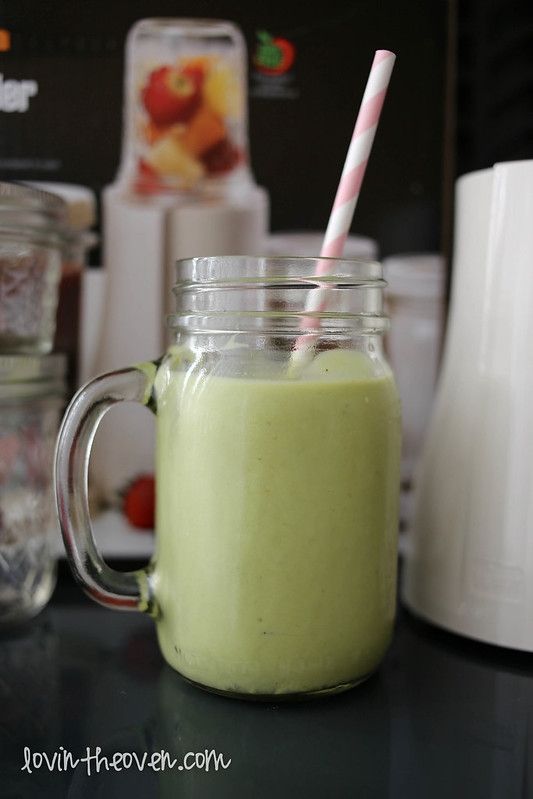
I decided to make a matcha green tea avocado smoothie using DoMatcha powder. Have you ever used matcha powder before? My DF was dependent on it when he was studying for his LSATs. It’s great for focusing since it promotes health in mind and body. It also provides sustained energy without the jitters that coffee induces.

matchablender-6

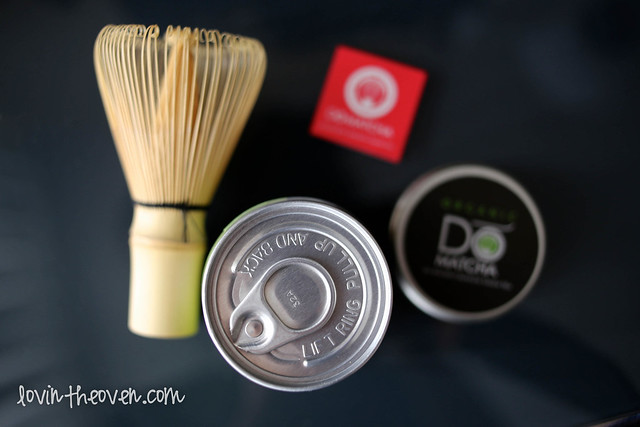
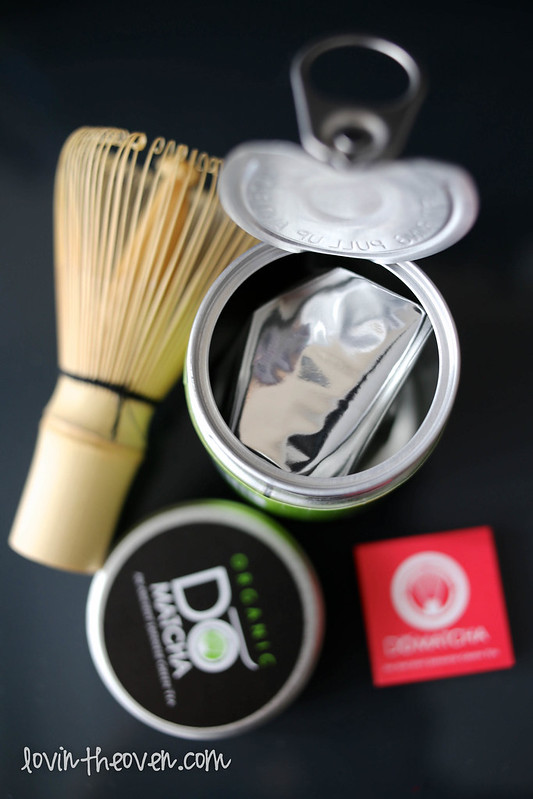
You can tell that they take time in packaging their matcha. There’s a foiled, air-tight package inside of a pop top can that has a twist cap. We’re sealing in all of the goodness, people.

matchablender-7

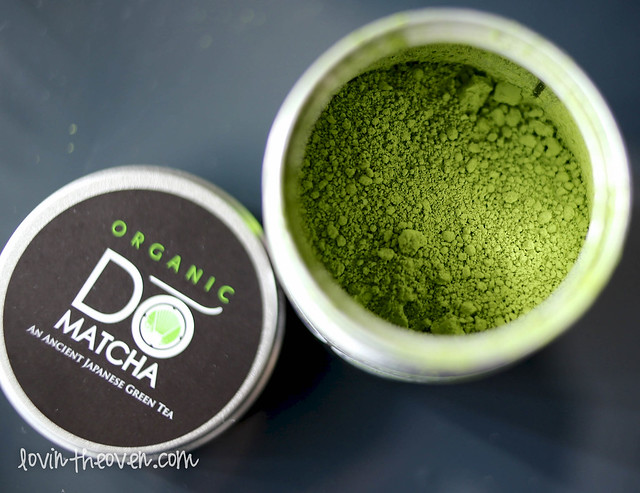
Matcha powder is really a thing of beauty. It’s bright green color and fine texture is absolutely mesmerizing.

matchablender-8

You can buy it online here. I know, I know.. it’s a little pricey but believe me, it’s worth it! The can may seem small, but you only need about a teaspoon of matcha for each cup of tea you make so a little goes a long way. Plus, there are a lot of health benefits that come with it!

matchablender-9

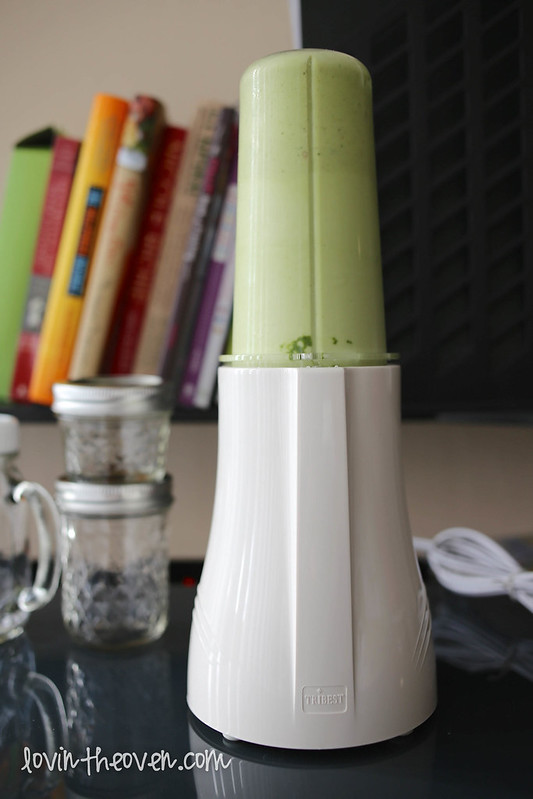
This little blender whipped my drink up in no time, thanks to its 200 watt motor.

matchablender-10

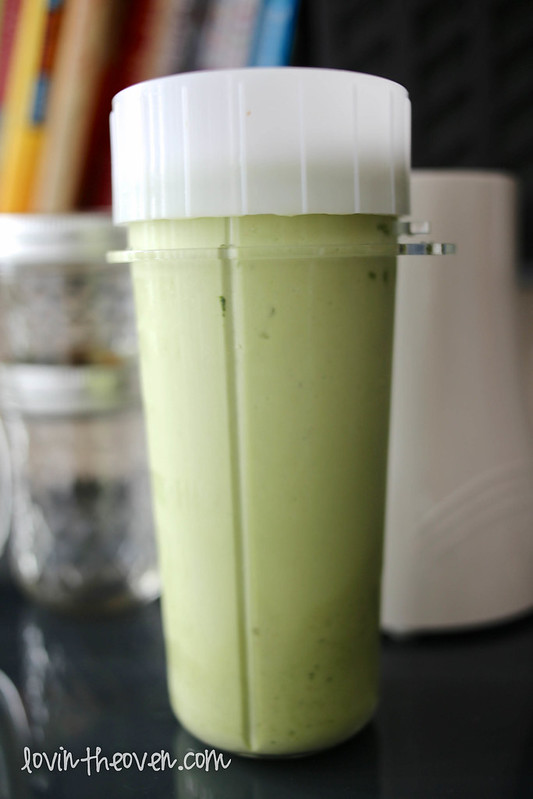
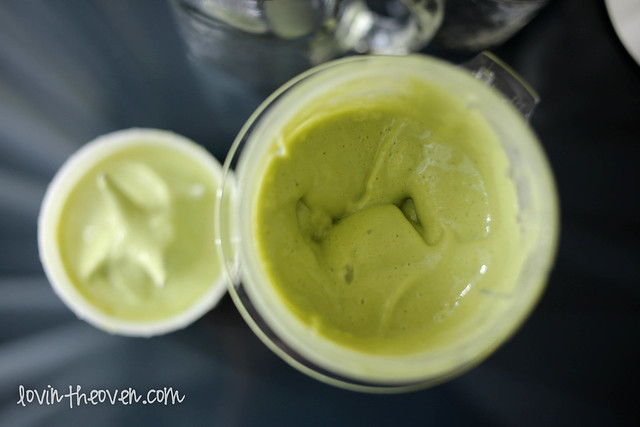
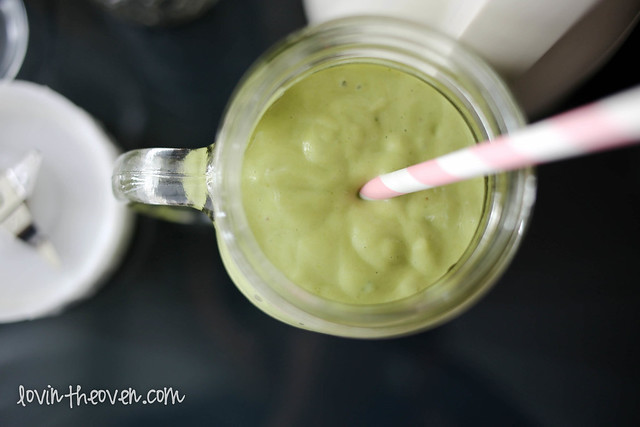
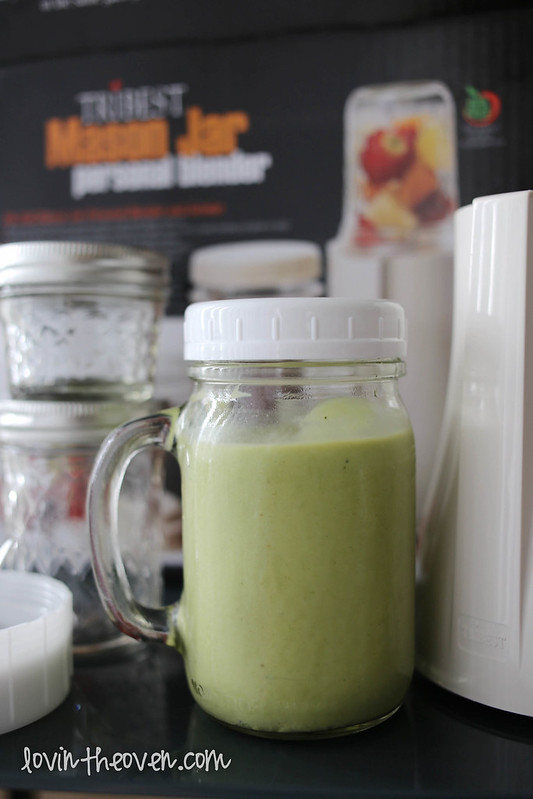
Just look at how smooth and creamy my drink came out!

matchablender-11

matchablender-13

The blender may have only one setting, but that’s what I like about it. It’s simple. No point in trying to figure out what speed you need for what, just pop everything in and twist.

matchablender-15

matchablender-16

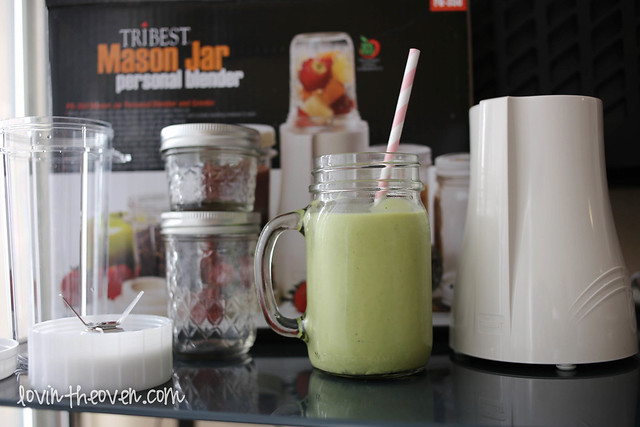
If you don’t want to drink it right away, there’s also a cap that you can put onto your jars and store in the fridge for later.

Print
Matcha Green Tea Avocado Smoothie

Ingredients

  • 1 banana, sliced and frozen
  • 1/2 avocado
  • 1/2 cup vanilla soy milk
  • 1 teaspoon honey
  • 1/2 teaspoon DoMatcha powder
  • 4-5 ice cubes

Directions

  1. Blend all of the ingredients until smooth.
3.1
https://lovintheoven.com/matcha-green-tea-avocado-smoothie/

Filed Under: banana, drinks, fruit

Cornbread BBQ Chicken Pot Pie

April 26, 2014 by kim Leave a Comment

cornbread-7

It’s been a while since I’ve experimented with dinner in my kitchen. I usually have no motivation when it comes to cooking or figuring out new recipes to make for lunch and dinner. Baking’s another story… I’ll happily spend hours in the kitchen trying out new desserts.

Just when I was about to give up, Fleischmann’s sent over a sample of their new Simply Homemade Cornbread Baking Mix along with some recipe inspiration. Thank goodness for that! I read the recipes to my DF and he liked the sound of all of them.

cornbread

I settled with the BBQ Chicken Pot Pie because I had a bottle of BBQ sauce to use up in my refrigerator. Moving out in three weeks means that I’m going to try and finish all of the ingredients in my kitchen while I still can!

Mixing up the cornbread was a cinch. I didn’t even use my KitchenAid! Just a regular fork and bowl.

cornbread-2

Pre-baking:

cornbread-3

And fresh from the oven:

cornbread-4

I’m actually surprised at how much of the BBQ sauce mixture was absorbed into the dish. There was a lot of liquid prior to baking, but all it did was keep the chicken and cornbread moist.

cornbread-6

Don’t worry, the BBQ flavor is still nice and strong. You can definitely tell that it’s BBQ chicken.

cornbread-5

I added corn on half of the pan and left the other half bare. You guessed it.. my DF doesn’t eat corn, either. How in the world does he survive? Beats me.

This dish was a huge hit for dinner and it made A LOT of servings. My DF had a lot of meals to eat after I left him home for a couple of days. As for the cornbread itself, the texture was perfectly grainy (thanks to the mixture being made with more corn than the leading brand) and it was nice and fluffy. It held the crumbly texture well and was very moist. All in all? I’ll definitely be buying this Simply Homemade Cornbread Mix in the future!

Again, recipe courtesy of Fleischmann’s.

Print
Cornbread BBQ Chicken Pot Pie

Ingredients

  • 2 pounds boneless skinless chicken breast, cut into 1-inch pieces (I used 4 breasts)
  • 3 tablespoons olive oil, divided
  • 1 onion, chopped finely
  • 1 teaspoon sea salt
  • 1/2 teaspoon black pepper
  • 2 teaspoons red cayenne pepper (less if you don't like it as spicy)
  • 1/2 cup BBQ sauce
  • 1/2 cup apple juice (I used light)
  • 1 package Simply Homemade Cornbread Mix
  • 2/3 cup non fat milk
  • 1/3 cup butter, melted
  • 1 egg
  • 2 cups shredded sharp cheddar cheese
  • 1 can yellow and white corn, drained

Directions

  1. Preheat oven to 375 degrees. Spray a 13x9x2 inch baking pan with cooking spray.
  2. In a gallon sized ziplock bag, add 2 tablespoons oil, sea salt, black pepper, and cayenne pepper. Shake until blended, add chicken pieces and toss until chicken is completely coated.
  3. In a 10-inch skillet, add remaining 1 tablespoon oil and heat over medium heat. Add onions, cook until soft and transparent, about 5 minutes. Remove cooked onions and set aside until needed.
  4. Add chicken pieces to skillet and cooke until slightly brown. Return cooked onion to pan, add BBQ sauce and apple juice.
  5. In a medium sized bowl, add the cornbread mix, milk, egg, melted butter, and shredded cheddar cheese. Mix until combined.
  6. In the prepared baking pan, add sauteed chicken pieces and drained corn. Top with the cornbread mix. Bake in preheated oven for 30 minutes or until slightly golden.
3.1
https://lovintheoven.com/cornbread-bbq-chicken-pot-pie/

Filed Under: chicken, dinner

WW: DIY Tassel Garland Banner

April 23, 2014 by kim 7 Comments

tassle-10

For my sister’s wedding back in February, I was in charge of setting up and decorating her dessert table and gifts table. Her wedding took a lot of manual labor from everyone and it turned out wonderful in the end despite all the stress that came from it in the beginning.

I wanted to make something simple for the front of the tables that was easy to carry and not very fragile (we had to lug all of our goods to Santa Barbara, which is about an hour and a half drive from our house). A tassel garland banner was perfect!

tassle-5-2

You can mix and match colors to create the perfect combination for your event. It’s definitely a bit time consuming, but the end result is impressive. Did I mention it’s extremely cheap to make?

tassle-2-2

All you need are scissors, tissue paper in whatever colors you plan on using, twine, and some washi tape. Total cost of this project? $8 for the materials, which is enough to make five banners plus some in my case. That’s about $1.60 for each garland banner long enough for a six feet rectangle table. Actually, it’s even less since I had a TON of twine leftover.

Bottom line? It’s a steal.

tassle

I happened to stumble across a pack of tissue paper at Marshall’s that had all of the colors that I needed. It had scalloped edges, but that’s not necessary for this project. Regular tissue paper works just fine, if not better. The way to read the pictures are from top to bottom, left to right. Let’s start!

1. First, cut your twine to your desired length. Set aside. (not pictured)
2. Lay out your tissue paper nice and flat.
3. Fold it in half horizontally.
4. Using your scissors, cut 1 inch strips from the bottom (you can do thinner strips if you want skinnier tassels) toward the fold. Make sure to stop cutting about two inches from the top.

tassle-2

5. After you’ve finished cutting your strips, unfold the tissue paper and lay it out flat once again.
6. Turn the tissue paper so that the uncut center is perpendicular to you. Start rolling the paper in the center until you’ve rolled the entire tissue paper, with the cut edges on the end.
7. Twist the middle and fold it in half.

tassle-3

8. Place the twine through the twist that you’ve just created.
9. Wrap a piece of washi tape around the center of the tissue paper to keep it intact.

tassle-8

10. Carefully fluff out the tassel ends until you get your desired look.

That’s it! Repeat steps 1-10 about a million times until your garland is full. Make sure to evenly space the tassels apart so you get a uniform look. Here, I’ll show you again how to do it:

tassle-4

tassle-5

tassle-6

tassle-9

Ta-da! Now keep going!

tassle-4-2

Happy tassel garland making!

tassle-6-2

Filed Under: DIY, wednesday wanderings

  • « Previous Page
  • 1
  • …
  • 84
  • 85
  • 86
  • 87
  • 88
  • …
  • 289
  • Next Page »

hi! i'm kim-- a girl mom, baker, blogger, and ex-flight attendant. welcome!

Search

  • Facebook
  • Instagram
  • Pinterest
  • Twitter

Categories

RODELLE-BABadge


Categories

  • Facebook
  • Instagram
  • Pinterest
  • Twitter

Copyright © 2026 · Foodie Pro Theme by Shay Bocks · Built on the Genesis Framework · Powered by WordPress