Lovin' From the Oven

  • Home
  • About Me
  • Recipes
  • FAQ
  • My Lifestyle Blog
  • Disclaimer

Yogurt Blueberry and Banana Bread

June 22, 2015 by kim Leave a Comment

IMG_7490

Man, I love Ikea. I went today to get some outside furniture for our balcony upstairs. Nothing special, just two chairs so we can sit outside as we please.

Ikea is NOT the place to go by yourself. Always bring some muscle when you go, even when you’re not planning on buying anything because you will walk out with something! I hate that they don’t let you bring the cart out to your car. You have to leave it with the guy working, pull you car up, and then load it yourself.

IMG_7499

Also, always make sure that the stuff you buy actually fits in your car. It’s easy to get overwhelmed and buy a dresser that comes in a flat wide box. You see the box and think, “Of course that’ll fit in my car!” When the time comes for you to pull your car up, you start second guessing yourself.

My DH and I have totally done that before. We ended up having to unbox the table or shelf and putting the pieces in one by one. Ten more minutes of Tetris and we’ve fit everything into his hatchback. Hoorah!IMG_7500

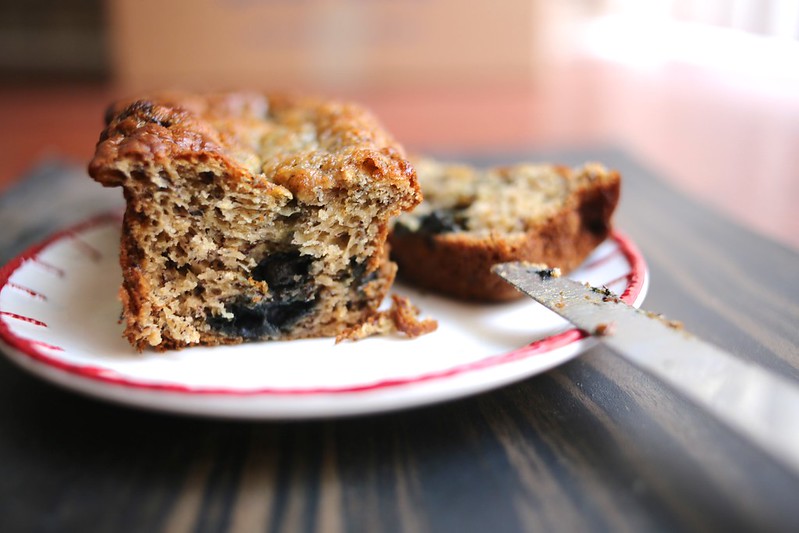
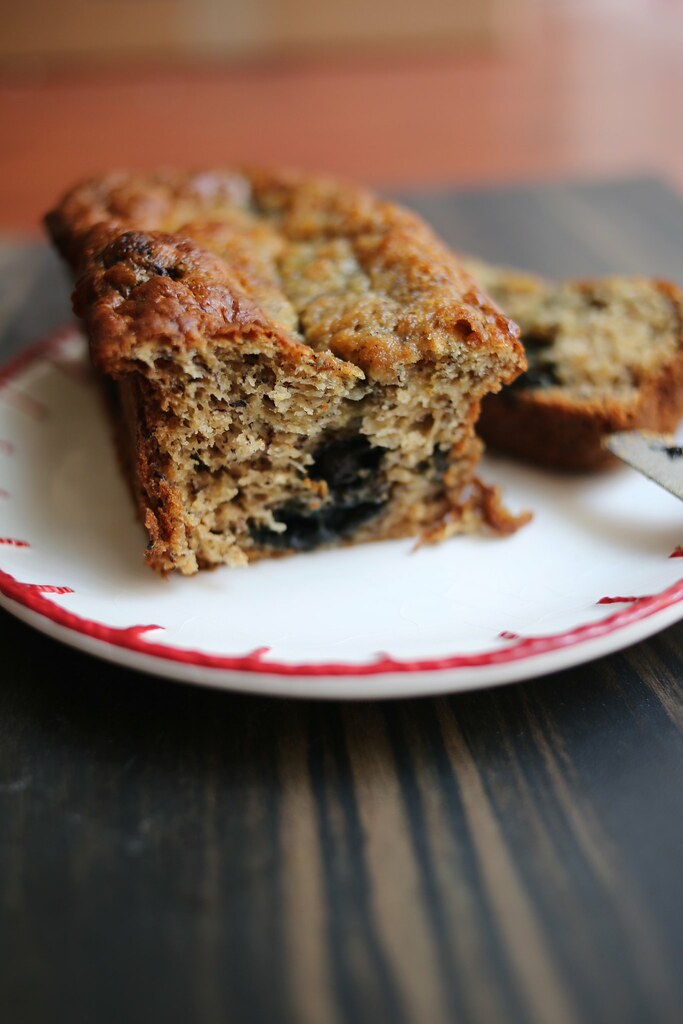
Anyhow, this recipe came about when I was trying to empty my refrigerator, but I wasn’t crazy about it. Despite the yogurt in the batter, the bread still came out a little chewy. Perhaps I over mixed it? It also wasn’t the prettiest thing. Better luck next time!

Print
Yogurt Blueberry and Banana Bread

Ingredients

  • 3 ripened bananas, mashed
  • 2 tbsp vegetable oil
  • 3/4 cup greek vanilla yogurt
  • 2 eggs
  • 2 tsp vanilla extract
  • 1/2 cup granulated sugar
  • pinch of salt
  • 1/2 tsp baking powder
  • 1/4 tsp baking soda
  • 1 tsp cinnamon
  • 1 and 3/4 cups flour
  • 1 cup blueberries

Directions

  1. Preheat oven to 350. Spray a loaf pan with cooking spray.
  2. Mix together the bananas, oil, yogurt, eggs, vanilla extract, and sugar.
  3. Gradually stir in the salt, baking powder, baking soda, cinnamon, and flour until just combined.
  4. Fold in the blueberries.
  5. Pour batter into prepared loaf pan and bake for 25 minutes, or until toothpick comes out clean.
3.1
https://lovintheoven.com/yogurt-blueberry-banana-bread/

Filed Under: banana, berry, bread, breakfast

Simple Sesame Noodles

June 19, 2015 by kim Leave a Comment

IMG_7957

Let’s talk about chopsticks. I have no idea when I actually learned how to use chopsticks, I just remember always using them. Some people start with the “beginner” or “kid” chopsticks. You know, the ones that are rubber banded together at the end so it’s essentially one piece. It helps small hands hold chopsticks and focus on the picking up part rather than the holding both sticks in one hand part.

IMG_7961

My DH also knows how to use chopsticks. When I asked him when he learned, he told me, “Middle School?” No one really remembers. It’s just something that everyone eventually learns. I don’t know anyone that doesn’t know how to use chopsticks.

Some chopsticks are definitely better than others. I don’t understand why metal chopsticks even exist (like the ones you find at Korean soup restaurants). Noodles get so slippery on it that you can barely grasp anything!

IMG_7973

Wooden chopsticks are the winner for me. The chopsticks in the photos above are from Daiso. It’s like the Japanese version of the 99 cent store. They work just fine for these simple sesame noodles from The Pioneer Woman. I LOVED this recipe. It’s so easy to make and has a great, sesame oil taste. Not only that, but they’d be a great accompanying dish to any meat. I also adjusted the chili oil because I like my dishes spicy. Add more or less, depending on your taste.

Print
Simple Sesame Noodles

Ingredients

  • 12 ounces, fluid Thin Noodles, Cooked And Drained
  • 1/3 cup Soy Sauce
  • 2 Tablespoons Sugar
  • 4 cloves Garlic, Minced
  • 3 Tablespoons Rice Vinegar
  • 3 Tablespoons Pure Sesame Oil
  • 1 teaspoon Hot Chili Oil (I used hot chili sauce to taste)
  • 4 Tablespoons Olive Oil
  • 4 whole Green Onions, Sliced Thin

Directions

  1. Whisk all ingredients (except noodles and green onions) together in a bowl. Taste and adjust ingredients as needed.
  2. Pour sauce over warm noodles and toss to coat.
  3. Sprinkle with green onions and toss.
  4. Serve in a bowl with chopsticks. Yummy!
3.1
https://lovintheoven.com/simple-sesame-noodles/

Filed Under: dinner sides, pasta

Red Velvet Oreo Pudding Cookies

June 17, 2015 by kim Leave a Comment

IMG_5564

You know what the worst is? When your fire alarm goes off when you’re just preheating the oven for the first time. Yup, that totally happened in our new place. And yup, it totally sucked. IMG_5524

I guess when we looked at the new place, I didn’t open the oven and stick my head in there to see how it really was. Note to self: always open ovens and thoroughly investigate before moving into somewhere new. Ours was FILTHY inside! I’ve never seen so much grease built up. The racks were layered with black sludge with no silver in sight. IMG_5525

The sides of the oven were splattered with everything that you could imagine. When the oven started to warm up, you could smell old food and oil. Our whole downstairs smoked up in a matter of minutes. It was a hot mess. IMG_5526

As I frantically looked for a step stool to unplug the fire alarm, my DH was opening windows and manually fanning the air out. Needless to say, we ordered takeout that night.IMG_5568

After that, I spent a good hour googling ways to clean your oven. I pulled out the baking racks, threw them in the bathtub, and soaked them with two different dish detergents. I made a baking soda and vinegar paste and smothered that all over the inside of the oven. I let the mixture sit overnight to do its magic.

IMG_5573

After scrubbing for what seemed like forever, I finally got the baking racks back to their original color: silver and shiny. The oven, on the other hand, still needs a lot of work. The paste helped, but there’s a lot more that could be taken off. Does anyone have any oven cleaning tips? I’m desperate because this girl needs a CLEAN working oven!

IMG_5581

These cookies were made at our old place. That oven was a dream. *sigh* I stumbled across red velvet Oreos at Target (of course) and bought them without hesitation. They’re pretty good on their own, but nothing compares to the original Oreo. Throw them in cookies, though, and you’ve got a whole other story. Another solid cookie from Two Peas and their Pod.

Print
Red Velvet Oreo Pudding Cookies

Ingredients

  • 1 cup unsalted butter, softened
  • 3/4 cup brown sugar
  • 1/4 cup granulated sugar
  • 1 (3.4 oz) package vanilla instant pudding mix
  • 2 large eggs
  • 1 teaspoon vanilla extract
  • 2 1/2 cups all-purpose flour
  • 1 teaspoon baking soda
  • 1/2 teaspoon salt
  • 2 cups chopped Red Velvet Oreos, crushed

Directions

  1. Preheat oven to 350 degrees F. Line a baking sheet a Silpat and set aside.
  2. Cream together butter and both sugars. Beat in pudding mix, eggs, and vanilla extract.
  3. Gradually stir in flour, baking soda, and salt until just combined. Stir in the crushed Oreos.
  4. Drop cookie dough by rounded tablespoons onto prepared baking sheet. Bake for 10 minutes.
3.1
https://lovintheoven.com/red-velvet-oreo-pudding-cookies/

Filed Under: cookies, dessert

  • « Previous Page
  • 1
  • …
  • 45
  • 46
  • 47
  • 48
  • 49
  • …
  • 289
  • Next Page »

hi! i'm kim-- a girl mom, baker, blogger, and ex-flight attendant. welcome!

Search

  • Facebook
  • Instagram
  • Pinterest
  • Twitter

Categories

RODELLE-BABadge


Categories

  • Facebook
  • Instagram
  • Pinterest
  • Twitter

Copyright © 2026 · Foodie Pro Theme by Shay Bocks · Built on the Genesis Framework · Powered by WordPress