Lovin' From the Oven

  • Home
  • About Me
  • Recipes
  • FAQ
  • My Lifestyle Blog
  • Disclaimer

Double Chocolate Oatmeal Cookies

August 11, 2011 by kim 3 Comments

IMG_3751

IMG_3764

IMG_3765

I’m excited to report that I am not a horrible mess in the cooking department. I’ve officially been away from home for over a week, which means that I am forced to start learning how to cook and experiment on the stove rather than in the oven. My DB definitely has nothing up his sleeve in the cooking department, so it’s all on me. I mean, I can’t eat dessert for every meal. I might die of malnutrition. Maybe….maybe not. My point being– You can look forward to real food recipes coming soon.

I’ve loved having all this free time with my DB. We’ve been sleeping in for who knows how long, catching up on Fringe (the TV show… totally addicted, btw), spending hours in used bookstores, eating breakfast at 1PM, and running random errands to get things that we forgot to bring. As lovely as that schedule sounds, I’m ready to get back into an organized routine. To start, I’ll get into a more consistent blogging schedule. I’ve already started that on my other blog!

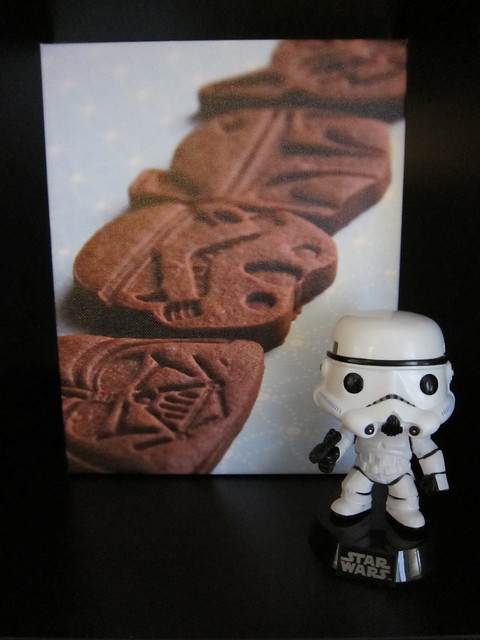
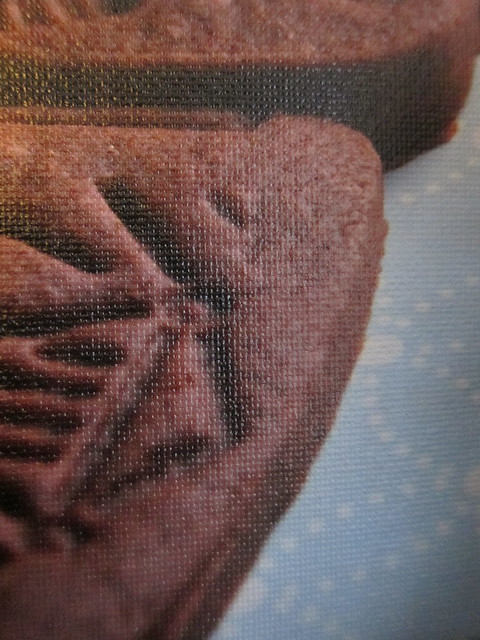
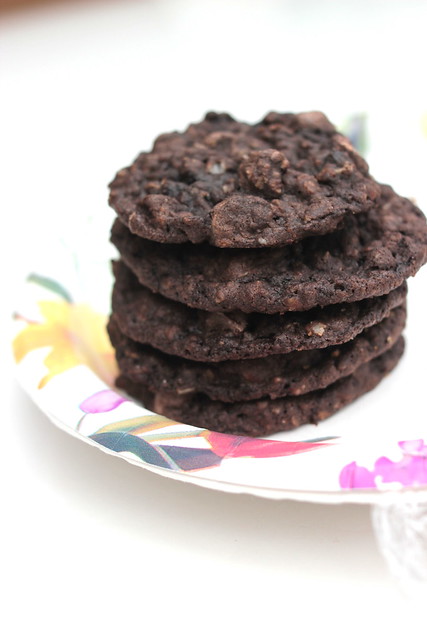
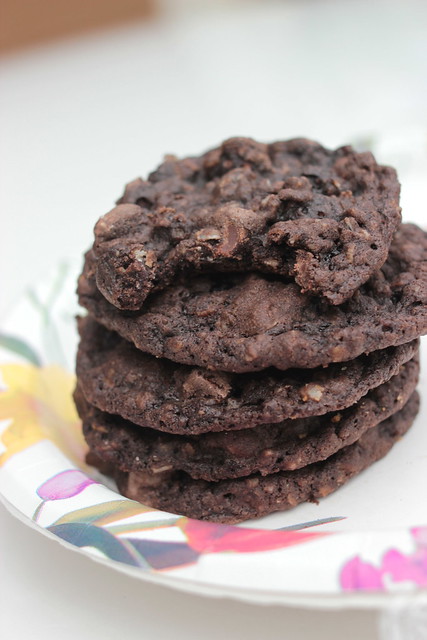
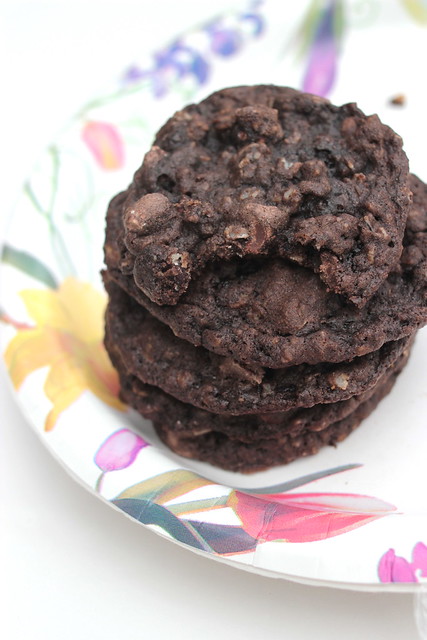
These cookies will help you bounce back into it. Soft, chewy, and chocolate-y, they’ll shock anyone back to life. I got this recipe from Itsby Bitsy Foodies.

  • 1 cup butter
  • 1 cup brown sugar
  • ½ cup sugar
  • 2 tsp vanilla
  • 2 eggs
  • 1 1/4 cup flour
  • ½ cup cocoa powder
  • 1 tsp baking soda
  • 2 cups oats
  • 2 cups chocolate chips
  1. Preheat oven to 350 degrees.
  2. Cream butter and both sugars. Mix in the vanilla and eggs. 
  3. Stir in the flour, cocoa powder, and baking soda until just incorporated into the batter.
  4. Gradually add in the oats and chocolate chips. 
  5. Drop the dough by tablespoons onto a baking sheet. Bake for 8 minutes or until they are just set.

Filed Under: chocolate chip, cocoa, cookies, dessert, oatmeal

Sour Cream Coffee Cake

August 6, 2011 by kim 12 Comments

IMG_3312

IMG_3320

IMG_3331

IMG_3344

IMG_3381

IMG_3368

Hello. My name is Kim. I graduated from UCLA, have 7 years experience working with kids and clerical/front desk work, was supervisor of a museum store, and bake whenever I’m bored. Want to hire me?

Hah! I wish it was that simple. I’ve been on the job hunt ever since I moved up here on Monday. Okay, I know that you don’t normally find a job in a week, but here’s to wishful thinking! Patience.. patience.. patience.  My goal is to turn in an application a day, in hopes of finding a job that will suit me. Until then, I’ll bake my little heart away.

I’ve always been a fun of coffee cakes; they’re light, versatile, and easy to pack. The best part? The crumb topping! My cake may look a little off to you because I baked it in a bundt pan rather than a tube pan. Note to self: Bundt pans are not made for inverting twice. It doesn’t really matter what it looks like, just as long as it tastes good. And oh boy, this coffee cake tasted like a buttery soft cloud of joy.

From The Meaning of Pie.

Streusel: (you will divide this between 2 bowls)

  • 1 cup all purpose flour
  • 1 cup sugar
  • 1/2 cup light brown sugar
  • 2 tablespoons ground cinnamon
  • 4 tablespoons unsalted butter, cold
  • 1 cup pecans, chopped

  1. Mix together the flour, both sugars, and cinnamon. Take 1½ cups of this mixture and set it in a separate bowl. This second bowl will be for the inside of the cake and I will call it LAYERING streusel. In this second small bowl of layering streusel, add an additional ¼ cup of brown sugar and mix it in. Set aside. 
  2. Add the butter and pecans to the original bowl. This will be the TOP streusel. Using a food processor or your hands (the best tools in the kitchen!), work the butter into the TOP streusel mixture until all of the topping is moistened. Set aside.

Cake:

  • 12 Tablespoons unsalted butter (1½ sticks)
  • 4 large eggs
  • 1½ cups sour cream (divided use)
  • 1 Tablespoon vanilla extract
  • 2¼ cups all purpose flour
  • 1¼ cup sugar
  • 1 Tablespoon baking powder
  • ¾ teaspoon baking soda
  • ¾ teaspoon salt

  1. Preheat the oven to 350 degrees. Butter a 10 cup tube pan. In a bowl, combine the eggs, 1 cup of the sour cream and the vanilla.
  2. In the bowl of an electric mixer, combine the flour, sugar, baking powder, baking soda and salt for about 30 seconds. Next, add the butter and 1/2 cup remaining sour cream and mix on low until just combined. Turn up the speed of the mixer to medium and mix for an additional 30 seconds.
  3. Slow down the mixer and add the first egg and sour cream mixture in 3 separate additions, beating for 30 seconds and scraping the bowl after each addition to make sure everything is combined. Increase the speed to medium-high and beat for an additional minute.
  4. Add 2 generous cups of batter to the bottom of the prepared tube pan and spread it evenly. Evenly sprinkle half of the LAYERING (not nuts) streusel on top of the batter. Add one and a half cups more of the batter on top of the streusel. Sprinkle on the rest of the LAYERING (no nuts) streusel. Top with the remaining batter and sprinkle on the TOP (with nuts) streusel.
  5. Bake for approximately 60 minutes or until a toothpick comes out clean. Remove the pan to a rack and allow the cake to cool in the pan for 30 minutes before removing.
  6. Re-invert it so that the streusel side is on the top.

Filed Under: breakfast, cake, nuts

Zucchini Bread

August 2, 2011 by kim 2 Comments

DSC_7132

DSC_7123

DSC_7163

DSC_7165

Zuchinni.. Zuchini… Zucchini.. ahhh, I definitely would have gotten kicked with that word at a spelling bee. Come to think of it, I’ve only been in a spelling bee once and it wasn’t on purpose. In second grade, I remember trying to spell “chimpanzee” wrong in the qualifying round on purpose so that I wouldn’t have to compete with kids outside of my classroom, but I spelled it right on accident. Imagine my surprise! You bet I spelled the first word wrong in the official competition so that I could sit down and get away from the audience. Hey, I was young. And scared. Being in front of people was so not my thing. It wasn’t then and it isn’t now.

Speaking of grade school… the first time I made zucchini bread was in my first grade classroom. We were given the ingredients in a ziploc bag and were told to mix it by shaking, pinching, doing whatever our heart desired to get it done. We gave back our ziploc bags to the teacher and she returned it as a mini loaf twenty minutes later. All I remember back then was pure heaven. Curious as to if I still loved it as much as I thought I did, I gave it a go in my kitchen.

Sure enough, the results were just as how I remembered it. Don’t worry, it doesn’t really taste like zucchini. My DB even ate a bite and he HATES vegetables!

  • 3 cups all-purpose flour
  • 1 teaspoon salt
  • 1 teaspoon baking soda
  • 1 teaspoon baking powder
  • 3 teaspoons ground cinnamon
  • 3 eggs
  • 1/2 cup vegetable oil
  • 1/2 cup apple sauce
  • 1 cup white sugar
  • 1 cup brown sugar
  • 2 1/2 teaspoons vanilla extract
  • 4 cups grated zucchini
  • 1 cup chopped walnuts
  1. Butter two 8 x 4 inch pans. Preheat oven to 325 degrees F.
  2. Mix together the eggs, oil, apple sauce, vanilla, and both sugars in a large bowl.
  3. Add flour, salt, baking powder, soda, and cinnamon into the mixture. 
  4. Gently stir in zucchini and nuts until well combined. Pour batter into prepared pans.
  5. Bake for 45-55 minutes, or until toothpick omes out clean.
P.S. As of today, I’m officially a Berkley-an! Whoo hoo! I’m still working on putting together my apartment, but here’s a sneak peak at one of my cubbies on my Expedit bookself, courtesy of Easy Canvas Prints: 
IMG_4001

Remember my brownie roll out cookies? Well, I decided to choose one of the pictures from that shoot for my canvas because 1. my DB loves anything Star Wars (can’t you tell by his bobblehead?) and 2. the background matched my tiffany blue themed kitchen.

IMG_3998

IMG_4005

The canvas was smooth, the perfect size, and even better than I expected. The colors seemed a bit darker than my actual photo, but it wasn’t a big deal. I loved the mirroring method on the sides of the canvas. If you want, you can make your own canvas print here. Enjoy!

Filed Under: bread, breakfast, dessert, nuts

  • « Previous Page
  • 1
  • …
  • 195
  • 196
  • 197
  • 198
  • 199
  • …
  • 289
  • Next Page »

hi! i'm kim-- a girl mom, baker, blogger, and ex-flight attendant. welcome!

Search

  • Facebook
  • Instagram
  • Pinterest
  • Twitter

Categories

RODELLE-BABadge


Categories

  • Facebook
  • Instagram
  • Pinterest
  • Twitter

Copyright © 2026 · Foodie Pro Theme by Shay Bocks · Built on the Genesis Framework · Powered by WordPress