Lovin' From the Oven

  • Home
  • About Me
  • Recipes
  • FAQ
  • My Lifestyle Blog
  • Disclaimer

Fluffy Buttermilk Pancakes

August 19, 2011 by kim 11 Comments

IMG_6775

IMG_6783

IMG_6781

IMG_6790

IMG_6796

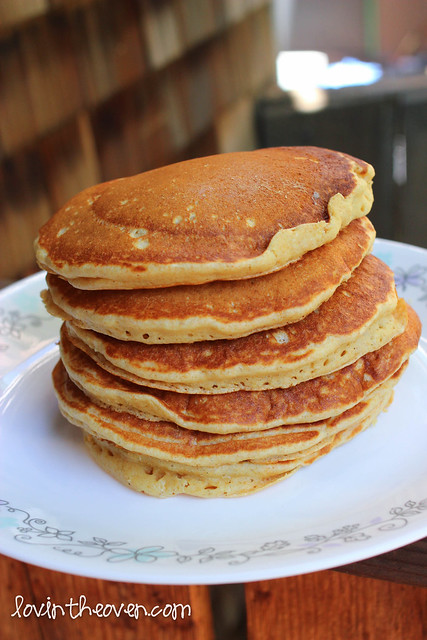
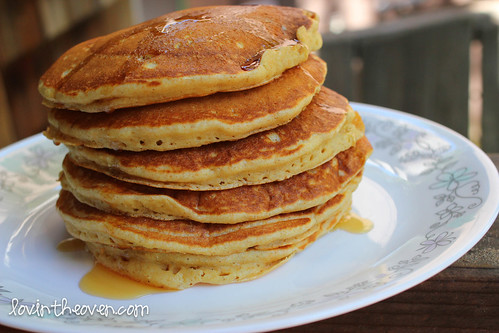
Tell me… do you prefer pancakes or waffles? I’m more of a waffles kinda gal, but without a waffle maker, I’ll have to settle for pancakes. I’ve made pancakes from scratch once in my life before this batch. Can you believe it? Hey, I warned you guys I was a rookie with the stovetop. I wasn’t kidding.

Notice anything different from these photos? Yup, I’ve started adding a watermark. A total bummer in my opinion.. it definitely wasn’t something I wanted to do. I was browsing Pinterest earlier and noticed one of the pictures from my blog. I clicked on the link and was taken to a blog for “healthy recipes” with my food picture, but a completely different recipe attached. First of all, my recipes are definitely not the healthiest. I even have a recipe that uses 3 sticks of butter! Second of all, to use one of my pictures and link a completely different recipe to it? Not cool. Not to mention that there was no credit.. I guess there’s only so much you can control with the internet now and days.

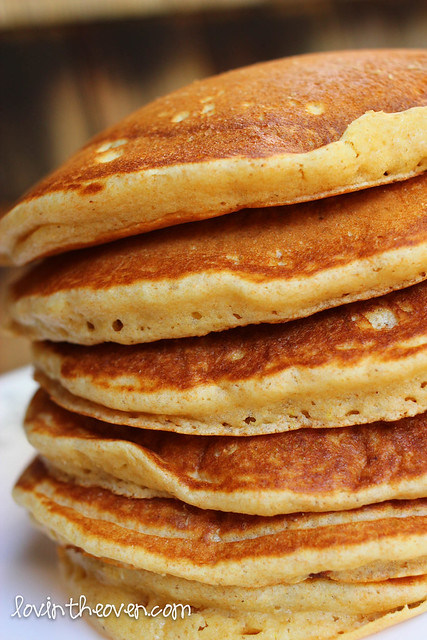
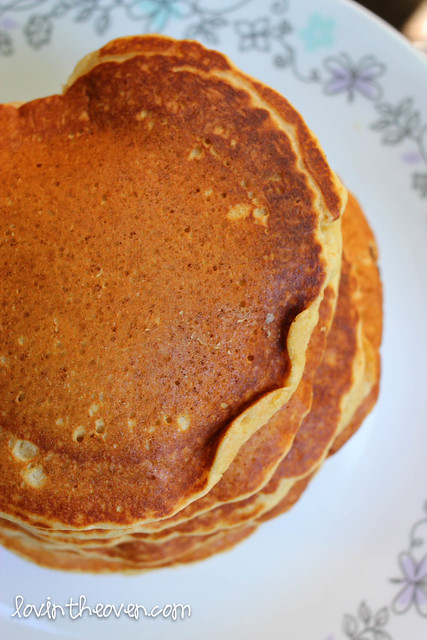
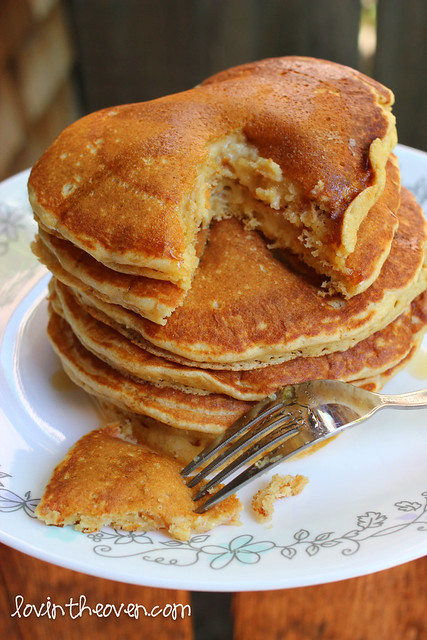
/End rant. These pancakes were soooo fluffy (Despicable Me, anyone?)! I used whole wheat flour and do admit that it gave them a different flavor and texture. They tasted healthier. Who knew that pancakes could taste healthy? My DB ate 6 pancakes over a span of three days. Refrigerate them after they’re cooked and microwave them for a minute and a half the next morning. This recipe comes from AllRecipes. Feel free to add a handful of chocolate chips or blueberries to jazz them up!

  • 3/4 cup buttermilk
  • 1 cup all-purpose flour
  • 2 tablespoons white sugar
  • 1 teaspoon baking powder
  • 1/2 teaspoon baking soda
  • 1/2 teaspoon salt
  • 1 egg
  • 2 tablespoons butter, melted
  • cooking spray
  1. Mix flour, sugar, baking powder, baking soda, and salt in a large mixing bowl. 
  2. In a separate bowl, whisk egg and butter into the buttermilk. Pour the flour mixture into the wet ingredients and whisk until lumps are gone.
  3. Heat a large skillet over medium heat, and coat with cooking spray. Pour 1/4 cupfuls of batter onto the skillet, and cook until bubbles appear on the surface. Carefully flip with a spatula, and cook until browned on the other side.

Filed Under: breakfast

Garlic Mashed Potatoes

August 16, 2011 by kim 6 Comments

IMG_6554

As I promised, a real food recipe! Now I’ve officially added savory to my blog of sweets. Say hello to garlic mashed potatoes.

IMG_6494

Dicing potatoes. There’s so much prep work in cooking. Uffff… I don’t know of I can get used to this.

IMG_6506

IMG_6518

Boiling.

IMG_6530

Draining.

IMG_6537

IMG_6545

Throw it all into your handy dandy Kitchenaid and let it do the work.

IMG_6548

IMG_6557

Not bad, huh? I think you’re normally supposed to mash the potatoes by hand, but I don’t own a potato masher so my fallback was my Kitchenaid. She’s always there when I need her. The result? A creamy, buttery bowl of goodness.

Mashed potatoes are like the chocolate chip cookie of the baking world. You can add mix-ins and it’s still forgiving. It’s hard to make bad mashed potatoes. If it’s too thick, add more milk. Want it even thicker? Use sour cream instead. Don’t like herbs? Add bacon. Want it richer? You guessed it.. add more butter. Experiment your tender heart away, using this recipe as more of a guideline than a “to the T” recipe.

  • 6-7 medium russet potatoes
  • 1/4 tsp minced garlic
  • 1 cup of milk 
  • 1 stick of butter
  • 2 tsp salt (plus additional for boiling)
  • dash of pepper
  1. Peel the skin from potatoes. Dice each potato into 16 pieces (cut into half and then cut each half into 8th’s)
  2. Place the diced potatoes, minced garlic, and a generous pinch of salt into a pot filled with cold water.
  3. Bring the water to a boil and then cook the potatoes on medium heat for approximately 25 minutes, until the potato is easily pierced with a fork.
  4. When the potatoes are done cooking, drain and let sit. While sitting, melt the butter in a pan and stir in the milk. Bring to a simmer and pour it into a Kitchenaid bowl with the cooked potatoes. 
  5. Turn the Kitchenaid on low and gradually work the speed up to medium. Add the salt and mix until creamy.
  6. Take a taste and adjust appropriately to your tastes. I topped mine with an oregano/parsley mix.

Filed Under: dinner sides, potatoes

Banana Cream Cheese Muffins With Crumb Topping

August 12, 2011 by kim 14 Comments

IMG_4071

Isn’t it fascinating how something so ugly can transform to such a beauty? Here’s a test question for you: Caterpillars are to butterflies as browned bananas are to….

IMG_4149

… banana cream cheese muffins with crumb topping, of course! Things are only what you make of it, so make sure to keep a positive outlook on life (that’s my blog lesson for the day).

IMG_4080

Beating together the batter.

IMG_4087

IMG_4088

The cream cheese mixture, which came out quite liquid-y for me.

IMG_4083

The beautiful crumb topping with plenty of cinnamon.

IMG_4082

IMG_4091

Before baking

IMG_4101

IMG_4097

And after. Let them cool a bit before removing the muffins.

IMG_4117

IMG_4124

IMG_4144

Then, get it naked!

IMG_4155

IMG_4161

It surely is a beautiful thing.

The cream cheese layer kind of disappeared into the batter (I’m guessing because it was so runny), so I’d increase the cream cheese amount to 8 oz next time. Besides that, this recipe was a winner. Wonderfully sweet, soft as a pillow, and ideally moist. Not to mention that I’m a sucker for a good crumb topping.

From How to Simplify

For the muffins

  • 1 1/2 cups all-purpose flour
  • 1 teaspoon baking soda
  • 1 teaspoon baking powder
  • 1/2 teaspoon salt
  • 3 bananas, mashed
  • 3/4 cup white sugar
  • 1 egg
  • 1/3 cup butter, melted
  • 1 tablespoon vanilla extract

For the cream cheese filling

  • 4 ounces cream cheese, softened
  • 1/4 cup sugar
  • 1 egg

For the crumb topping

  • 1/3 cup light brown sugar
  • 1/4 cup all-purpose flour
  • 1/2 teaspoon ground cinnamon
  • 1 tablespoon butter, melted

Directions:

  1. Preheat oven to 375 degrees. Line muffin pan.
  2. Mash the bananas and beat together the bananas, sugar, egg, melted butter and vanilla extract. Gradually stir in the 1 1/2 cups AP flour, baking soda, baking powder and salt until just moistened.
  3. Spoon the batter into prepared muffin cups (leave a little batter to top the cream cheese filling).
  4. Make the cream cheese filling by beating all of the three ingredients. Pour a tablespoonful of the cream cheese filling onto the batter in each muffin cup. Top the cream cheese with the remaining muffin batter.
  5. Now, for the topping, use a fork or your hands to mix the topping ingredients together until crumbly. Sprinkle the topping evenly the batter.
  6. Bake for 18 to 20 minutes or until a toothpick comes out clean.

I also received some wonderful personalized labels from BuildASign. I was able to choose my own colors, fonts, sayings, pictures, and size. Completely custom signs, how useful!

DSC_7980

I received some 3″x5″ and some 2″x4″ decals to use for labeling goodies as I give them out.

DSC_7976

I could also write recipes on them and give them out. The possibilities are endless! I love that it’s a personal touch from my kitchen. Create your own signs here— they even make signs as big as 4 x 8 FEET!

Filed Under: banana, breakfast, fruit, muffins

  • « Previous Page
  • 1
  • …
  • 194
  • 195
  • 196
  • 197
  • 198
  • …
  • 289
  • Next Page »

hi! i'm kim-- a girl mom, baker, blogger, and ex-flight attendant. welcome!

Search

  • Facebook
  • Instagram
  • Pinterest
  • Twitter

Categories

RODELLE-BABadge


Categories

  • Facebook
  • Instagram
  • Pinterest
  • Twitter

Copyright © 2026 · Foodie Pro Theme by Shay Bocks · Built on the Genesis Framework · Powered by WordPress