Lovin' From the Oven

  • Home
  • About Me
  • Recipes
  • FAQ
  • My Lifestyle Blog
  • Disclaimer

Cinnamon Churro Puppy Chow

February 7, 2013 by kim 5 Comments

chexmix-4

My love for cinnamon sugar has no bounds. I will eat it in a car, I will eat it from a jar, I will eat it here and far. I will eat it if you dare, I will eat it with a pear, I will eat it anywhere.

chexmix-6

Thank you Dr. Seuss for teaching me how to rhyme. But seriously, there is no greater combination than cinnamon and sugar– not peanut butter and chocolate, not nutella and bananas, not ice cream and sprinkles. Cinnamon and sugar is just a match made in heaven. Put it on donuts, cake, churros, and bread… my heart can’t resist.

chexmix-3

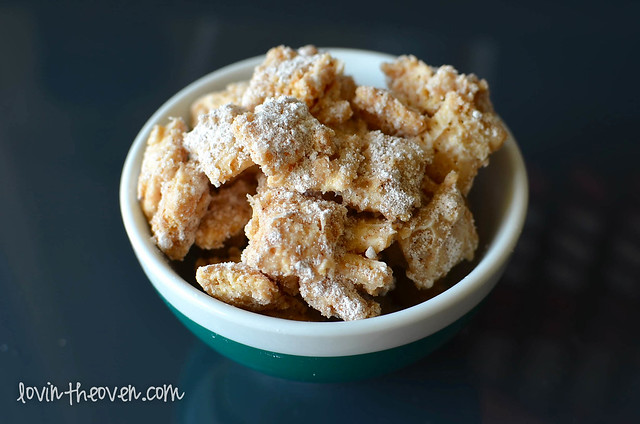
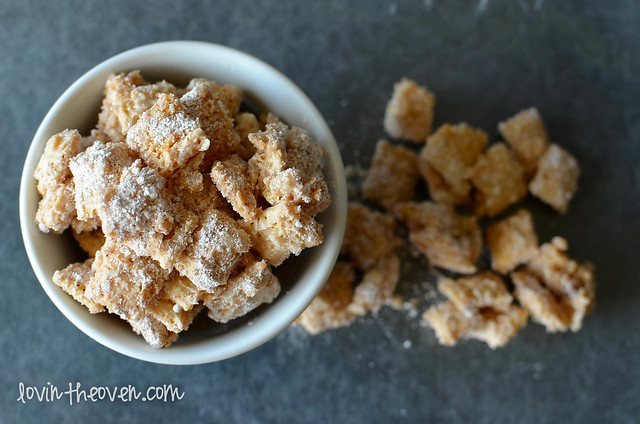
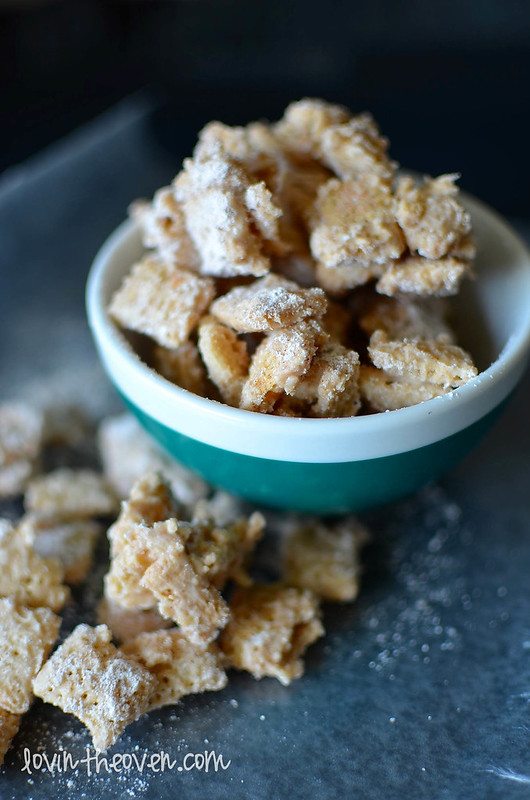
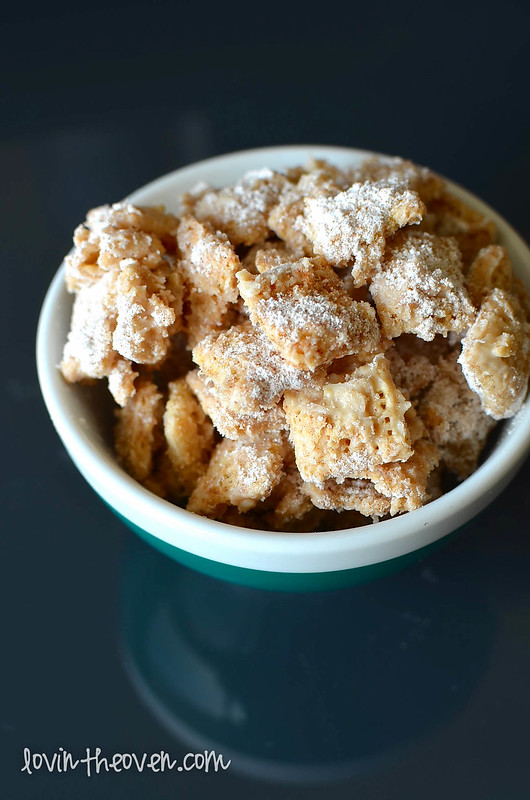
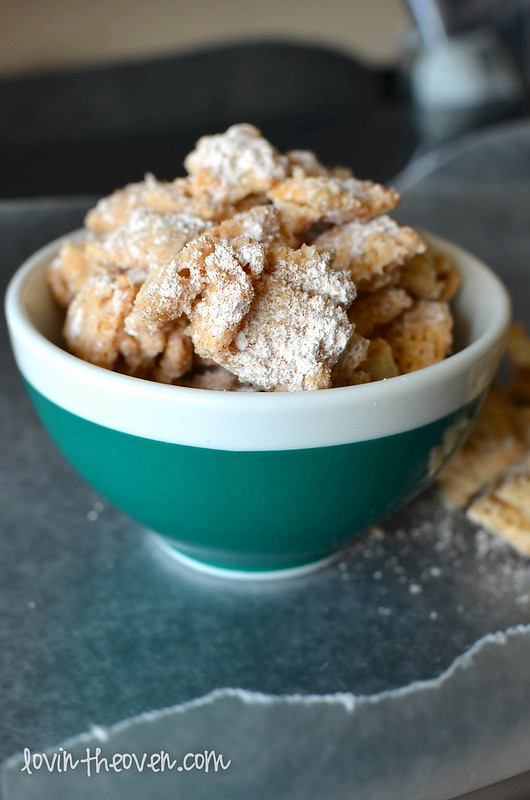
That’s why this puppy chow is a no brainer for me. Call them whatever you want, but I grew up calling this puppy chow and will continue to do so. I never even heard of the term “muddy buddies” until high school.

chexmix-5

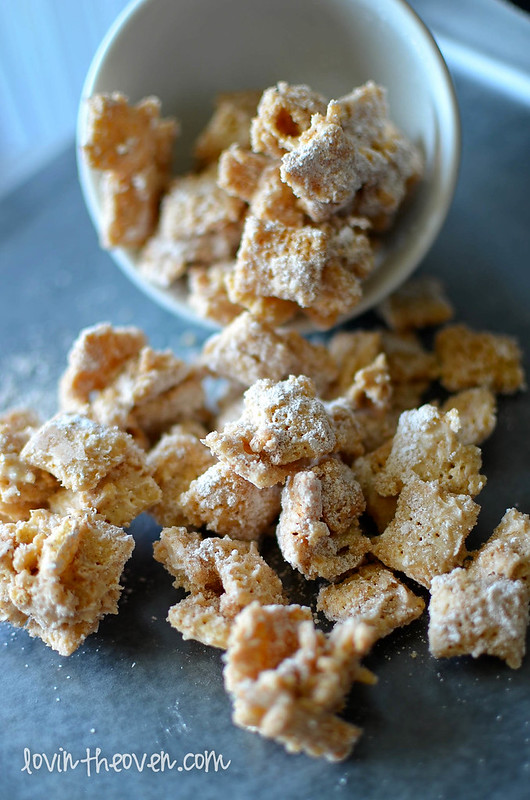
For those of you that don’t know about this genius invention, it’s not really dog food. It’s people food! It’s just cereal doused in chocolate and powdered sugar. It’s called puppy chow because the appearance slightly resembles dog food. I don’t know what people feed their dogs, but if my dog food looked like this, I’d be tempted to eat it myself.

chexmix-2

I thought nothing could beat this Nutella Puppy Chow that I made before, but I was wrong. Cinnamon sugar trumps Nutella!

chexmix

So here’s another recipe for those people who love white chocolate over chocolate. Don’t leave it out for too long, it’ll all disappear before you can store it!

Print
Cinnamon Churro Buddies

Ingredients

  • 6 cups Cinnamon Chex Cereal
  • 2 cups white chocolate candy melt
  • 1/2 cup powdered sugar
  • 1/4 cup granulated sugar
  • 2 1/2 tsp cinnamon

Directions

  1. Pour the cereal into a large mixing bowl and set aside.
  2. In a separate bowl, stir together both sugars and cinnamon.
  3. Melt the white chocolate in a double boiler (or you can melt it in intervals of 30 seconds in the microwave).
  4. Pour the melted white chocolate into the mixing bowl over the cereal.
  5. Once the cereal is evenly coated, fold in the sugar mixture.
  6. Put your cereal on wax paper to let dry completely. Store in ziploc bag or sealed container.
3.1
https://lovintheoven.com/cinnamon-churro-puppy-chow/

————————————————————————————————————-

And now for the winners of the giveaways! First up is for Tate’s Bake Shop:

Screen Shot 2013-02-06 at 9.45.58 PMScreen Shot 2013-02-06 at 9.48.09 PM

Congrats Lisa! Now for the baking pans….

Screen Shot 2013-02-06 at 9.49.42 PM Screen Shot 2013-02-06 at 9.50.44 PM


Congrats Tu Anh! Both of you guys have been emailed, so check your inboxes!

Filed Under: snack, white chocolate

DIY: How to use a Knitting Loom to make an Infinity Scarf

February 5, 2013 by kim 158 Comments

DSC_8968

Like I said in my previous post, this post has nothing to do with cooking, so look away if you’re not interested. After posting a picture on my Instagram about my recent knitting obsession, I had a couple of people ask me about knitting with the loom. There are tons of tutorials online to learn how to knit using sticks, but not as many using a knitting loom. Since I had a camera and was starting a new project, I figured I’d make my own tutorial if anyone else wanted to learn the easier way to knit.

First, here’s what you need:

DSC_8978

  • knitting loom
  • loom hook
  • yarn needle
  • scissors
  • yarn (If you want a chunkier scarf, use a thicker yarn. My favorite is by Bernat: “Softee chunkee.” I used two skeins for this project.)
  • crochet hook in a size K (I forgot to include this in the picture. Also, it’s not necessary but it makes your life a whole lot easier when casting off at the end.)

Here are the details of my yarn if you’re into that kind of thing. I don’t really bother with specifics. If it looks and feels right, use it.

DSC_8971

Did you know about this trick? In order to get the end of the yarn, stick your hand into the left side of the yarn ball and pull out the little bundle you feel.

DSC_8980

DSC_8982

Voi-la! You’ve got an end of the yarn without dismantling the entire thing. I may or may not have taken too big of a handful in this picture. Oh well, you’re going to use it anyways.

saveone

Start out by making a slip knot with about five inches at the end. Then, stick your slip knot onto the end prong of your loom.

steptwo

Let’s number our prongs. All the ones closest to you at the bottom will be odd numbers and the top row will be even numbers.

Now grab your string that’s attached to the ball of yarn and put it in between prongs 1 and 3. Wrap it clockwise around prong 1 and bring it up in between prongs 2 and 4.

Wrap it counterclockwise around prong 2 and bring it down in between prongs 2 and 4. Repeat this figure 8 pattern until you get to the desired width of your scarf. For this one, I used 13 prongs.

DSC_9001

Once you get to your last even prong, bring it back in between the last two odd prongs you used.

Tip: There’s no need to make the string as tight as humanly possible. Actually, don’t even do that. I did that the first time and the middle of my loom started caving in the middle. No bueno. Nice and easy wins the race.

stepthree

Push all the yarn loops on the pegs to the bottom. Then, continue wrapping your string again, now going from the right end of the loom to your left.

Wrap the string counterclockwise against the last odd peg and then bring it in between the 2nd and 3rd to last even pegs. Your last even peg will only have one layer. Continue the figure 8 pattern all the way to the where you began.

It helps me to remember which way to wrap the string by thinking of climbing up a ladder. Use the string to “climb” up your loom.

stepfour

Once you get back to the end, wrap the string between pegs 2 and 4 and hold it there, as pictured.

stepfive

It’s time to bust out your loom hook. Starting from left to right,take the bottom yarn loop and bring it over the top one, completely taking the bottom loop off of the peg.

DSC_9028

DSC_9029

Continue this process for every peg, except for the your last even peg (since it only has one loop).

DSC_9030

This is what your loom should look like after taking off the bottom layer of yarn loops.

stepsix

Now that you’re left with one layer of yarn loops at the top, push them all to the bottom again. Repeat this process again and again until you get your desired length. Remember, there will always be one peg with only one yarn loop when you go to hook them, so don’t freak out. Leave that single yarn loop alone!

Don’t forget to remove your slip knot from the peg after doing a couple of rows.

IMG_4551

It takes a bit of time, but you’ll eventually see progress if you keep working at it. The thicker the yarn, the faster the scarf will be done. As for how to cast off when you’re finished, this YouTube video will show you better than any picture could explain.

Attach both ends together using a flat seam and your knitting needle. Congratulations! You just made an infinity scarf.

IMG_4554

Filed Under: DIY

P.F. Chang’s Copycat Mongolian Beef

February 4, 2013 by kim 11 Comments

mongolianbeef-3

With these two months that I have off of work, I set a goal for myself: to learn how to knit. I’ve never been a knitter and have never tried, so I was really going in blind with this task. I didn’t have anyone to teach me, either. We all know that my DB isn’t very skilled in anything related to domesticity.

I’ve always wanted to learn how to knit since it’s useful and it’s something that I can do anywhere. Knitting is the perfect hobby for me to do while traveling, too. I can pack lightly with a ball of yarn and two sticks. Not only that, but imagine all the possibilities of knitting! I can make scarves, headbands, beanies, leg warmers…. the list is endless. What I’m really saying is that in the case of an apocalypse, I won’t be naked. That’s the most important part.

mongolianbeef-5

So off I went to the closest craft store to gather my materials. I went into the knitting/crocheting section and was completely overwhelmed. I mean, I’m usually at Joann’s on a regular basis for gift wrapping materials, specialty baking needs, scrapbook paper, and other odds and ends… but there are FOUR aisles of yarn in my Joann’s. FOUR. How did I miss these aisles before? It’s funny how you never notice something that’s right in front of you.

Of course, those four aisles of yarn kept me occupied for a good hour. I’m not ashamed. I went through every single row and every brand, touching and feeling the differences in all the fabrics while little ol’ ladies would zoom past me, grab their yarn, and leave in a second.

mongolianbeef

I wasn’t in a rush to make a decision. In order for me to learn, I have to start with the basics. I have to get to know my materials and understand the differences between them. It’s the same thing as baking. We all have brands and styles of pans that we love and adore, while there are others that we aren’t very fond of.

Example? Silicone pans. That’s just a big no-no for me, even though some swear by it. I’ll stick to my no-stick, steel pans, thank you very much.

mongolianbeef-2

After what seemed like two seconds to me in the store, I bought my yarn and bamboo needles. I went home to figure out what the heck I was going to do with them. A couple of YouTube videos later and I was on my way to knitting… something. I just started and went with it. A swatch? A baby sized placemat? What could I turn this rectangular shape into?

mongolianbeef-4

Once I finished learning how to knit with two separate needles, I went back to Joann’s for my next task: learn how to knit using a loom.

I couldn’t find any good tutorial online to figure out how to do it. I watched numerous videos and pieced them all together in order to create a scarf. Once I got the hang of it, I was in beast mode. The loom gives out way better results than knitting by hand!

mongolianbeef-6

So now, loom knitting has taken over my life. I. can’t. stop. It makes me feel productive when I’m not. I can watch five shows on Netflix and not feel so lazy because hey, I got an infinity scarf out of it.

That totally justifies sitting on the couch for the past four hours, doesn’t it?

I’m so addicted to this loom knitting thing that I’m even working on a tutorial post for you guys. Of course, my first tutorial post on this cooking blog would be about a craft. It just makes sense. As my high-school-volleyball-playing-self would say, “I do what I want.”

mongolianbeef-7

So just a heads up: If you don’t care about knitting, are offended by it, or can’t stand the sight of large needles, look away from my next post tomorrow.

I’m always looking for meat recipes since my DB is such a big carnivore. He loved this recipe– just meat and rice. I added more garlic to mine because we’re big garlic lovers, but even with the recipe unaltered, it’s a keeper. Flank steak cooks quite quickly, which is another reason why I love this recipe. Anything that takes less than 30 minutes in the kitchen to make gets extra bonus points from me. This mongolian beef recipe comes from Six Sisters’ Stuff.

Oh, as for the P.F. Chang’s copycat part, I have no idea if it tastes anything like it because I never eat at P.F. Chang’s. I went there once in high school and thought every dish was too salty and too expensive. I’d choose Panda Express over P.F. Chang’s any day.

Print
P.F. Chang’s Copycat Mongolian Beef

Ingredients

  • 2 teaspoons vegetable oil
  • ½ teaspoon ginger, minced
  • 1 tablespoon garlic, chopped
  • ½ cup soy sauce
  • ½ cup water
  • ¾ cup dark brown sugar
  • vegetable oil , for frying (about 1 cup)
  • 1 lb flank steak
  • ¼ cup cornstarch
  • 2 large green onions, chopped

Directions

    Sauce:
  1. Heat 2 tsp. of vegetable oil in a medium saucepan over medium/low heat, without letting it get too hot.
  2. Add ginger, garlic, soy sauce and water to the pan, being careful not to scorch the garlic.
  3. Dissolve the brown sugar in the sauce, then increase the heat to medium and boil the sauce for 2-3 minutes or until the sauce thickens. Remove it from the heat and set aside.
  4. Beef:
  5. Slice the flank steak against the grain at a 45 degree angle into 1/4" thick bite-size slices.
  6. Dip each piece into cornstarch and then let sit for 10 minutes.
  7. As the beef sits, heat up one cup of oil in a wok over medium heat. You want it hot enough, but not smoking.
  8. Add the beef to the oil and sauté until brown, cooking evenly on all sides.
  9. After a couple of minutes, remove the cooked meat and place on paper towels.
  10. Dab excess oil off meat and add to medium saucepan with the sauce in it. Put the pan back over medium/low heat.
  11. Add chopped green onions and let sauce simmer until warm. Serve over rice.
3.1
https://lovintheoven.com/p-f-changs-copycat-mongolian-beef/

Filed Under: beef, dinner

  • « Previous Page
  • 1
  • …
  • 136
  • 137
  • 138
  • 139
  • 140
  • …
  • 289
  • Next Page »

hi! i'm kim-- a girl mom, baker, blogger, and ex-flight attendant. welcome!

Search

  • Facebook
  • Instagram
  • Pinterest
  • Twitter

Categories

RODELLE-BABadge


Categories

  • Facebook
  • Instagram
  • Pinterest
  • Twitter

Copyright © 2026 · Foodie Pro Theme by Shay Bocks · Built on the Genesis Framework · Powered by WordPress