Lovin' From the Oven

  • Home
  • About Me
  • Recipes
  • FAQ
  • My Lifestyle Blog
  • Disclaimer

Caramelized Onion, Prosciutto, and Goat Cheese Pizza

October 27, 2014 by kim 15 Comments

IMG_2547

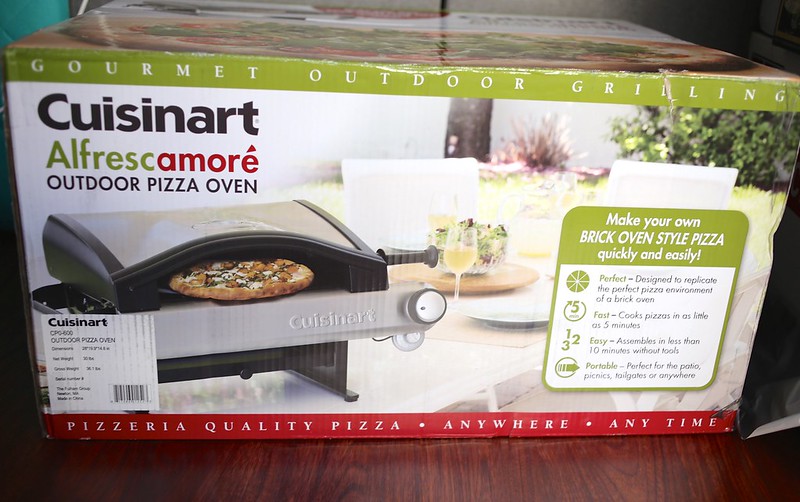
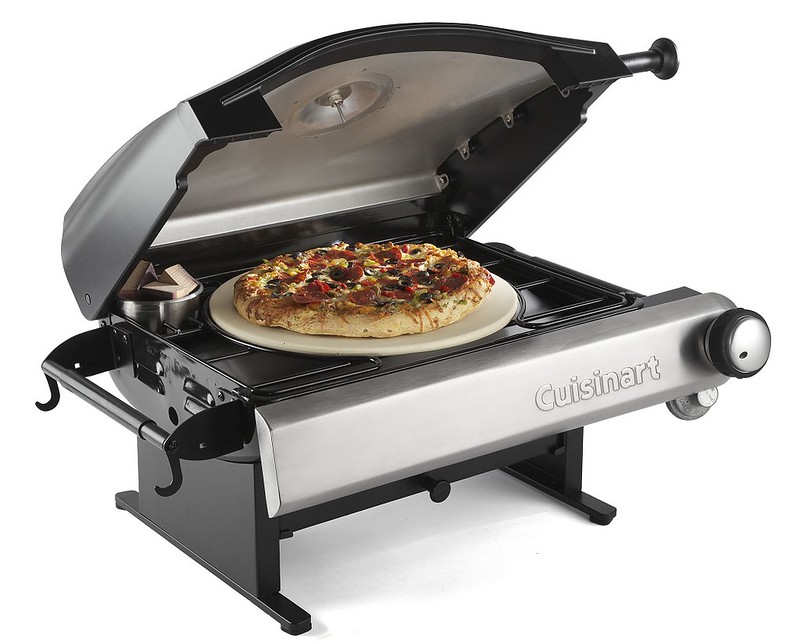
Surprise! It’s National Pizza Month. That gives you the perfect excuse for eating pizza every day this month. Thanks to the Cuisinart Alfrescamoré Outdoor Pizza Oven, you can have a freshly baked pizza any time you want. It gives the environment of a real brick oven, without taking up all of the space!

Cuisinart Table

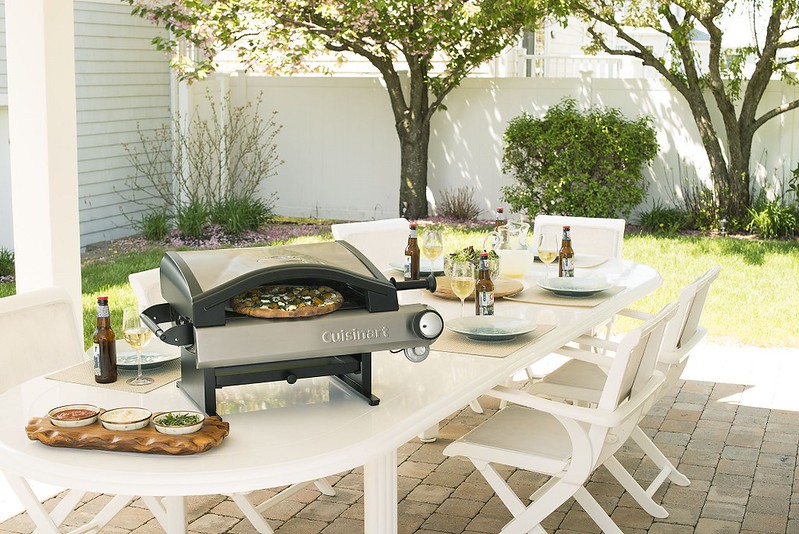
Isn’t it cute? It’s perfect for your backyard BBQ’s. Since all we have in our place is a teeny tiny outside patio (I’m talking like 3 x 7 feet small), we don’t have a lot of room for cooking outside. This outdoor pizza oven solved our problems. It allowed us to enjoy the nice Los Angeles weather while making a delicious meal.

IMG_2425

Plus, it’s portable! Take it with you when you’re going over to someone’s house for a tailgating party. It weighs 35 pounds and assembles in less than ten minutes, so I’m not afraid to do it myself since I usually rely on my DH for of the grunt work. The pizza oven retails for $249.99 and you can find it online at BedBathBeyond.com, Amazon.com, HomeDepot.com and Cuisinart.com. 

IMG_2512

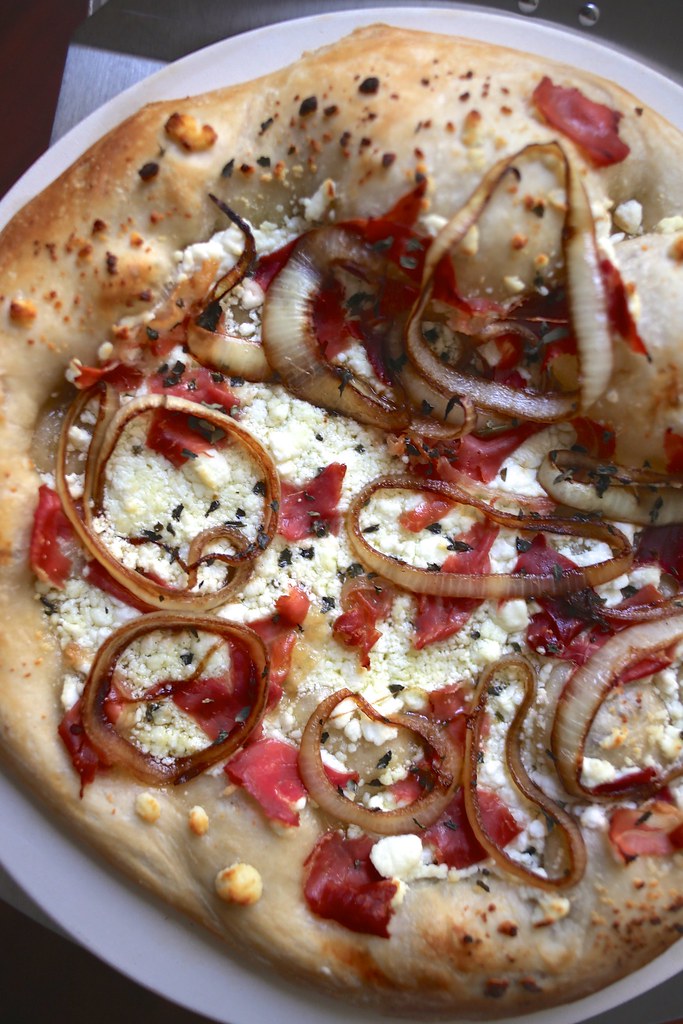
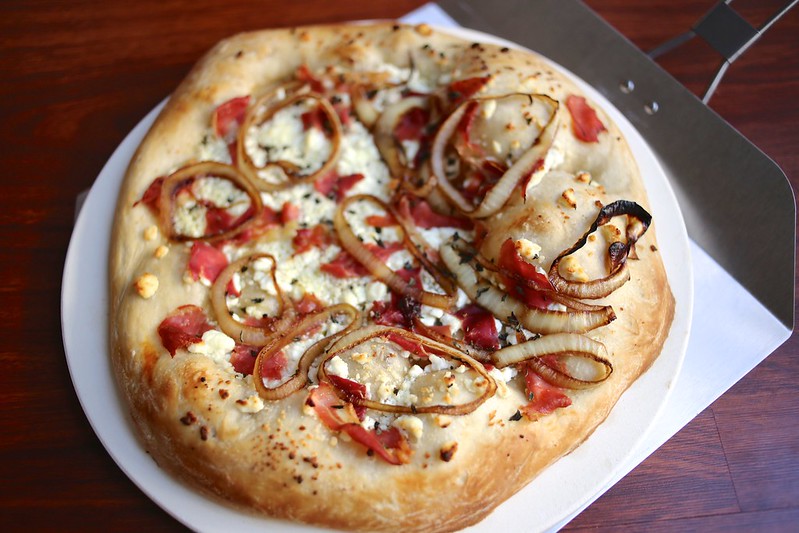
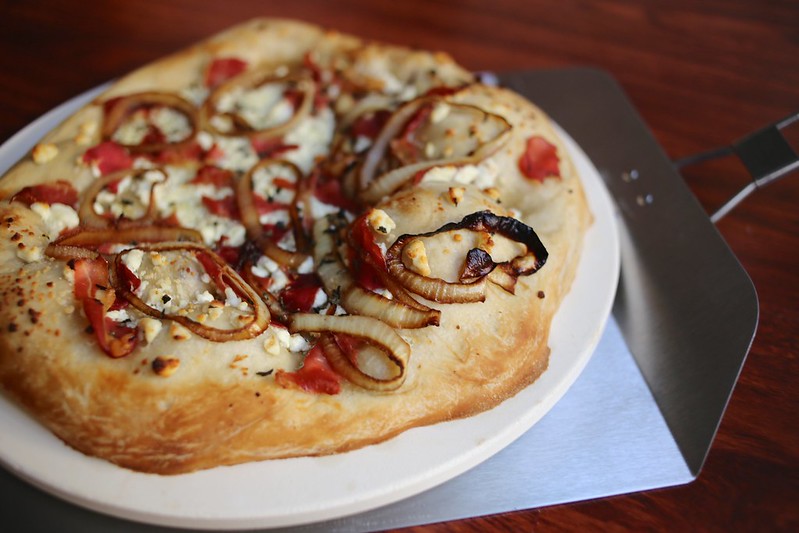
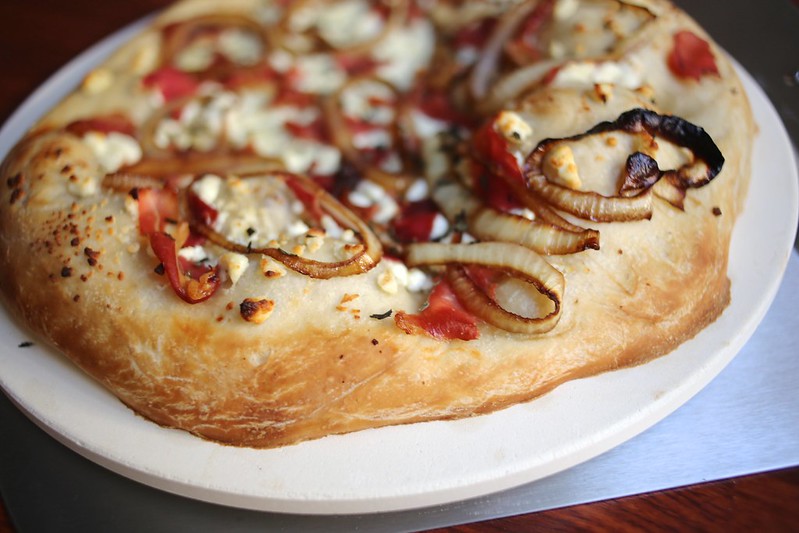
The caramelized onion, prosciutto, and goat cheese pizza came looking perfect. My pizza dough never gets those beautiful air bubbles in it like the ones at the restaurant. In this particular pizza, I had two!

IMG_2535

I chose to make a pizza with goat cheese since my DH started working today and I wanted to make him something that he loved… a little surprise to come home to. I knew he was a sucker for goat cheese, so it was the perfect opportunity to combine it with the pizza oven.

IMG_2557

It’s definitely a winner in my book. The pizza oven advertises to cooking pizzas in as little as five minutes, but mine took a little longer than that. Just make sure to keep an eye on it so it doesn’t burn!

IMG_2536


Cuisinart Open

I’m doing a giveaway with Cuisinart, which includes a Cuisinart 12″ Pizza Peel and Pizza Cutter!  All you have to do is leave a comment letting me know the first pizza recipe you’d test in the Cuisinart Alfrescamoré Outdoor Pizza Oven! You can also gain entries by linking to this post on your social channels and tagging #Alfrescamore.

Print
Caramelized Onion, Prosciutto, and Goat Cheese Pizza

Ingredients

  • 1 recipe of pizza ball dough (store bought also works)
  • 1/2 onion, sliced, leaving rings whole
  • 2 tsp olive oil
  • 1 tsp brown sugar
  • 1 tablespoon olive oil
  • 4 oz goat cheese
  • 3 slices of prosciutto, torn into pieces
  • 1 tsp dried basil

Directions

  1. Roll out your pizza dough as far as it will stretch, approximately 12" round. Place on your pizza stone.
  2. In a medium saucepan over medium high heat, cook the onion slices, 2 tsp olive oil, and brown sugar until evenly browned (about 7 minutes). Set aside.
  3. Drizzle the olive oil on the dough. Add the goat cheese, prosciutto, caramelized onions, and dried basil.
  4. Bake in pizza oven for 7-8 minutes, keeping an eye on it.
  5. Serve immediately.
3.1
https://lovintheoven.com/caramelized-onion-prosciutto-goat-cheese-pizza/

a Rafflecopter giveaway

In the spirit of full-disclosure, I’ve partnered with Cuisinart Alfrescamoré and received a product demo and premium items as part of my participation. However, no payment was given or expected for posting about the program, and as always, all opinions given here are fully my own

Filed Under: dinner, giveaway, lunch, vegetables

Avocado, Spinach, and Egg McMuffin

February 28, 2014 by kim 1 Comment

mcmuffin

It’s a great day for a hearty breakfast. By that, I mean it’s pouring rain outside with no sun in sight so I might as well spend the morning inside creating something fulfilling to eat. Doesn’t food just made gloomy days that much better?

mcmuffin-2

I practically grew up on Sausage McMuffins from McDonald’s, so I wanted to make a healthier “McMuffin” (not to mention more adult-like!). This one has some more color and not as much fat or sodium. It will, however, still leave you full for a good couple of hours.

mcmuffin-3

Some people are very anti McDonald’s and would never feed their child something from there. I have no shame eating McDonald’s as a child. As a matter of fact, I loved it and have fond memories from spending my afternoons on the playground. I still eat it now— definitely not as much as I used to and in moderation, but I won’t turn down a McDonald’s run for breakfast if asked.

Did I ever tell you guys that my parent’s first date was at Carl’s Jr? My dad was broke and couldn’t afford more than that. My mom came from Paris, so she never really tasted a hamburger until then. I don’t even think she knew what fast food was. She thought it was delicious! About 239048 Carl’s Jr dates later, they got married and it was a match made in heaven.

mcmuffin-4

This green McMuffin may take a little more time to make, but the end result is worth it. The creamy avocado and the slight saltiness from the spinach truly brings together every single bite. I left one side of the muffin off to save some carbs, but you can certainly make it a closed face sandwich if you prefer. It’s also less messy to eat when you have two pieces of bread to hold onto instead of one.

mcmuffin-5

I just like looking at the perfectly toasted cheese on top. Isn’t she a thing of beauty?

mcmuffin-6

Print
Avocado, Spinach, and Egg McMuffin

Ingredients

  • 1 whole wheat english muffin (I only used half of one to make it open faced, but you can use both)
  • 1 egg, scrambled
  • handful of spinach
  • drizzle of olive oil
  • pinch of sea salt
  • half of an avocado, sliced
  • 1 1/2 tablespoons shredded mozzarella

Directions

  1. In a small skillet over medium heat, warm up the olive oil and toss in your handful of spinach. Sprinkle sea salt on top. Cook until the spinach has fully wilted, about 4-5 minutes. Remove from heat, drain, and set aside.
  2. Place the scrambled egg on top of your english muffin. Layer it with the spinach, avocado, and cheese.
  3. Toast your open faced sandwich for a minute or two. You can also do this under the broiler in your oven until your cheese begins to melt, but make sure to keep an eye on it because it can burn quickly. Enjoy!
3.1
https://lovintheoven.com/avocado-spinach-egg-mcmuffin/

Filed Under: breakfast, fruit, sandwich, vegetables

Beef Stir Fry

February 17, 2014 by kim 6 Comments

meat-2

One major event for this year down.. my older sister is officially married! We spent this past weekend in Santa Barbara setting up for my sister’s wedding. She got married in a park, so there was a lot of DIY and manual labor involved. All in all, no one notices the little things that you stress over and there is always something that you forgot. That’s just the way it goes.

In the end, it doesn’t really matter because it all falls together eventually.

meat-5

It was great seeing my family and friends, but I’m exhausted from the past couple of days. I can’t even complain because my parents did ten times what I did helping out. My parents are honestly super heroes.

meat

I can’t believe my wedding is only six months away. More wedding projects coming up soon on my Wednesday Wanderings!

meat-3

The food that my sister had at her wedding was amazing. It was catered barbecue with ribs, tri tip, and chicken and I’m impressed because both my sister and her husband are vegan!

meat-4

Here’s a quick dish that you can make in less than 30 minutes for dinner. Serve it over some rice and you’ve got yourself a take out meal made in your own kitchen!

Print
Beef Stir Fry

Serving Size: 4

Ingredients

  • 3 1/2 tablespoons cornstarch, divided
  • 1/2 cup water plus 2 tablespoons water, divided
  • 1 teaspoon garlic powder
  • 1 lb top sirloin stir fry meat
  • 2 tablespoons olive oil, divided
  • 16 oz bag frozen bell peppers (can also use fresh)
  • 1 tablespoon dried onion
  • 1/3 cup reduced sodium soy sauce
  • 2 1/2 tablespoons brown sugar
  • 1 tablespoon sesame oil
  • 1 teaspoon ground ginger
  • 2 teaspoons red pepper

Directions

  1. In a large mixing bowl, whisk together 2 tablespoons cornstarch, 2 tablespoons water, and garlic powder.
  2. Add the beef to the mixture and stir until evenly coated.
  3. Add one tablespoon of olive oil in a large pan over high heat. Add in the meat and cook until browned. Place meat on a plate and set aside.
  4. Using the same pan, add in the frozen bell peppers and dried onion. Cook until just hot.
  5. In another bowl, whisk together the soy sauce, brown sugar, sesame oil, ginger, red pepper, 1 1/2 tablespoon cornstarch, and 1/2 cup water until there are no more lumps.
  6. Return the meat to the pan with the bell peppers and pour in the soy sauce mixture.
  7. Continue to cook for another 3 minutes, until the sauce begins to thicken.
3.1
https://lovintheoven.com/beef-stir-fry/

Filed Under: beef, dinner, vegetables

  • « Previous Page
  • 1
  • …
  • 6
  • 7
  • 8
  • 9
  • 10
  • …
  • 15
  • Next Page »

hi! i'm kim-- a girl mom, baker, blogger, and ex-flight attendant. welcome!

Search

  • Facebook
  • Instagram
  • Pinterest
  • Twitter

Categories

RODELLE-BABadge


Categories

  • Facebook
  • Instagram
  • Pinterest
  • Twitter

Copyright © 2026 · Foodie Pro Theme by Shay Bocks · Built on the Genesis Framework · Powered by WordPress