Lovin' From the Oven

  • Home
  • About Me
  • Recipes
  • FAQ
  • My Lifestyle Blog
  • Disclaimer

Slutty Brownies

November 7, 2016 by kim 1 Comment

IMG_4082

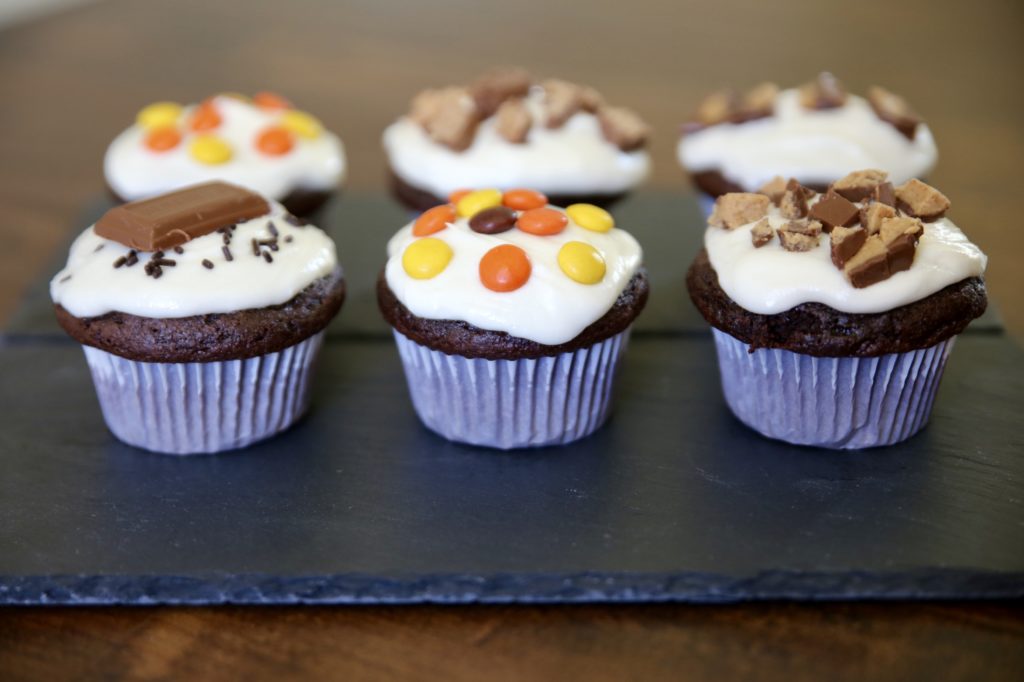
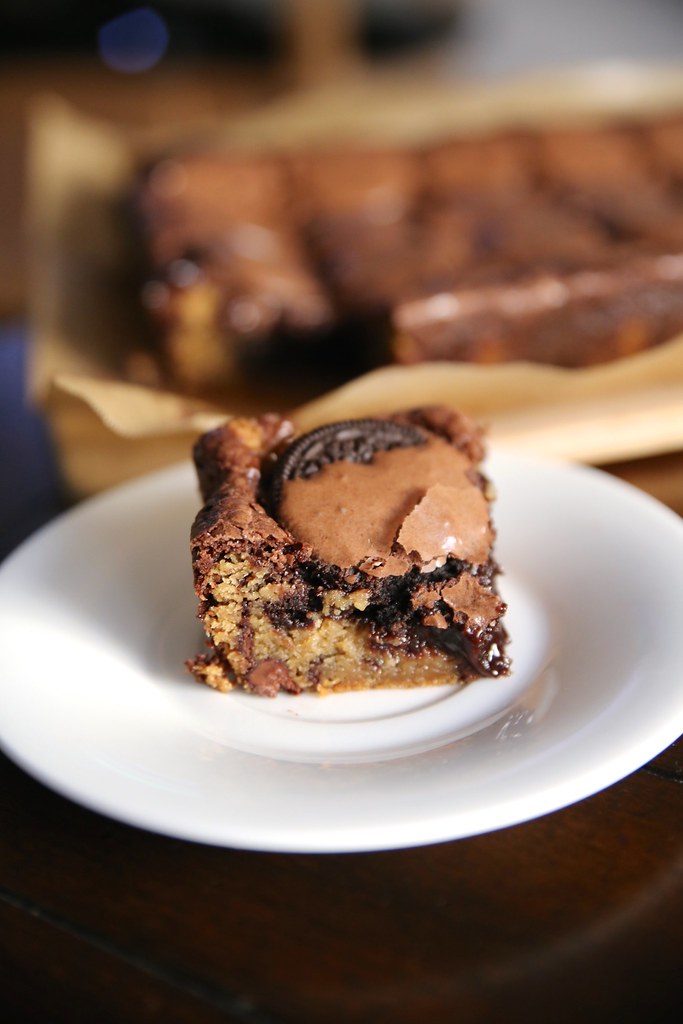
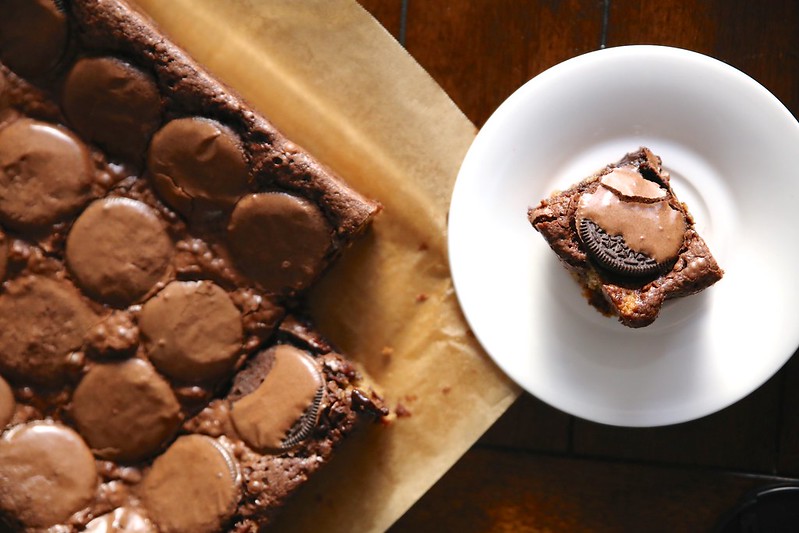
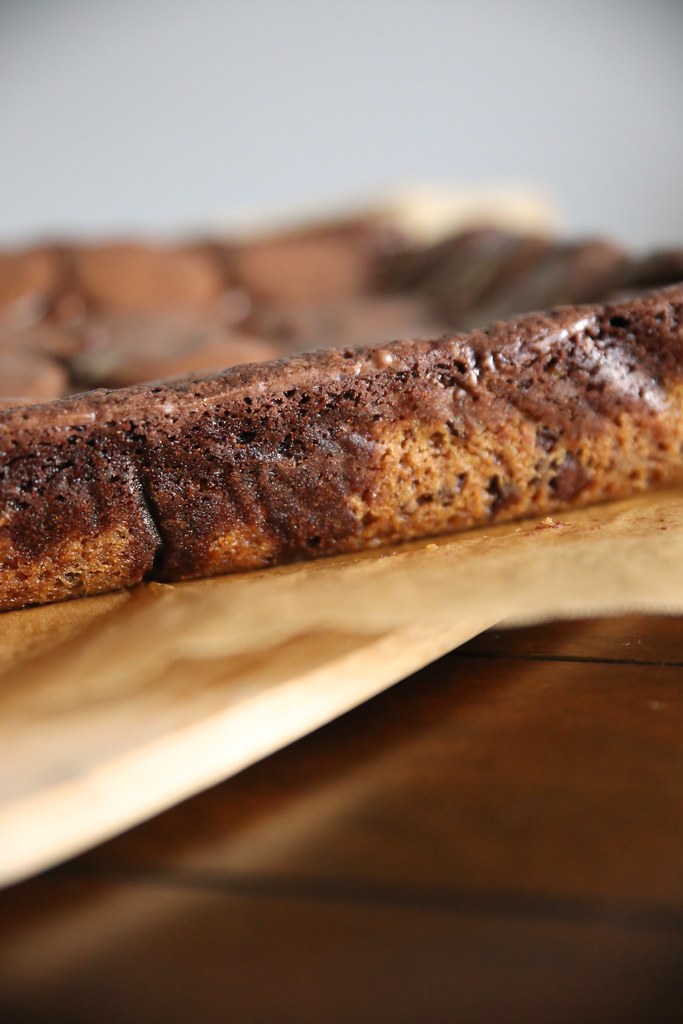
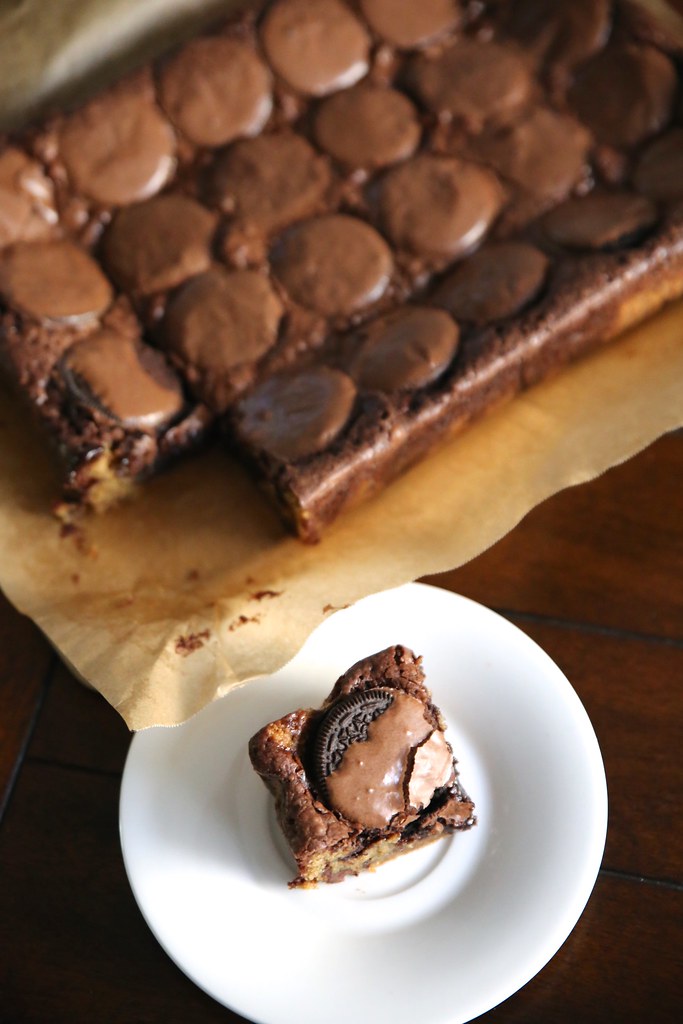
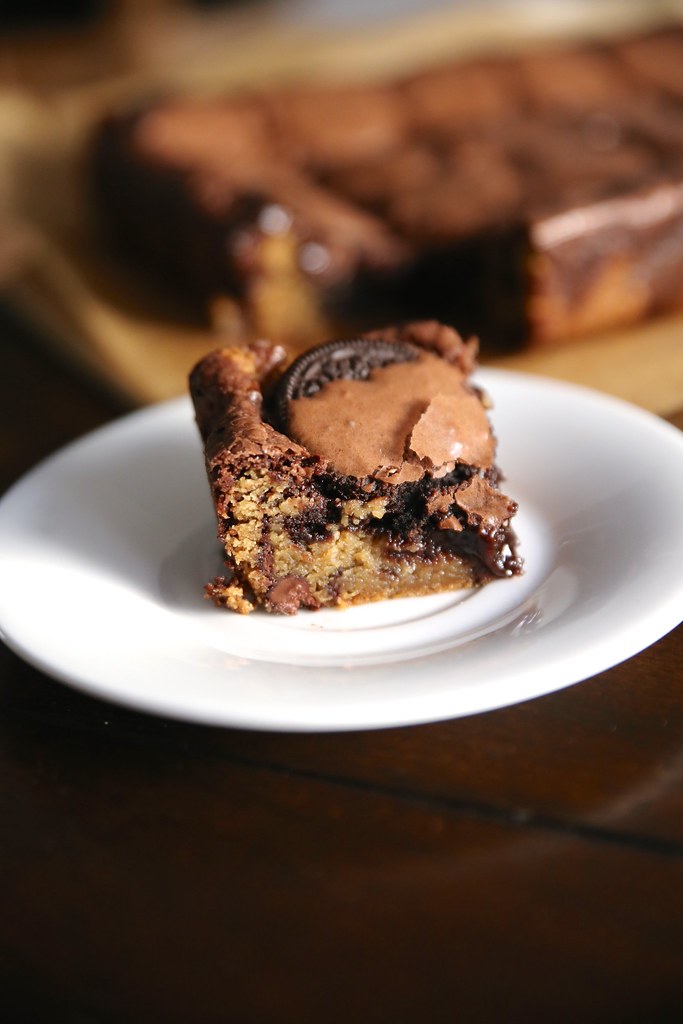
Have you ever heard of these before? I have no idea why they’re called “slutty” brownies, but I’ll eat them anyway. I mean, wouldn’t you? They have chocolate chip cookie dough, brownies, AND Oreos. I love them all individually so it’s a no brainer that I’d love them all together.

These are a hit with the ones that always pick the dessert that’s on the safe side. You know, the ones that don’t like nuts, coconut, raisins… in their desserts. The ones that like just chocolate chip. Heck, I’m even that person on some days.

IMG_4092

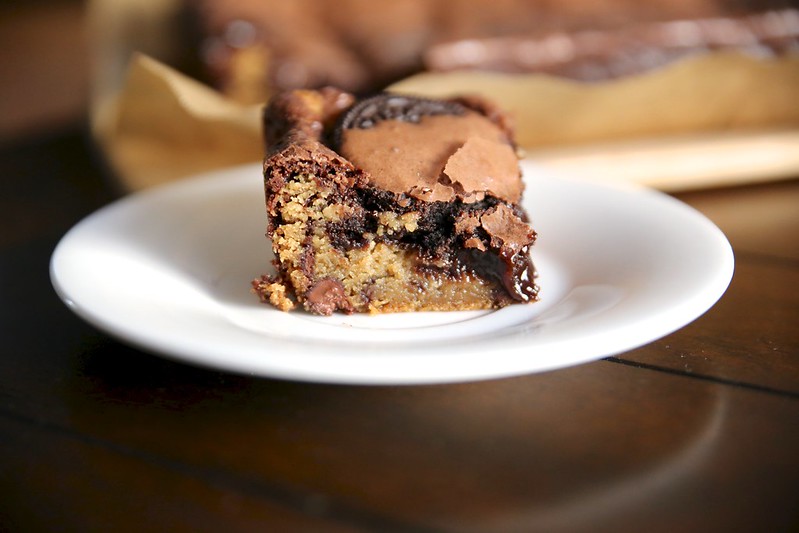
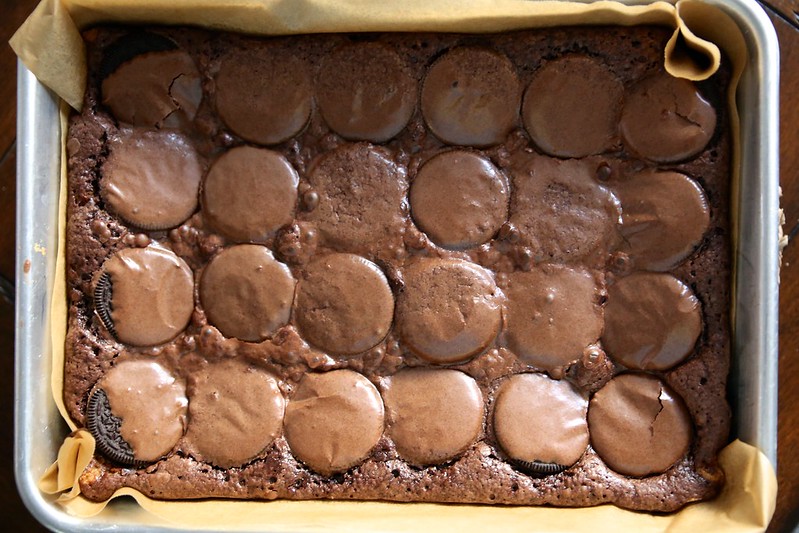
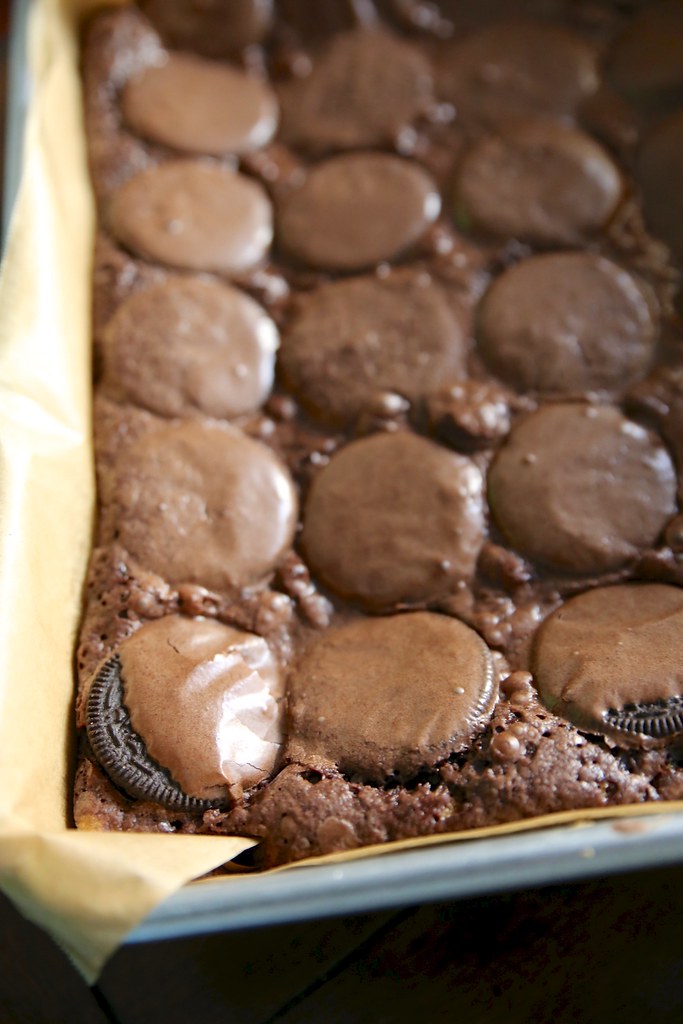
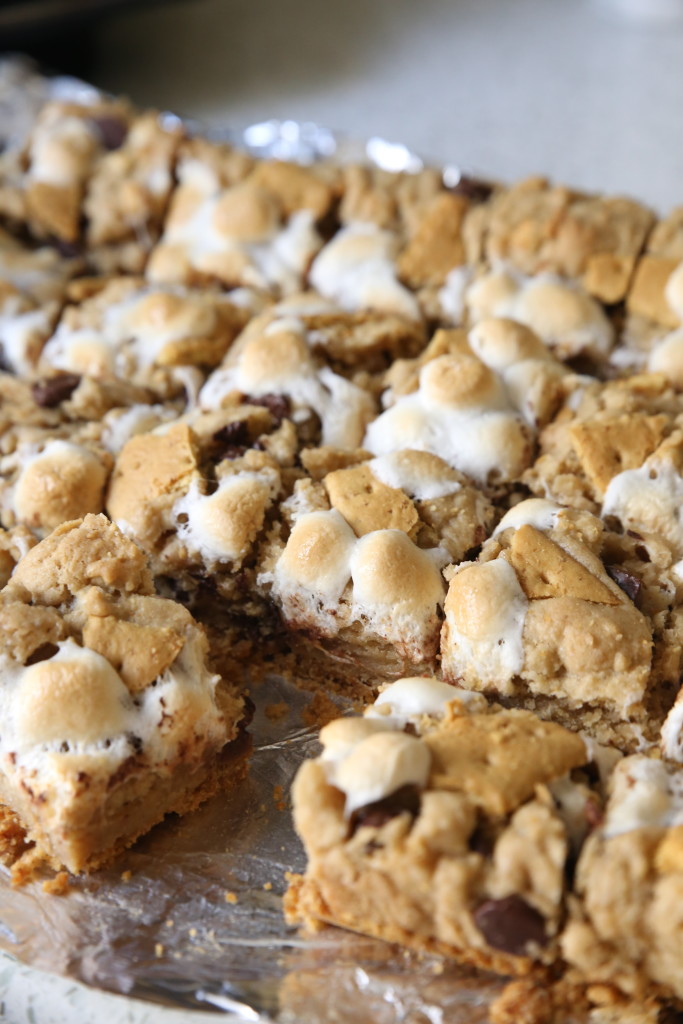
This really is a gorgeous dessert. You can undercook them a little if you like gooey brownies. You could also use a smaller pan to bake them in if you want thicker, fudge-y bars. Obviously, you’ll need less Oreos to top it with if you use a smaller pan. For me, the 9×13 pan was perfect.

IMG_4096

IMG_4050

I always forget how good Oreos are until I buy them to bake with. Then I eat the remaining rows of Oreos that were unused in the recipe and remember why I don’t buy them as often.

IMG_4053

But that’s what husbands and siblings are for… sharing Oreos! Thank goodness I have three siblings to help me eat all the Oreos. Oreos are even vegan so my older sister can participate in this Oreo eating fest.

IMG_4058

IMG_4087

Make this for your Thanksgiving dessert this year, you won’t regret it! Maybe just leave out the part that they’re called “slutty brownies.”

IMG_4103

Print
Slutty Brownies

Ingredients

  • 1 pound (16 oz) chocolate chip cookie dough
  • 1 box brownie mix (prepared using directions on box)
  • 24 Oreos

Directions

  1. Preheat oven to 350 degrees. Line a 9x13 pan with parchment paper.
  2. Press the cookie dough into the bottom of the pan. Pour the prepared brownie mix on top. Layer with the Oreos.
  3. Bake for 30-35 minutes, or until toothpick comes out clean.
3.1
https://lovintheoven.com/slutty-brownies/

Filed Under: bars/brownies, cookies, dessert

S’mores Bars (Again!)

October 29, 2016 by kim 1 Comment

IMG_7387

Yup, another s’mores recipe. The more, the better! I really don’t understand people that dislike s’mores (cough cough Larry David in Curb Your Enthusiasm). They’re so gosh darn good!IMG_7389

These have a nice cookie dough base that holds all of your marshmallows and chocolate in place. I adore a thick, hearty dessert, and these fit the bill. IMG_7395 IMG_7396

See what I mean? Since this makes a 9×13 pan, you can cut them into smaller pieces and feed a TON of people. IMG_7400

I have so many drafts on my blog that I need to organize and add pictures. Hopefully I can find a time to get that done before my 12 days of Christmas this year! IMG_7401 This recipe comes from from Glorious Treats.

Print
S’mores Bars (Again!)

Ingredients

    Crust
  • 1/2 cup butter, melted
  • 2 cups graham cracker crumbs
  • Cookie Dough
  • 1 cup granulated sugar
  • 1 1/4 cups brown sugar
  • 3/4 cup butter, melted
  • 3 eggs
  • 2 teaspoons vanilla
  • 3 cups flour
  • 2 1/2 teaspoons baking powder
  • 1 teaspoon salt
  • 1 cup semi-sweet chocolate chips
  • 1 cup mini marshmallows (I used Jet-Puff mallow bits)
  • Toppings
  • 1-2 Hershey chcolate bars (I omitted)
  • 1 graham cracker, broken into pieces
  • 1/2 cup mini marshmallows

Directions

  1. Preheat oven to 325*F and line a 9"x13" baking pan with foil.
  2. Mix together the graham cracker crumbs and 1/2 cup melted butter. Press into the bottom of the pan and place it in the freezer.
  3. Cream together both sugars and the melted butter. Add eggs and vanilla.
  4. Gradually stir in flour, baking powder and salt until just combined. Mix in the marshmallows and chocolate chips.
  5. Take the pan out of the freezer and drop the cookie dough over the crust. Spread even.
  6. Add the toppings on top.
  7. Bake 35-40 minutes, or until toothpick comes out clean.
  8. Cool completely before cutting.
3.1
https://lovintheoven.com/smores-bars-again/

Filed Under: bars/brownies, chocolate chip, dessert, Uncategorized

Simply Chocolate Cupcakes

October 24, 2016 by kim Leave a Comment

fullsizeoutput_3eea

Can I tell you how much better the holidays are when you have kids? Or in my case, a kid? I’m SO excited to dress Ellie up for her first Halloween, eat tons of food for her first Thanksgiving, and wrap presents to leave under the tree for her first Christmas! I know she’s not even one yet so she won’t remember any of these events, but I’m going to go all out anyway.

Let’s start with Halloween. I bought Ellie her costume before she was born (hellooooo 80% off-after-Halloween-sale! How could I resist?). She’s a little too young to help me in the kitchen right now, but I’m counting down the days until she can wear a mini apron and stand beside me watching cupcakes rise through the oven glass door. img_5053
img_5064

When that day comes, I’ll have Pillsbury’s Purely Simple mixes to help me out. With a toddler on hand, it’ll be difficult to bake things truly from scratch. I’ll need a little help to get me started and that’s where these mixes come in. It makes everything a little homemade, while giving me more time to spend with family.

Plus, there is so much you can do with these mixes! I love using them in the kitchen. For these simply chocolate cupcakes, I doctored up the normal recipe by adding a couple of my finishing touches. From there, I used Halloween candy to dress up the tops.

Kids will love choosing their favorite Halloween candy to put on top of their very own dessert. Cupcakes are the perfect size for tiny hands to hold and devour. I played it safe with chocolate and peanut butter based candies, but you can be adventurous with taffy, gummies, or even hard candies.
fullsizeoutput_3eeb

I like using Pillsbury’s Purely Simple mixes because they’re free of preservatives and they don’t use any bleached flour. It’s easy to make them at home and it tastes like every ingredient was thoughtfully mixed in, one by one. img_5117

You can always use the recipe on the back of the box, but if you have a little extra time, you can use this recipe to make it even more personal.
fullsizeoutput_3ee9

I made the buttercream exactly as listed on the package. Believe it or not, you only need to add butter and water to the mix. That’s it! Just two ingredients that are almost always readily available in your refrigerator.img_5135 img_5146 fullsizeoutput_3ee7

The result is this deliciously moist, fluffy, and tasteful cupcake. It took me less than half an hour total to make these cupcakes. Yes, that even includes the baking time! That’s faster than doing a load of laundry, going grocery shopping, or running the dishwasher.

Use up that leftover Halloween candy and turn it into gold!

Print
Simply Chocolate Cupcakes

Ingredients

  • 1 package Pillsbury Purely Simple Chocolate Cake Mix
  • 1 package (3.9 oz) instant chocolate pudding mix
  • 2 tbsp dark cocoa powder
  • 1 1/2 cup half and half
  • 1/4 cup vegetable oil
  • 2 eggs
  • 1 package Pillsbury Purely Simple Buttercream Frosting Mix, prepared using the directions on the package

Directions

  1. Preheat the oven to 350 degrees. Line a muffin pan with 18 cupcake liners.
  2. In a large bowl, mix all of the ingredients together until smooth.
  3. Evenly distribute the batter into the 18 cupcake liners.
  4. Bake for 20 minutes, or until toothpick comes out with only a few crumbs.
  5. Wait until cool and then frost with the buttercream. Top with chopped candy.
3.1
https://lovintheoven.com/simply-chocolate-cupcakes/

You can check out more Pillsbury ideas here:

  • Website – http://www.pillsburybaking.com/
  • Facebook – https://www.facebook.com/PillsburyBaking
  • Pinterest – http://www.pinterest.com/pillsburybaking/
  • Instagram – https://instagram.com/pillsburybaking/

This is a sponsored post, but the opinions expressed are my own.

Filed Under: cake, candy, cocoa, cupcake, dessert

  • « Previous Page
  • 1
  • …
  • 11
  • 12
  • 13
  • 14
  • 15
  • …
  • 159
  • Next Page »

hi! i'm kim-- a girl mom, baker, blogger, and ex-flight attendant. welcome!

Search

  • Facebook
  • Instagram
  • Pinterest
  • Twitter

Categories

RODELLE-BABadge


Categories

  • Facebook
  • Instagram
  • Pinterest
  • Twitter

Copyright © 2026 · Foodie Pro Theme by Shay Bocks · Built on the Genesis Framework · Powered by WordPress