Lovin' From the Oven

  • Home
  • About Me
  • Recipes
  • FAQ
  • My Lifestyle Blog
  • Disclaimer

S’mores Bars (Again!)

October 29, 2016 by kim 1 Comment

IMG_7387

Yup, another s’mores recipe. The more, the better! I really don’t understand people that dislike s’mores (cough cough Larry David in Curb Your Enthusiasm). They’re so gosh darn good!IMG_7389

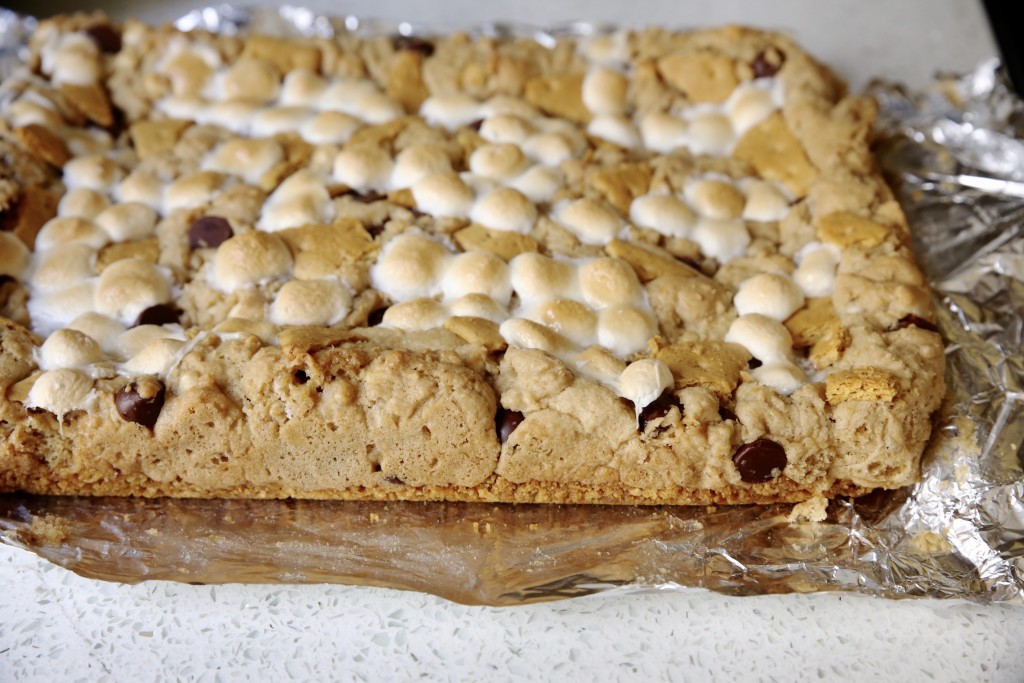
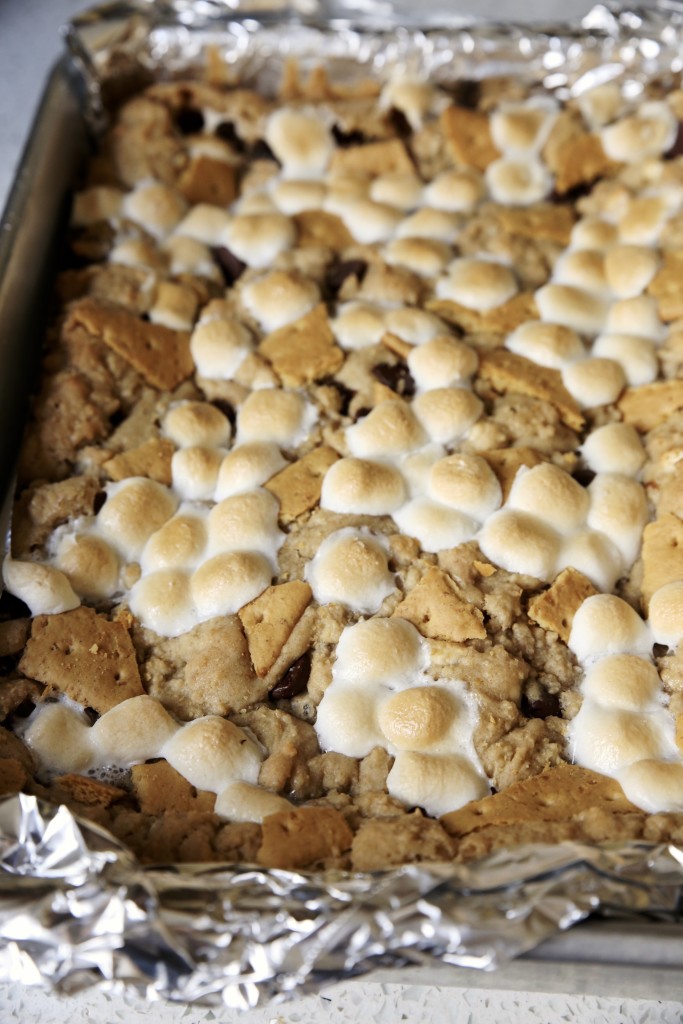
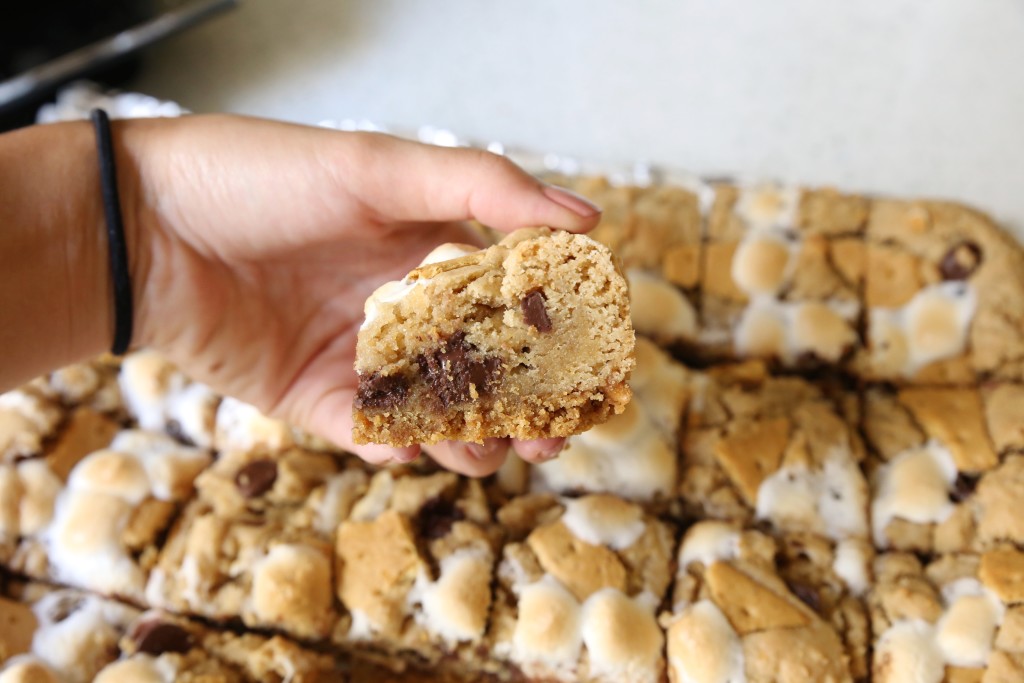
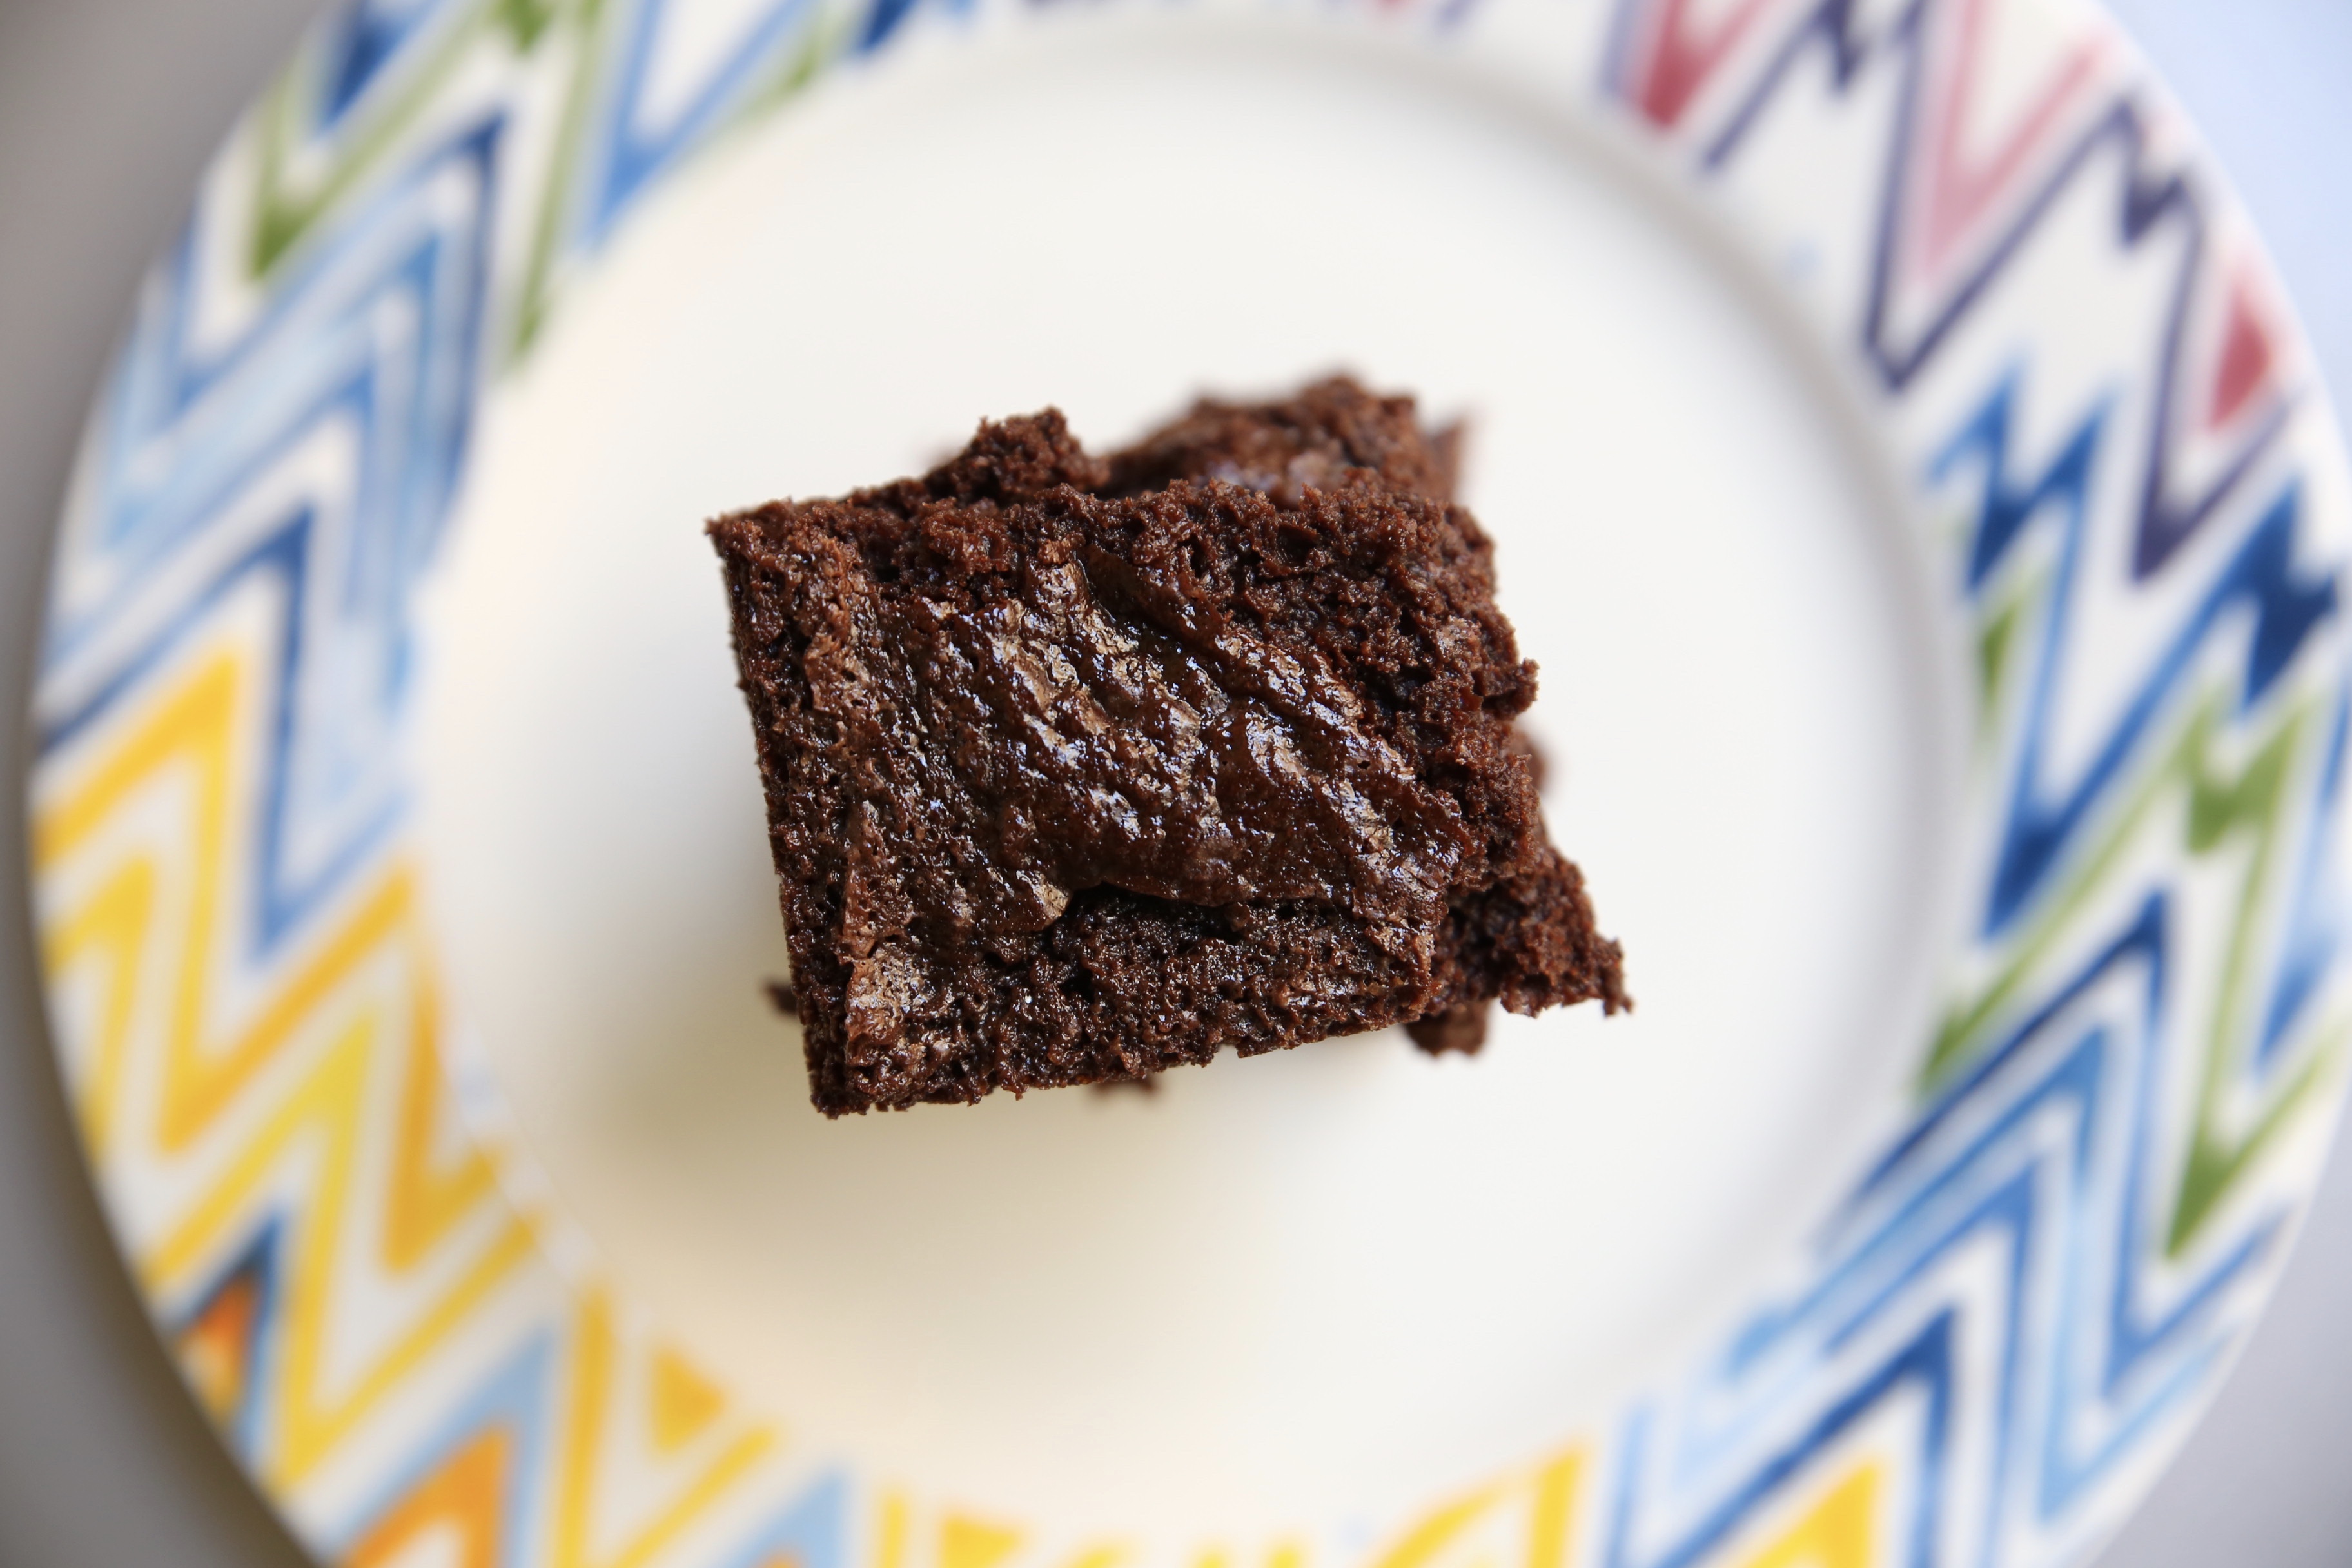
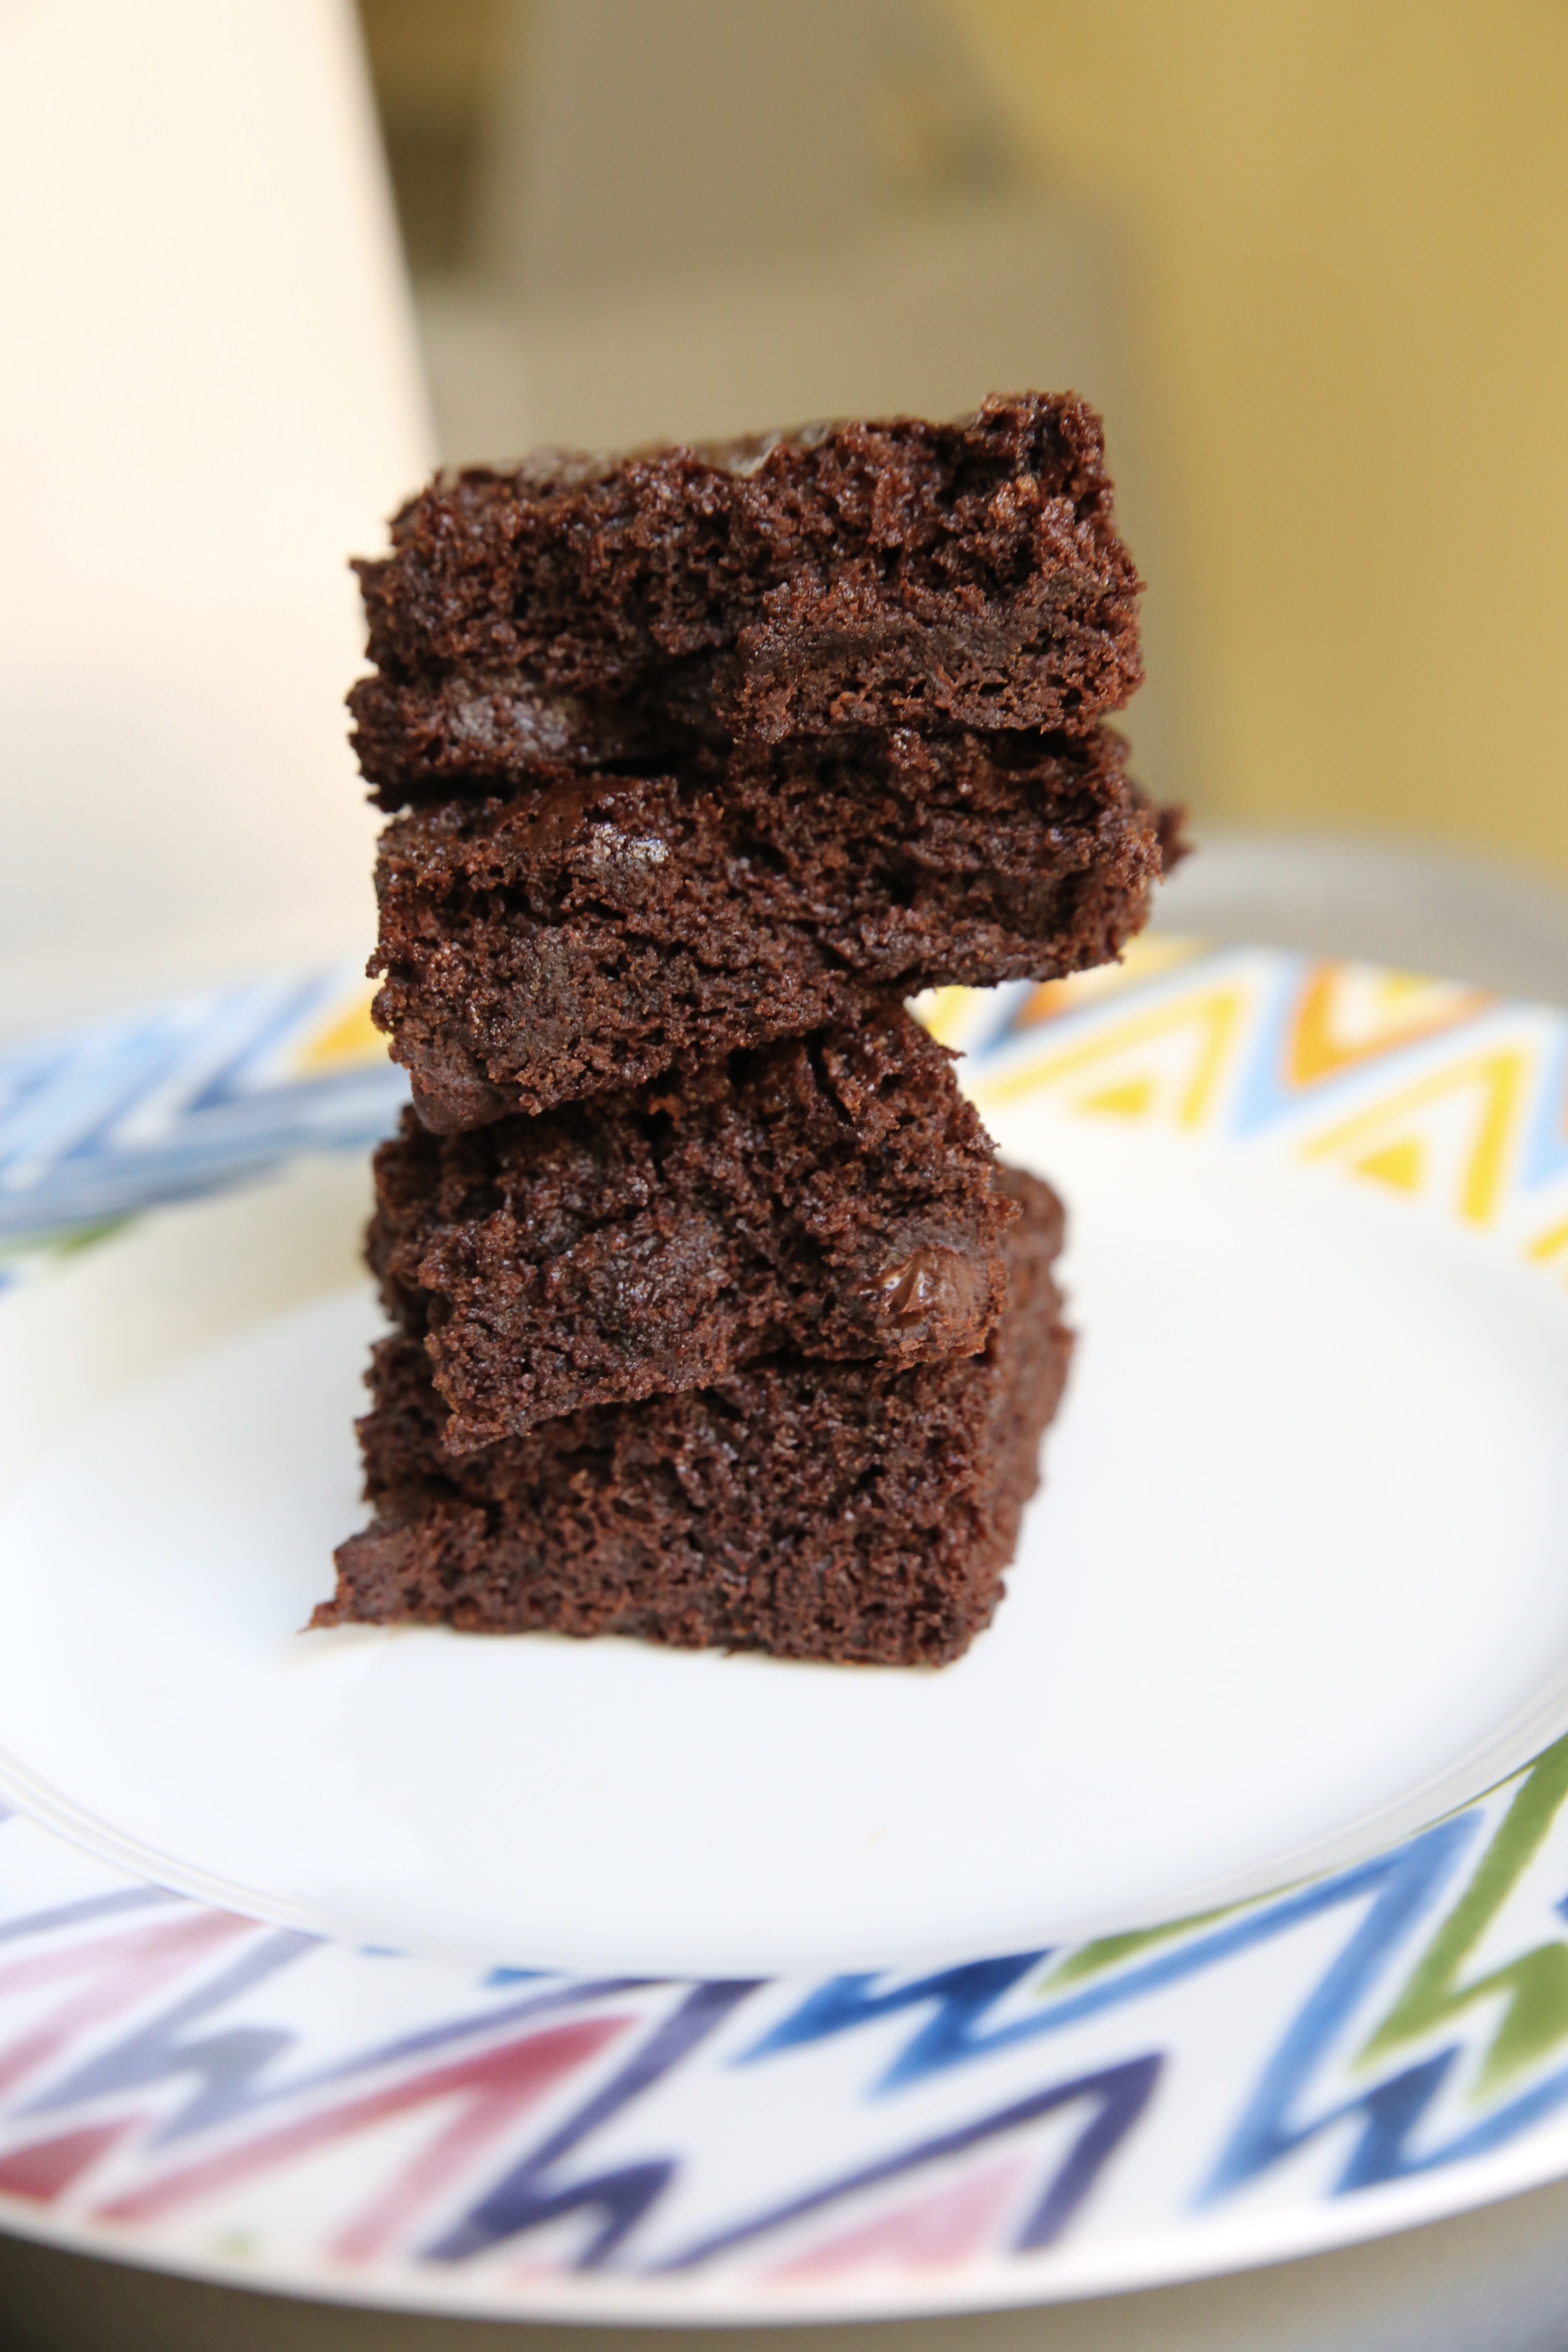
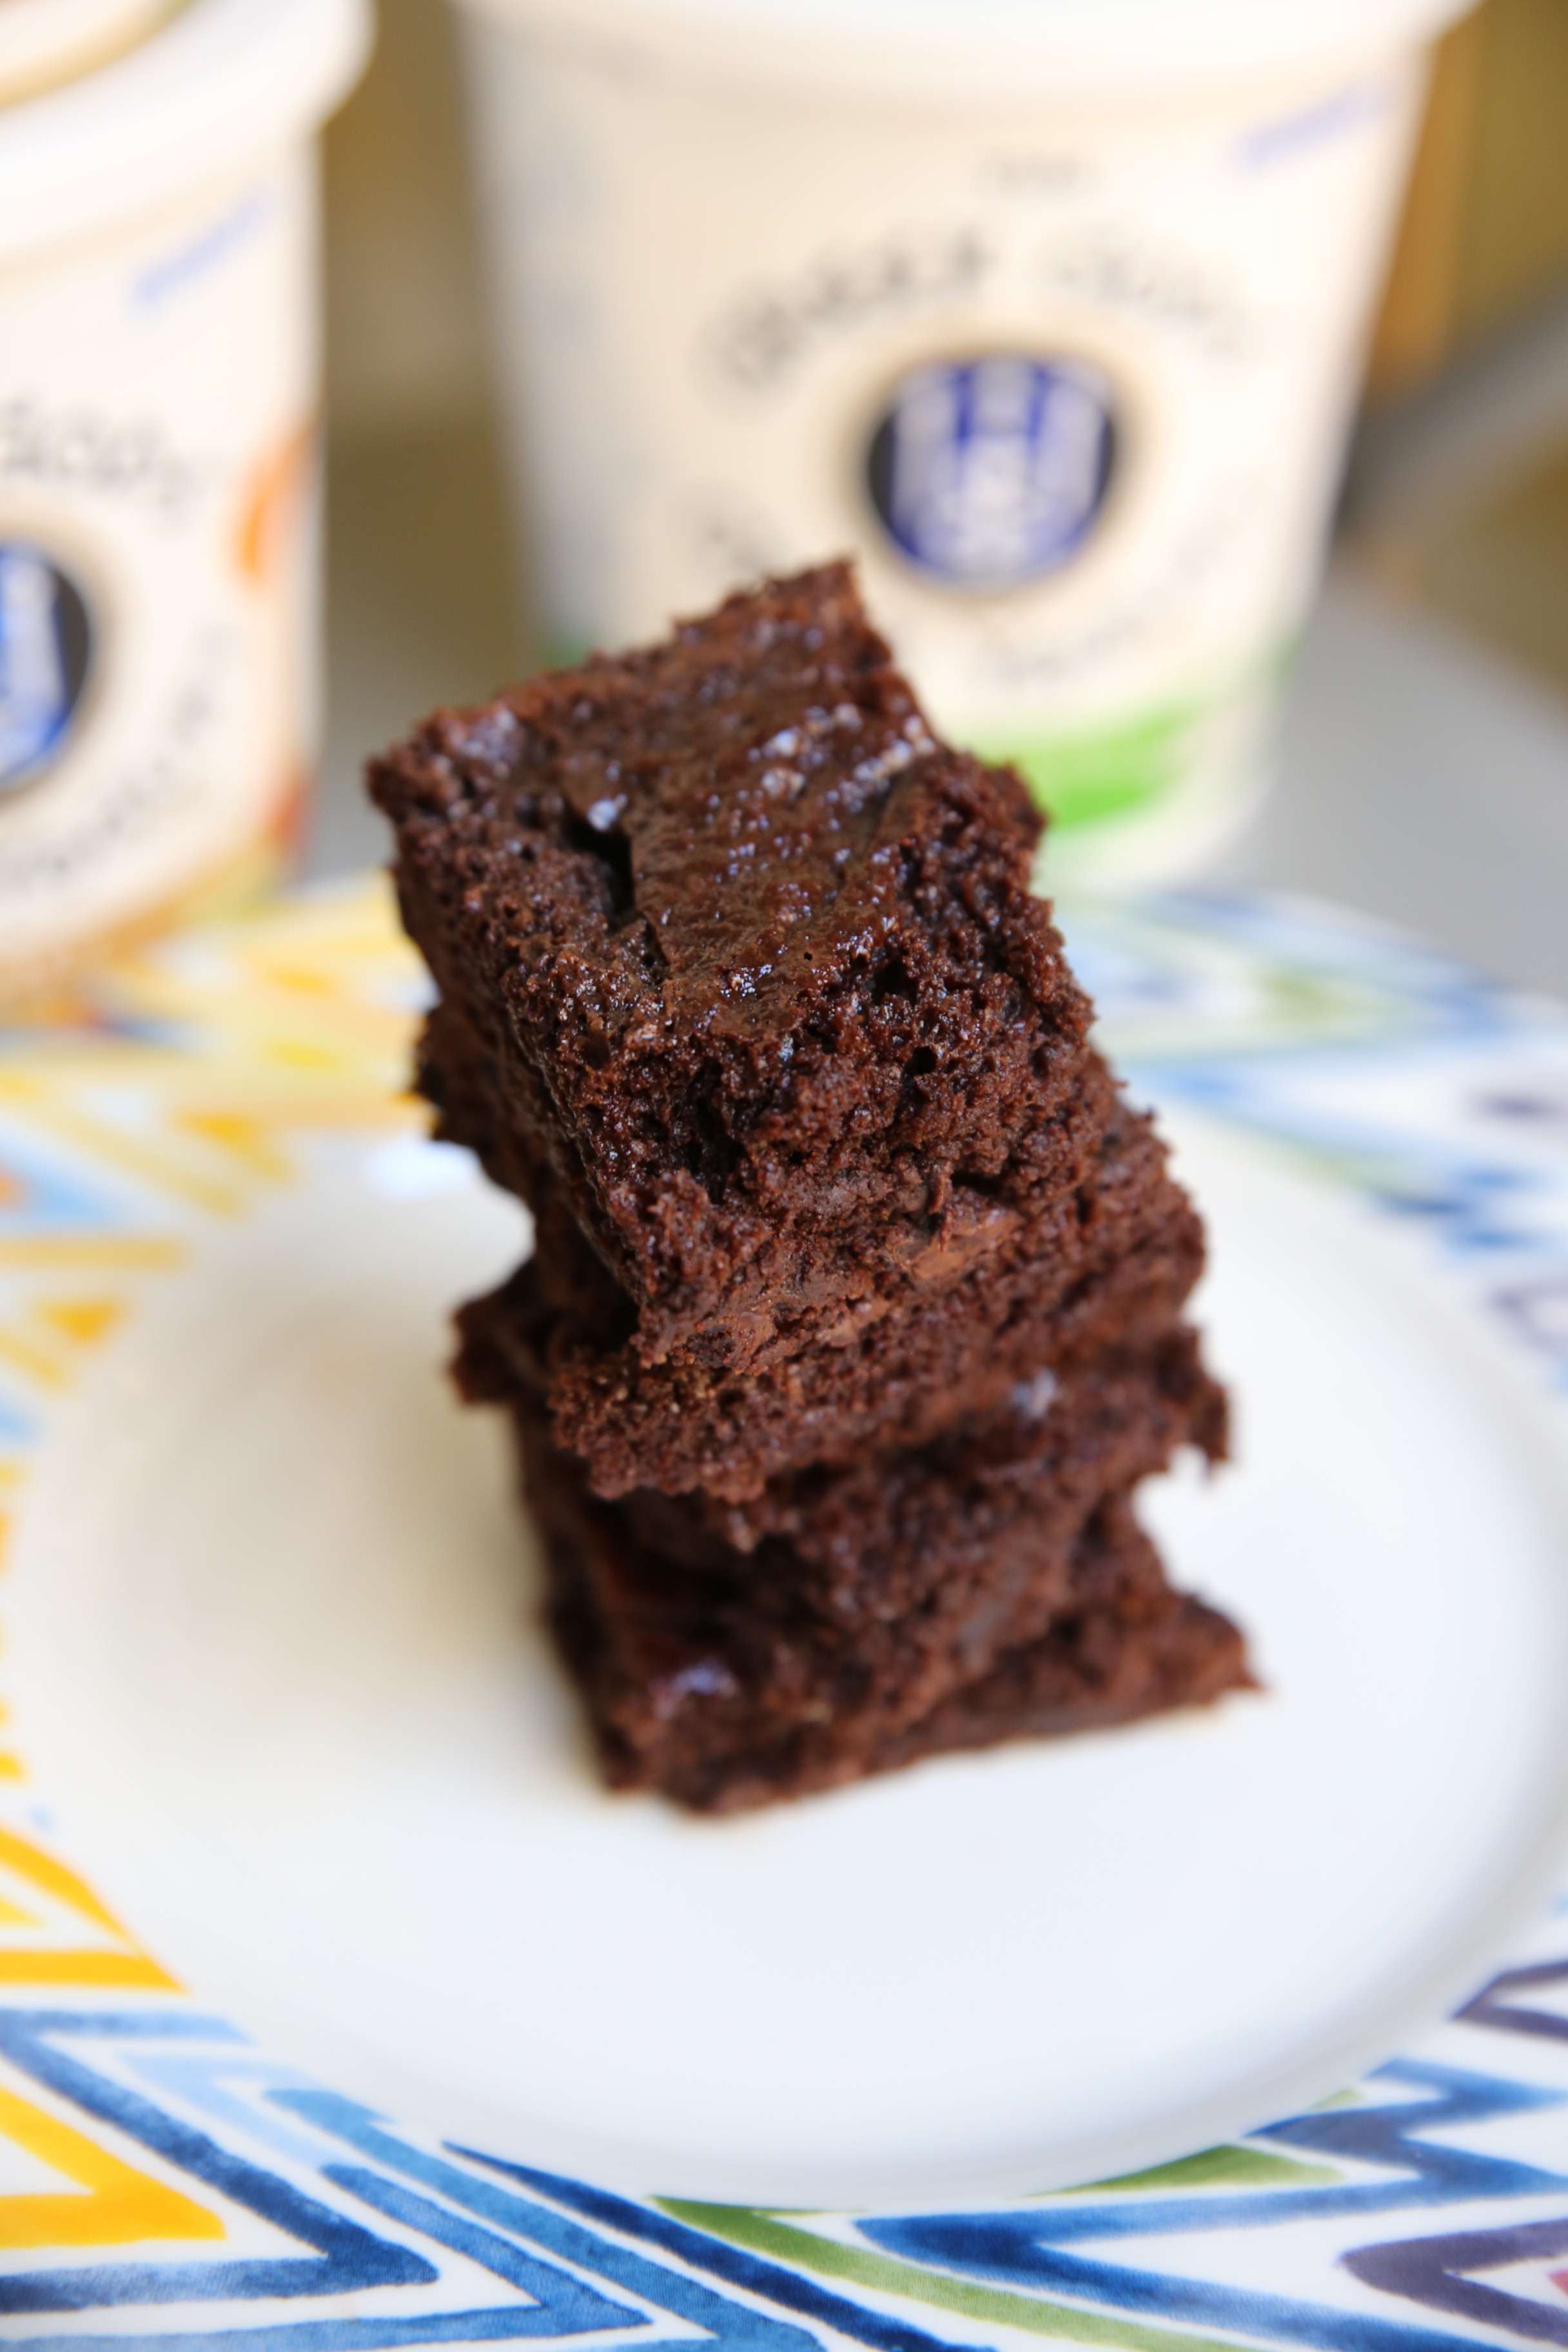
These have a nice cookie dough base that holds all of your marshmallows and chocolate in place. I adore a thick, hearty dessert, and these fit the bill. IMG_7395 IMG_7396

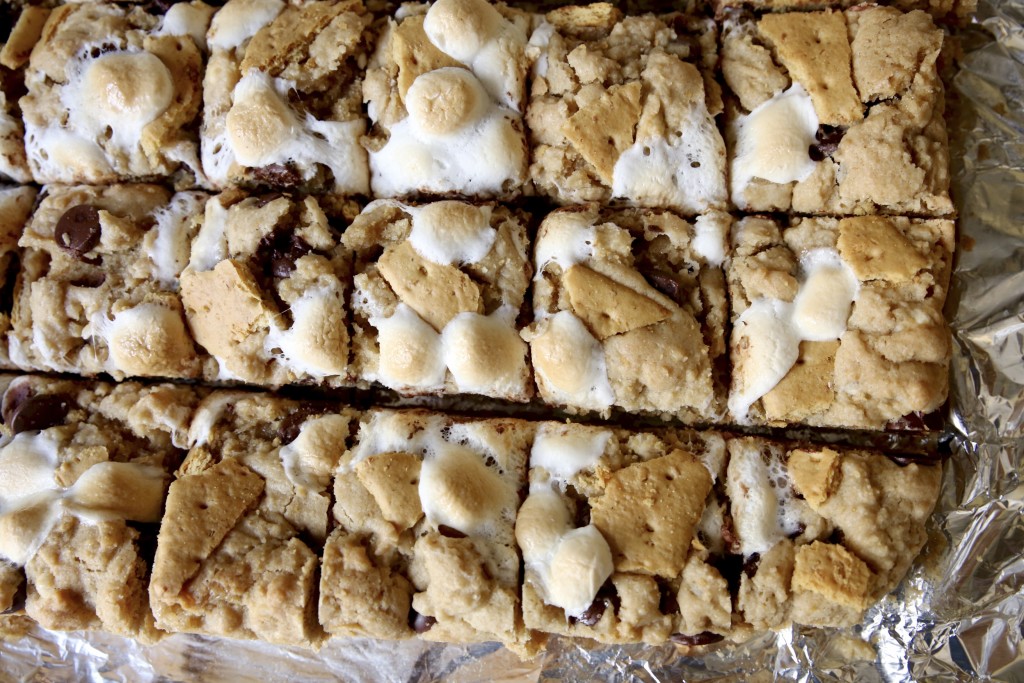
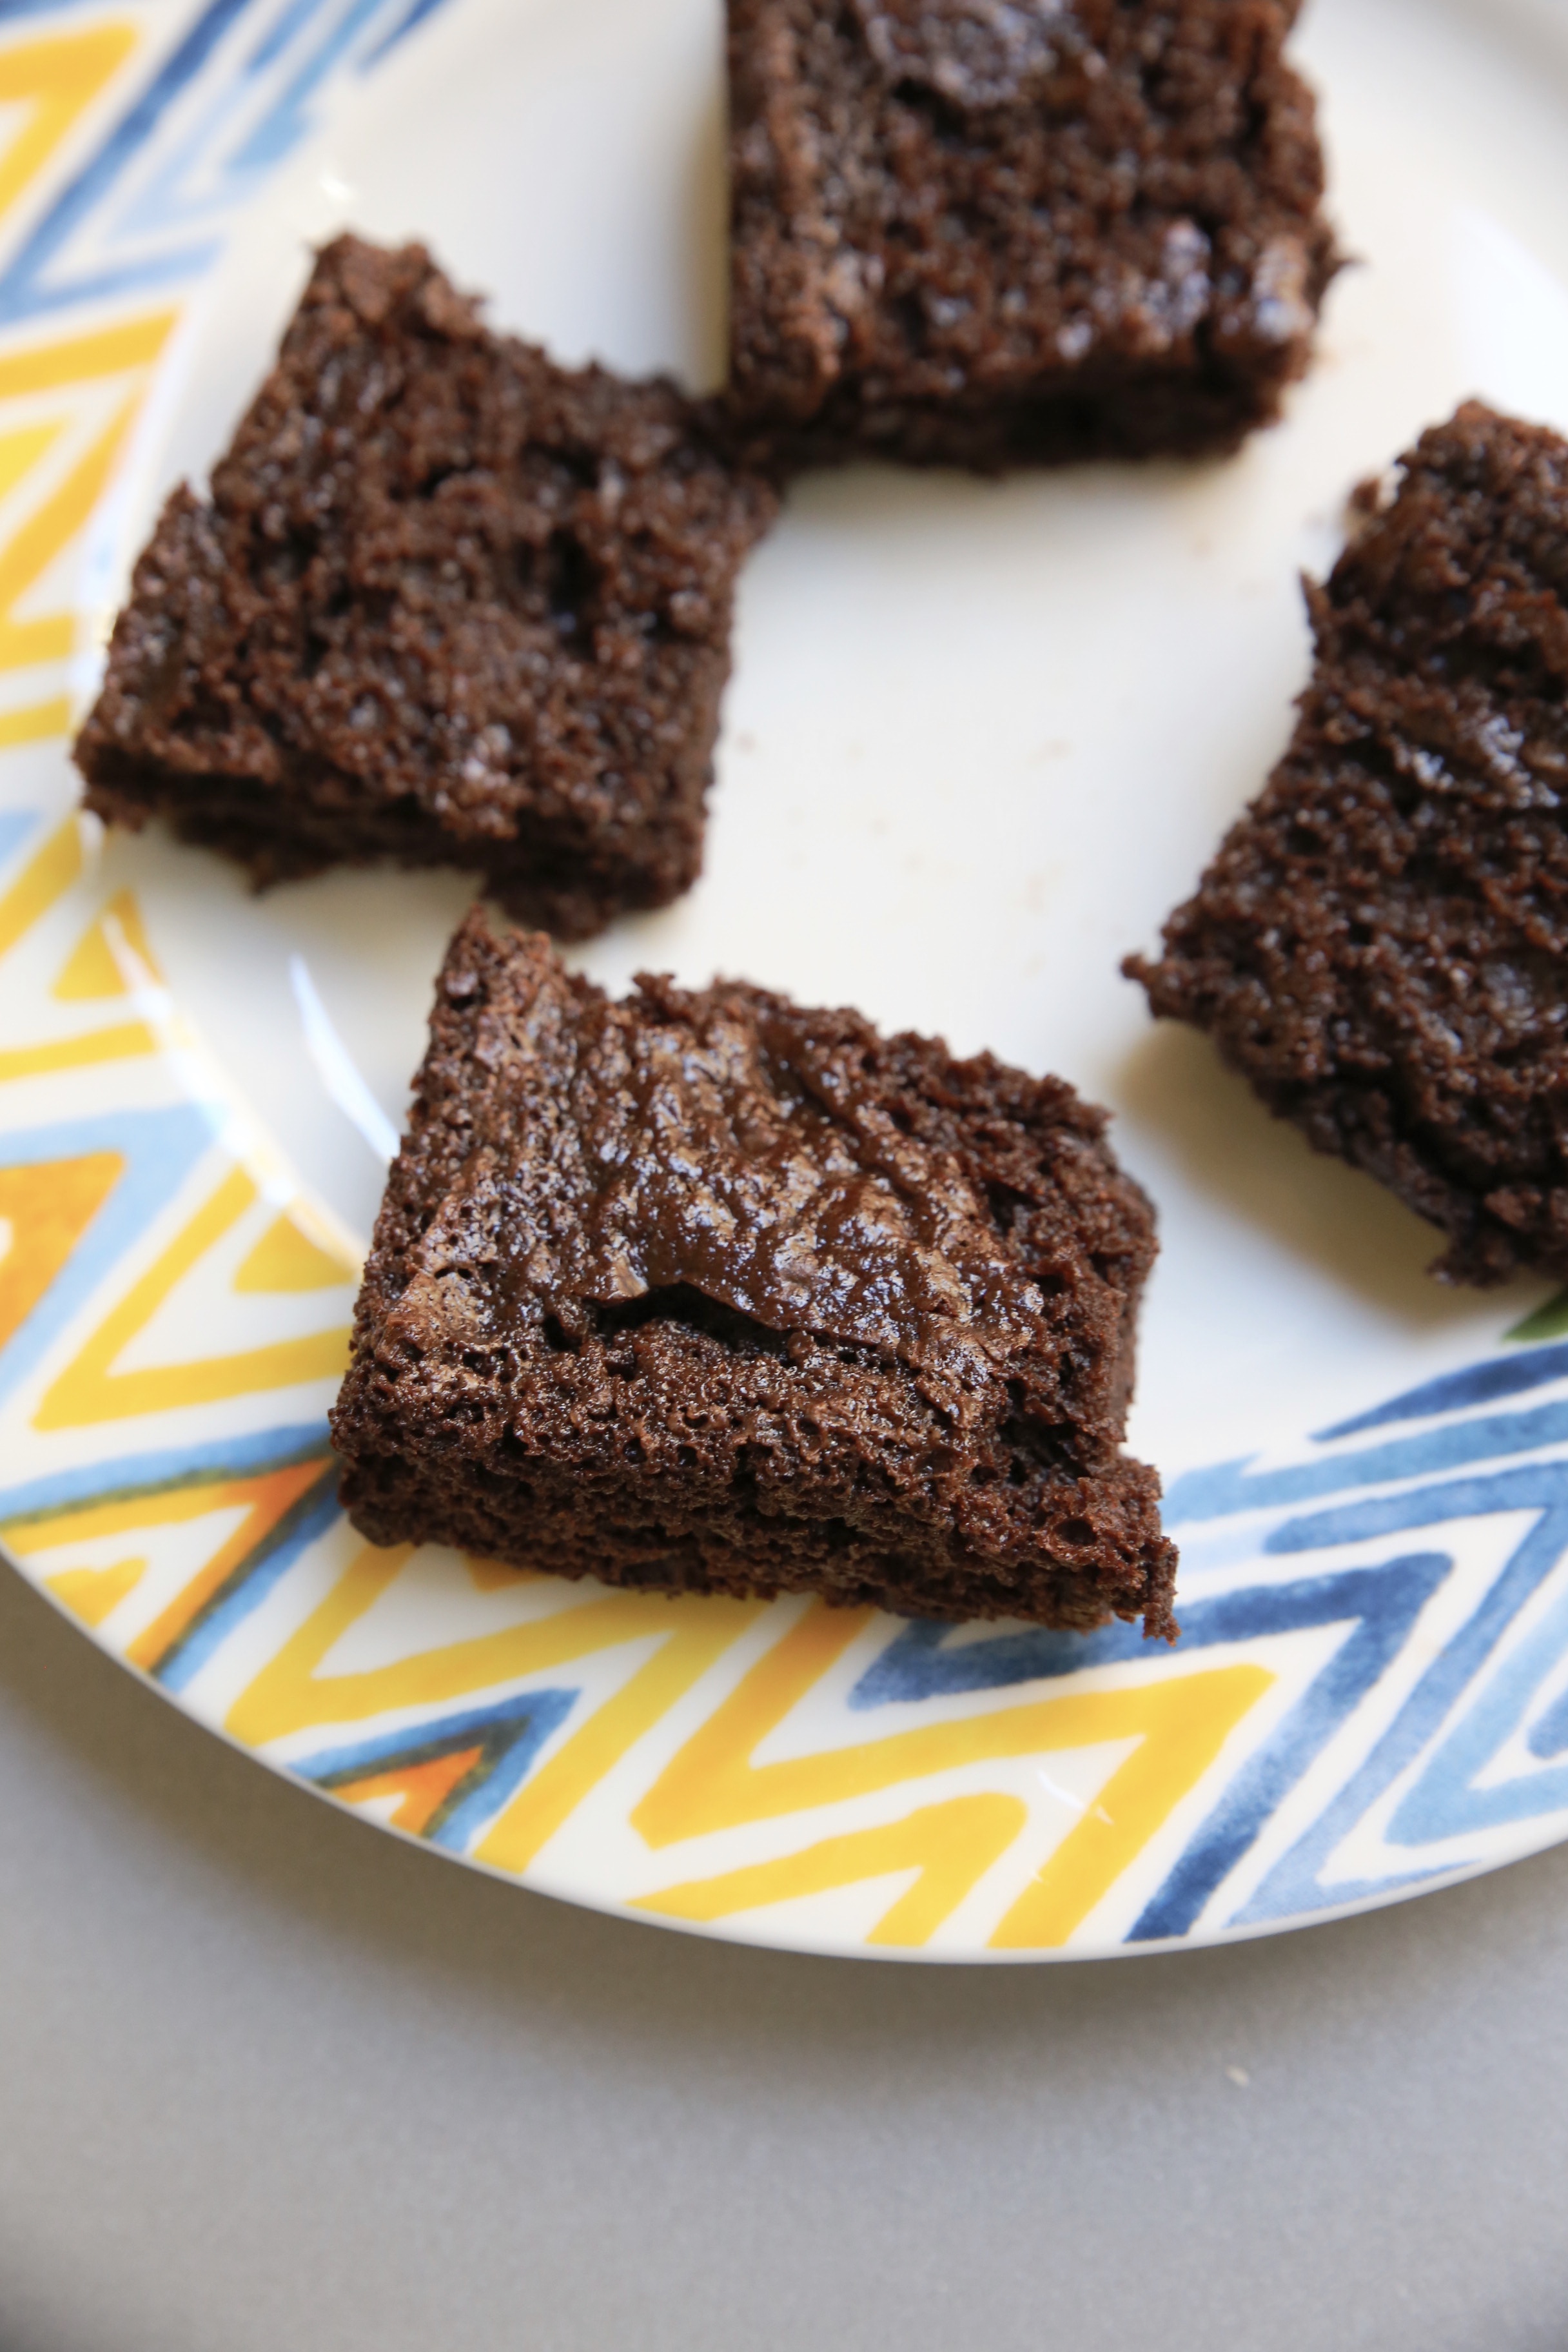
See what I mean? Since this makes a 9×13 pan, you can cut them into smaller pieces and feed a TON of people. IMG_7400

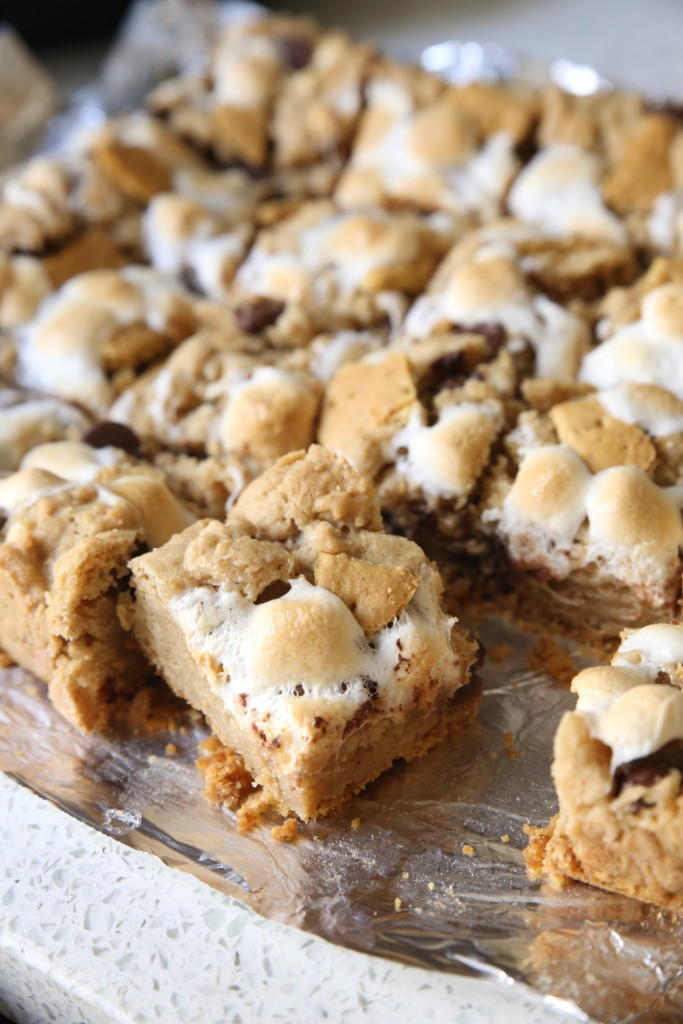
I have so many drafts on my blog that I need to organize and add pictures. Hopefully I can find a time to get that done before my 12 days of Christmas this year! IMG_7401 
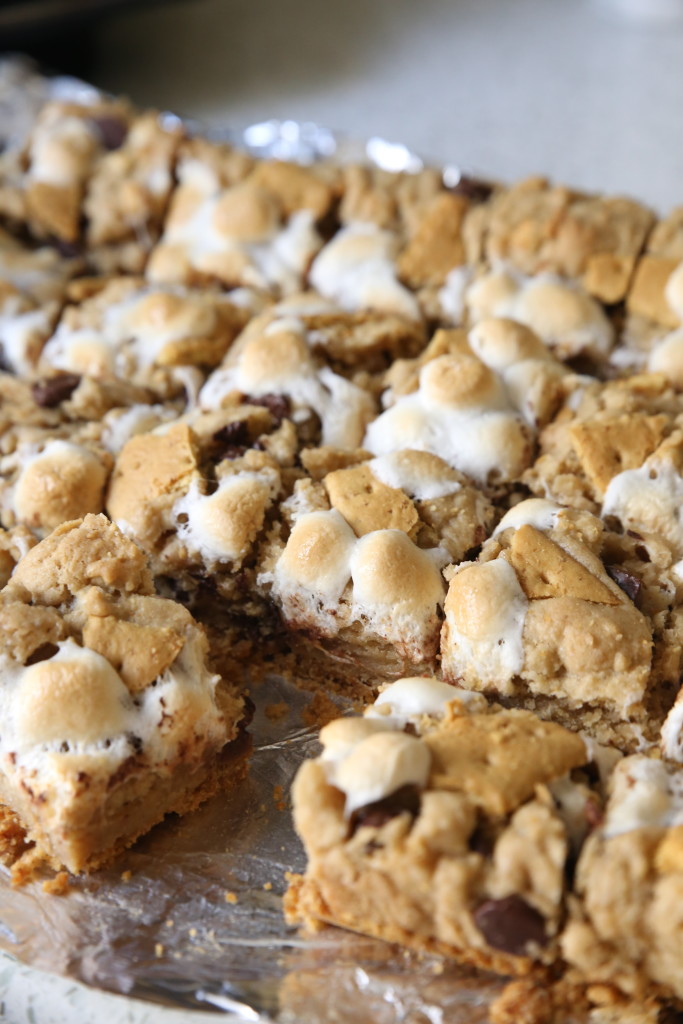
This recipe comes from from Glorious Treats.

Print
S’mores Bars (Again!)

Ingredients

    Crust
  • 1/2 cup butter, melted
  • 2 cups graham cracker crumbs
  • Cookie Dough
  • 1 cup granulated sugar
  • 1 1/4 cups brown sugar
  • 3/4 cup butter, melted
  • 3 eggs
  • 2 teaspoons vanilla
  • 3 cups flour
  • 2 1/2 teaspoons baking powder
  • 1 teaspoon salt
  • 1 cup semi-sweet chocolate chips
  • 1 cup mini marshmallows (I used Jet-Puff mallow bits)
  • Toppings
  • 1-2 Hershey chcolate bars (I omitted)
  • 1 graham cracker, broken into pieces
  • 1/2 cup mini marshmallows

Directions

  1. Preheat oven to 325*F and line a 9"x13" baking pan with foil.
  2. Mix together the graham cracker crumbs and 1/2 cup melted butter. Press into the bottom of the pan and place it in the freezer.
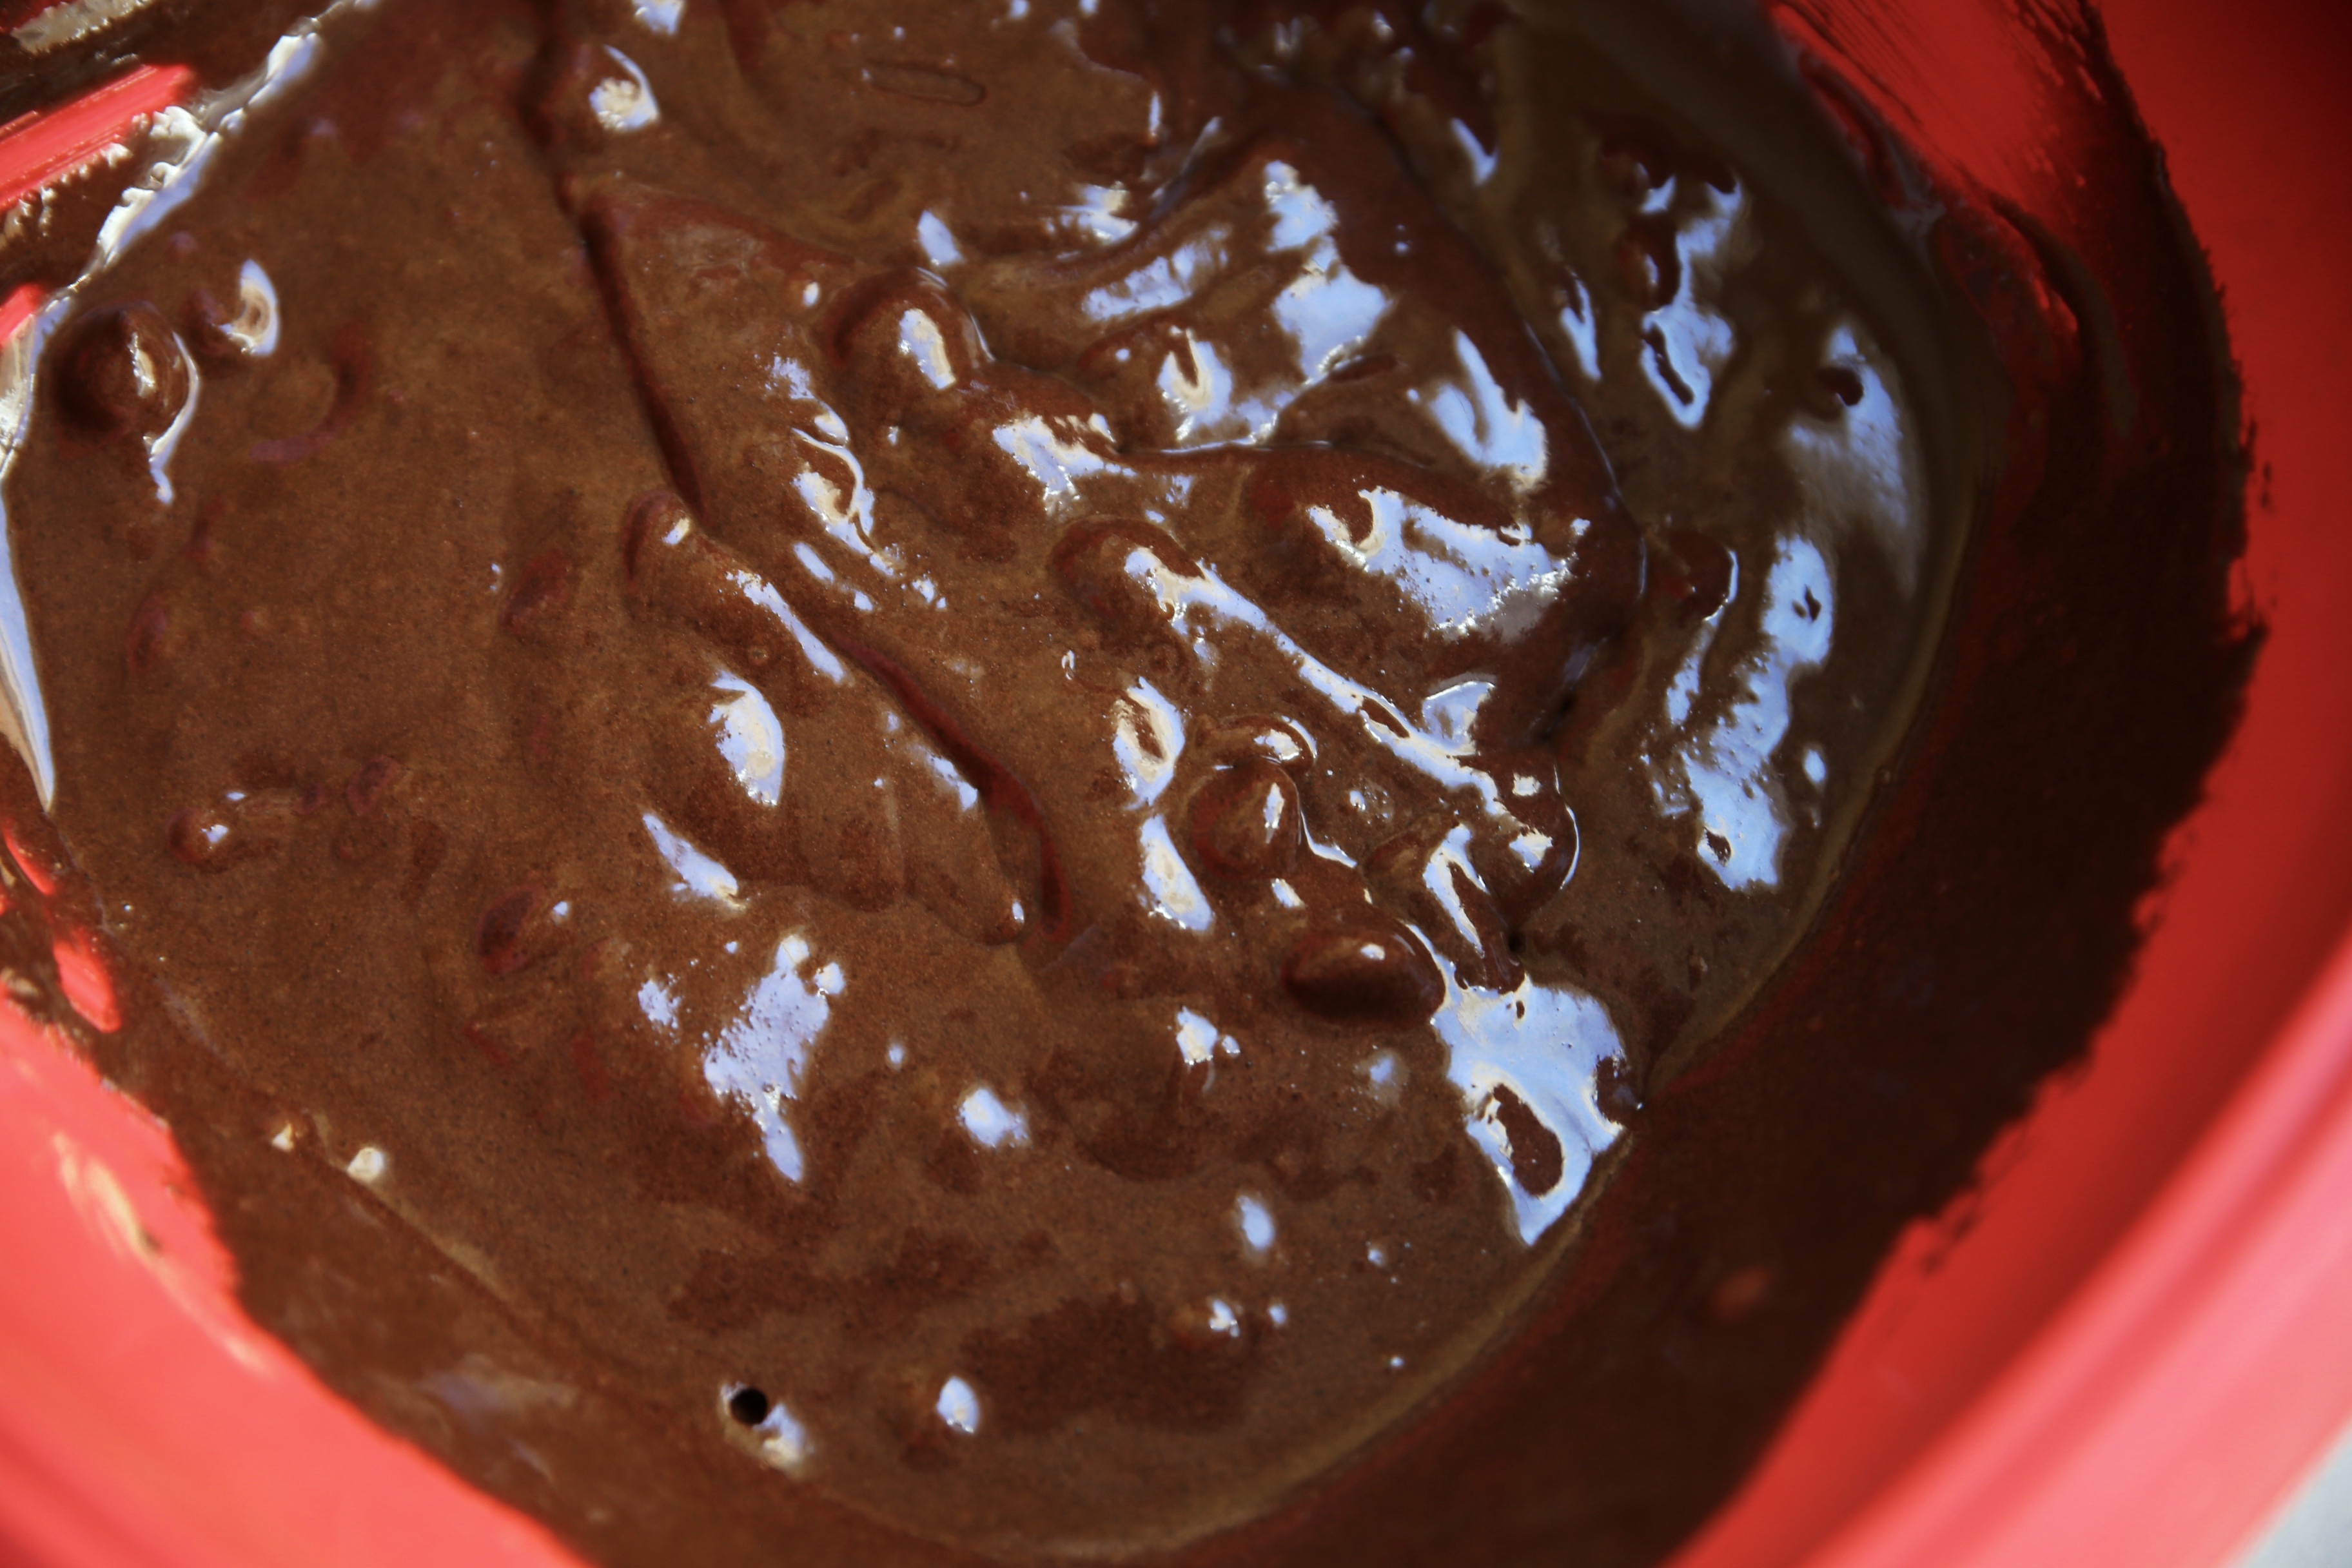
  3. Cream together both sugars and the melted butter. Add eggs and vanilla.
  4. Gradually stir in flour, baking powder and salt until just combined. Mix in the marshmallows and chocolate chips.
  5. Take the pan out of the freezer and drop the cookie dough over the crust. Spread even.
  6. Add the toppings on top.
  7. Bake 35-40 minutes, or until toothpick comes out clean.
  8. Cool completely before cutting.
3.1
https://lovintheoven.com/smores-bars-again/

Filed Under: bars/brownies, chocolate chip, dessert, Uncategorized

Mini Brownie Donuts

November 23, 2015 by kim 3 Comments

This is a sponsored post, but the opinions expressed are my own.

IMG_9277

We all know that when the holidays start rolling, they really start rolling. In other words, you don’t want to get behind on your baking list! Pillsbury has made it simple for you to keep up, thanks to their Purely Simple line of mixes. With a little bit of creativity, no one will ever know they came from a box.

IMG_9352

These mini baked brownie donuts are perfect for sharing in the classroom. Not only that, but the kids would love to get involved making and decorating each treat. The directions and ingredients are minimal for this recipe. The hardest part is deciding what sprinkles to use on top!

IMG_9371

I made them mini so they’re easier to hold for smaller hands. It’s also great for packing individually or in bunches to hand out in class. This recipe yields 24 mini donuts with one box of mix, which is enough to share with a small classroom.

To get the kids involved in the kitchen, you can have them mix the batter together and count 50 strokes. It’s an easy task that even the younger kids can handle. For the older kids, you can have them pipe the batter into the pan cavities prior to baking. Once they’re done baking, everyone can help decorate with buttercream frosting and sprinkles. That way, everyone in the family can get involved in making these donuts. IMG_9244 IMG_9256 IMG_9265

The kiddos will feel extra special when they bring in these treats to share because they helped make it themselves. How many kids can say they made their own treats?

IMG_9279This was the first time I used Pillsbury’s buttercream frosting mix and I was very impressed! All you have to do is add softened butter and water. I adjusted half of the buttercream and made chocolate buttercream by adding some cocoa powder to the mix.

IMG_9303

I’ve got to warn you, though. These things are seriously addicting. I had three of them when they came out of the oven and thought to myself, “Oh, that’s alright.. it’s like eating one regular sized brownie.” I love how the middle of the donut cooks to the same consistency as the edge in a regular brownie pan. These Pillsbury mixes are pure gold, I tell ya.

IMG_9362They nailed it with their Purely Simple line. The difference with this line and others is that the mixes are made with simple ingredients. There are no colors, preservatives, or artificial flavors. 


IMG_9394

I can look at pictures of these donuts all day. I just might.. while snacking on them.

IMG_9372

IMG_9396

IMG_9403Happy Thanksgiving, friends! Enjoy it making memories in the kitchen with your loved ones!

Print
Mini Brownie Donuts

Ingredients

    For the donuts
  • 1 box Pillsbury™ Purely Simple™ Chocolate Chunk Brownie Mix (15.5 oz)
  • 1/3 cup oil
  • 3 tablespoons water
  • 1 egg
  • For the top
  • 1 package Pillsbury™ Purely Simple™ Buttercream Frosting Mix (13.2 oz)
  • 1 stick (1/2 cup) softened butter
  • 1/4 cup water
  • 2 tablespoons cocoa powder, optional (if you want to make chocolate buttercream)
  • sprinkles, for decorating

Directions

  1. Preheat oven to 350 degrees F.
  2. Generously spray a mini donut pan with baking spray and set aside.
  3. In a large bowl, mix together the ingredients for the donuts: brownie mix, oil, water, and egg. 50 strokes does the trick!
  4. Put batter into a ziploc bag and snip off the corner (make it big enough so the chocolate chunks can get through).
  5. Pipe the batter into the pan cavities, filling them 2/3 of the way full.
  6. Bake for 12 minutes.
  7. Let cool for a couple of minutes before inverting pan and tapping the donuts out.
  8. Once the donuts are completely cooled, make the frosting. Beat together the frosting mix and butter on low until creamy. Slowly add the water until incorporated.
  9. If you want to make chocolate buttercream, divide the current batter in half and mix in 2 tablespoons cocoa powder with a couple of drops of water until mixed.
  10. Decorate as desired.
3.1
https://lovintheoven.com/mini-brownie-donuts/

Filed Under: bars/brownies, cocoa, dessert, frosting

Greek Yogurt Brownies

November 9, 2015 by kim 7 Comments

IMG_8954

You guyyysssssssss. I just made “healthy” (okay, “healthier”) brownies and they turned out to be the best brownies I’ve ever made! I’m not even joking! They’re so so good and I devoured 1/4 of the pan the moment it cooled down enough to eat.

IMG_8963

What’s the secret? The Greek Gods® Greek Yogurt, of course! I used traditional plain in mine, and I can see it being very versatile in other recipes as well. Sub it for a sour cream dip, whip it up with some sugar to make frosting, add a cup in cake mix to keep it soft… there’s a lot you can do. Their yogurts are made from milk from cows that are not treated with growth hormones, so you can trust that you’re using the good stuff.

IMG_8990

It’s deliciously creamy and tart. It’s a great base to make a yogurt bowl (that’s how I eat it!). I add a bit of honey, granola, chia seeds, and fruit on top for breakfast in the morning.

IMG_9001

The batter will seem very dry at first, but once you get it incorporated, it will be smoother than smooth. See for yourself:IMG_8940

Once it’s baked, wait completely until it’s cooled before you cut! That’s really important. I didn’t wait completely, so it stuck to the knife quite a bit. IMG_8948
The texture of these brownies are gummy and gooey. It’s like the center of a pan of regular brownies if you undercook it just a bit. That’s my favorite part of a regular brownie!
IMG_8981

Another note: Don’t stack your brownies without using wax paper in between. They’ll stick to each other because of how gooey they are.

Recipe slightly adapted from Sprinkled with Jules. The only thing I did differently was add some vanilla extract.

Print
Greek Yogurt Brownies

Ingredients

  • 1/4 cup flour
  • 1/4 teaspoon salt
  • 1/4 teaspoon baking powder
  • 1/2 cup Rodelle cocoa powder
  • 3/4 cup sugar
  • 1/4 cup brown sugar
  • 1/2 cup chocolate chips
  • 1 egg
  • 1 teaspoon vanilla extract
  • 1/2 cup The Greek Gods Traditional Plain yogurt

Directions

  1. Preheat oven to 350 degrees and coat a 9"x9" pan with nonstick spray.
  2. In a large bowl, mix all of your ingredients together until smooth.
  3. Pour batter into prepared pan and bake for 20 minutes.
  4. Let cool completely before cutting.
3.1
https://lovintheoven.com/greek-yogurt-brownies/

This is a sponsored post, but the opinions expressed are my own.

Filed Under: bars/brownies, chocolate chip, cocoa, dessert

  • « Previous Page
  • 1
  • 2
  • 3
  • 4
  • …
  • 29
  • Next Page »

hi! i'm kim-- a girl mom, baker, blogger, and ex-flight attendant. welcome!

Search

  • Facebook
  • Instagram
  • Pinterest
  • Twitter

Categories

RODELLE-BABadge


Categories

  • Facebook
  • Instagram
  • Pinterest
  • Twitter

Copyright © 2026 · Foodie Pro Theme by Shay Bocks · Built on the Genesis Framework · Powered by WordPress