Lovin' From the Oven

  • Home
  • About Me
  • Recipes
  • FAQ
  • My Lifestyle Blog
  • Disclaimer

Archives for September 2012

Lemon Garlic Pasta

September 17, 2012 by kim 4 Comments

lemonpasta-2

lemonpasta-4

I had a “Final Destination” moment on the freeway the other day. You know, where things go falling off of a semi and crash into cars on the freeway.

My DB and I were driving back from a little trip to visit Stanford since he’s never been, and we passed by a semi holding eight porta potties onboard. We didn’t really think anything of it as we drove by. For some reason, both of us were looking in the rear view mirror when we saw it happen it slow motion.

One porta potty fell off to the left of the semi, just a couple yards from us. Luckily, there wasn’t a car close behind, so no one was hurt. Just seconds after the first one fell, a second porta potty came tumbling onto another lane of the freeway.

I kid you not, this stuff really does happen all the time. And it’s dangerous. Really, really dangerous. Can you imagine if there was a car right next to the semi when it happend? What if all the cars behind him were going 80 miles per hour? What a disaster that would be!

So I’m not crazy when I say I won’t drive behind semis that are transporting things.. whether it be cars, logs, or porta potties, I’ll be avoiding them as much as I possibly can.

lemonpasta-3

lemonpasta

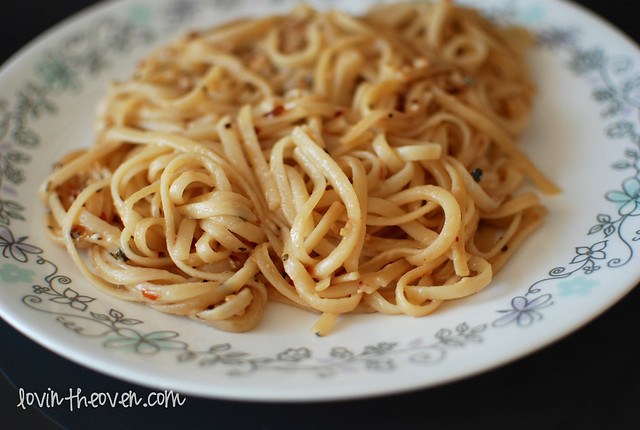
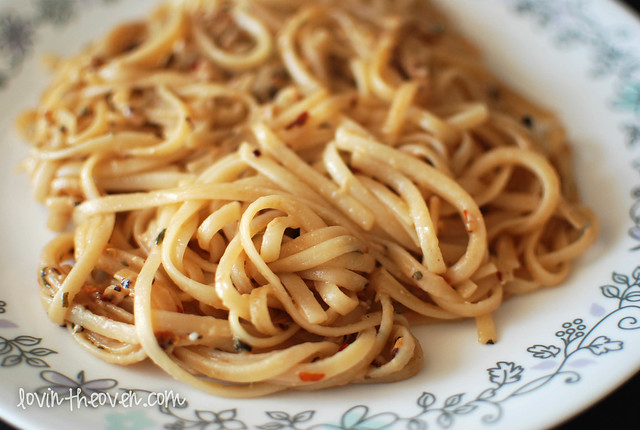
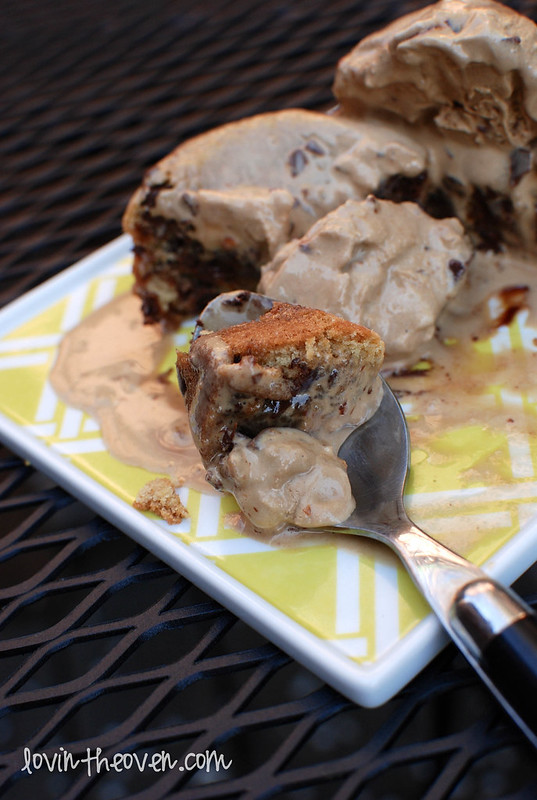
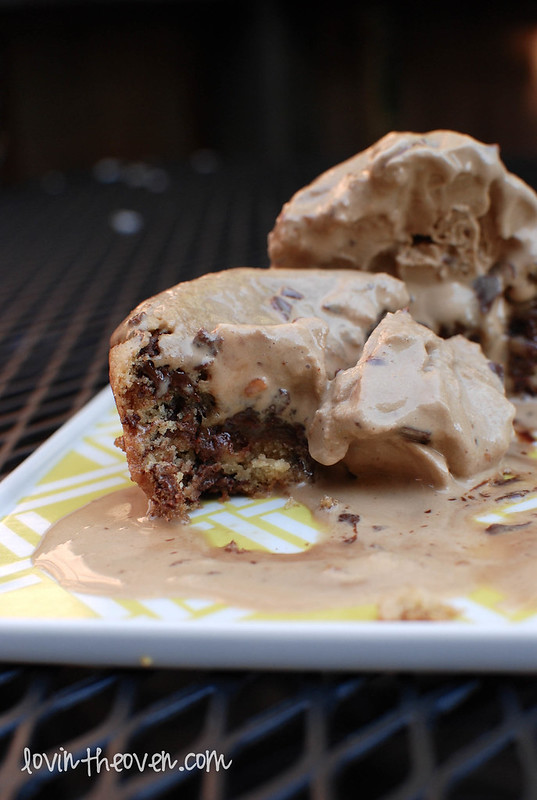
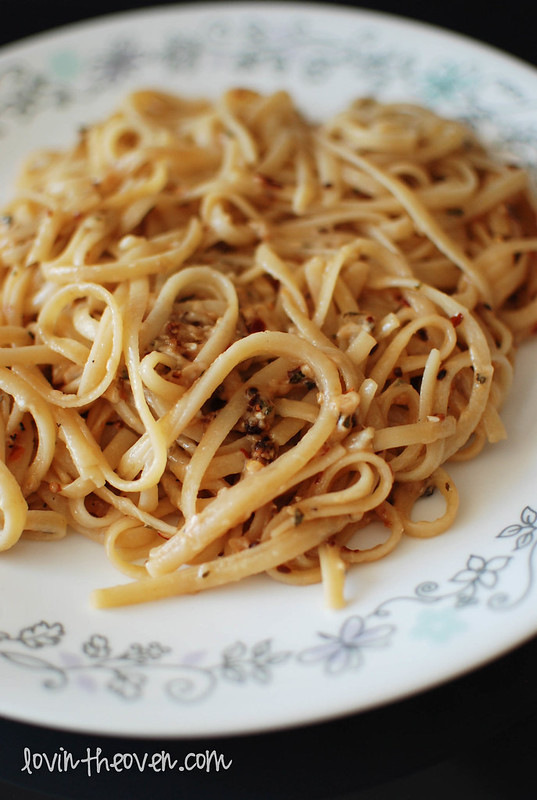
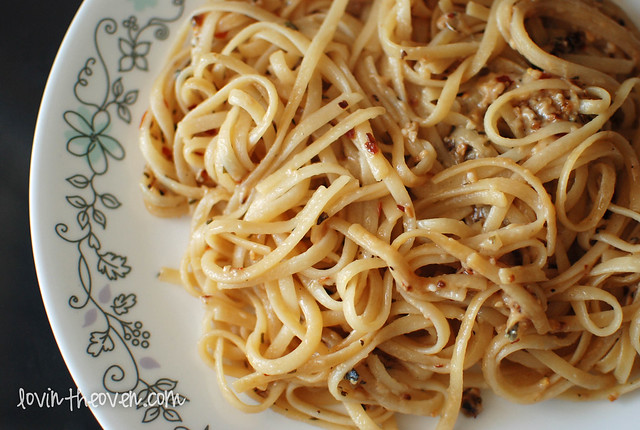
Whenever I’m a loss at what to make for dinner, I turn to my usual: pasta. I can eat pasta and pizza everyday. Although, I probably wouldn’t recommend that diet to anyone unless you want to gain 10000 pounds.

This recipe is easy to whip up and I’m sure the majority of you guys already have the ingredients in your pantry. I served this with some chicken, but it tastes great alone if you just want plain ol’ pasta.

Print
Lemon Garlic Pasta

Ingredients

  • 8 oz fettucine
  • 2 tsp olive oil
  • 2 tsp minced garlic
  • 1/2 cup grated parmesan cheese
  • juice of 1/4 of a lemon
  • 1 tsp dried oregano
  • 2 tsp red pepper flakes
  • cracked black pepper to taste

Directions

  1. Cook pasta until al dente according to the package's directions.
  2. When done, drain. Return the pasta back to the pot and add in the rest of the ingredients. Stir until evenly coated.
3.1
https://lovintheoven.com/lemon-garlic-pasta/

Filed Under: dinner, dinner sides

Heathy Cookies

September 15, 2012 by kim 6 Comments

heathycookies-2

heathycookies-4

heathycookies

I had a terrible experience at a certain coffee shop that rhymes with “Schmarbucks” the other day. It was so bad that I had to walk out latte-less. I’ve never done that!

Hey “Schmarbucks,”the way I see it: If you’re unhappy at your job, PLEASE find another one! Life is too short to be hating what you do. Why do you think I’m not in law school right now? Or sitting in an office cubicle? I understand that sometimes you have to do what you don’t love to make ends meet, but at least be nice about it.

//end rant

No, my post isn’t titled “healthy cookies.” These are by no means healthy. They’re actually HEATHy cookies… as in Heath candy bars. These cookies didn’t spread out much and strongly held their shape when being baked, so make sure you roll them into pretty dough balls. I imagine that these would be great for mailing because they’re quite sturdy. This is for the peanut butter/chocolate combo lovers out there, so thanks Bakerella for the recipe!

Print
Heathy Cookies

Yield: 2 1/2 dozen cookies

Ingredients

  • 2 cups all purpose flour
  • 3/4 teaspoon baking soda
  • 1/2 teaspoon salt
  • 1/2 cup butter, slightly softened
  • 1 cup dark brown sugar
  • 1/2 cup peanut butter
  • 2 eggs
  • 2 teaspoons vanilla
  • 1 1/3 cup (8 oz bag) Heath Toffee Bits
  • 1/3 cup chocolate chips

Directions

  1. Preheat oven to 350 degrees.
  2. Cream together the butter, sugar, and peanut butter. Add in the eggs and vanilla.
  3. Gradually stir in the flour, baking soda, and salt until just combined. Stir in toffee bits and chocolate chips.
  4. Roll cookie dough into 1 1/2 inch balls and drop them on a baking sheet.
  5. Bake about 10 minutes.
3.1
https://lovintheoven.com/heathy-cookies/

Filed Under: candy, chocolate chip, cookies, dessert, peanut butter/peanuts

Chocolate Chip Lava Cookies

September 12, 2012 by kim 9 Comments

As much as I love living up here in the bay area, I HATE that B.J.’s is quite a journey from me. I have to either pay a bridge toll or drive over half an hour just to get to one. I crave pizookies on a daily basis, so this situation is quite unfortunate for me.

On the other hand, I could try and make a substitute at home in my kitchen. This recipe may not be the exact one, but it comes close enough to subdue my pizookie cravings.

chocolava

chocolava-2

chocolava-3

chocolava-4

chocolava-5

chocolava-6

I served the cookies warm, straight from the oven. I also nuked them in the microwave for 20 seconds the next day before serving and it was just as good. I topped it with a generous scoop of Ben and Jerry’s Coffee Heath Bar Crunch ice cream, but feel free to use any ice cream flavor you’d like. Everything goes good with chocolate chip cookies! … except maybe sherbet.

Seriously. These babies were delicious. I may or may not have eaten all ten lava cookies by myself and am not one bit ashamed. Recipe from Kevin & Amanda.

Print
Chocolate Chip Lava Cookies

Ingredients

  • 1/2 cup (1 stick) butter, softened
  • 1/2 cup light brown sugar, packed
  • 1/2 cup granulated sugar
  • 1 large egg
  • 1/2 tablespoon vanilla extract
  • 1 3/4 cups all purpose flour
  • 1/2 teaspoon salt
  • 1/2 teaspoon baking soda
  • 1 (11.5 oz) bag milk chocolate chips

Directions

  1. Preheat oven to 350 degrees F. Grease a muffin tin.
  2. Put 1/2 cup of the chocolate chips in a Ziploc bag and microwave laying flat for 30 seconds. Remove bag and flip over, microwaving for an additional 10-15 seconds until all the chips are softened. Set aside to cool.
  3. In a mixer, cream together the butter and both sugars. Stir in the egg and vanilla. Once that is well blended, mix in the flour, salt, and baking soda until just combined. Add the remaining chocolate chips (1 cup) and stir to combine.
  4. Using half of the cookie dough, scoop 1.5-2 tbsp of dough, flatten it, and place in the bottom of the muffin tin. Repeat for a total of 10 cookies.
  5. Snip off a corner of the Ziploc bag and gently squeeze a layer of chocolate over the cookie. Scoop and flatten the remaining dough and place on top of the chocolate layer.
  6. Bake at 350 for 15-20 minutes, until the edges are just browned. As soon as they come out of the oven, run a knife around the edges to make for easy removing later. Cool completely before removing from the muffin tin, running a knife around the edge to help loosen.
3.1
https://lovintheoven.com/chocolate-chip-lava-cookies/

Filed Under: chocolate chip, cookies, dessert

  • « Previous Page
  • 1
  • 2
  • 3
  • 4
  • 5
  • Next Page »

hi! i'm kim-- a girl mom, baker, blogger, and ex-flight attendant. welcome!

Search

  • Facebook
  • Instagram
  • Pinterest
  • Twitter

Categories

RODELLE-BABadge


Categories

  • Facebook
  • Instagram
  • Pinterest
  • Twitter

Copyright © 2026 · Foodie Pro Theme by Shay Bocks · Built on the Genesis Framework · Powered by WordPress