Lovin' From the Oven

  • Home
  • About Me
  • Recipes
  • FAQ
  • My Lifestyle Blog
  • Disclaimer

Lunch Lady Brownies

November 7, 2013 by kim 5 Comments

dessert-10

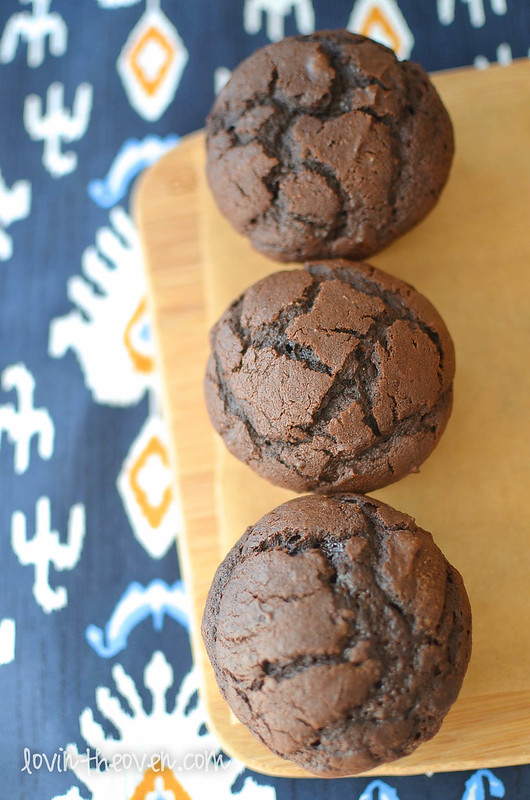
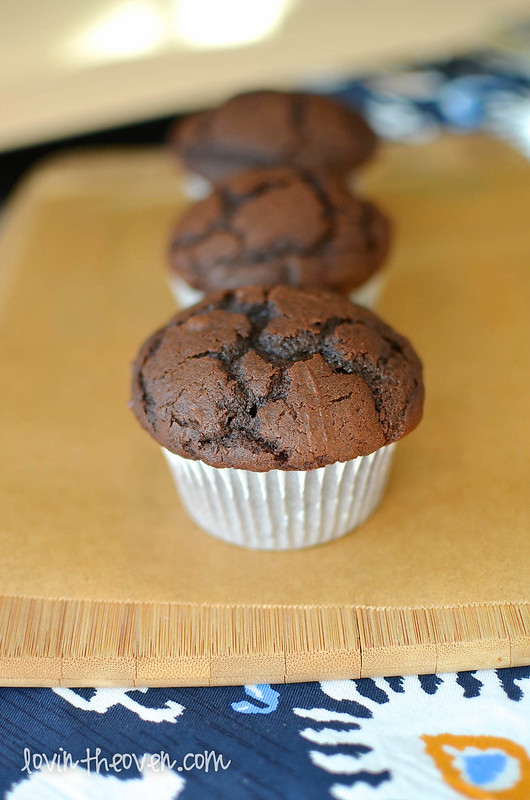
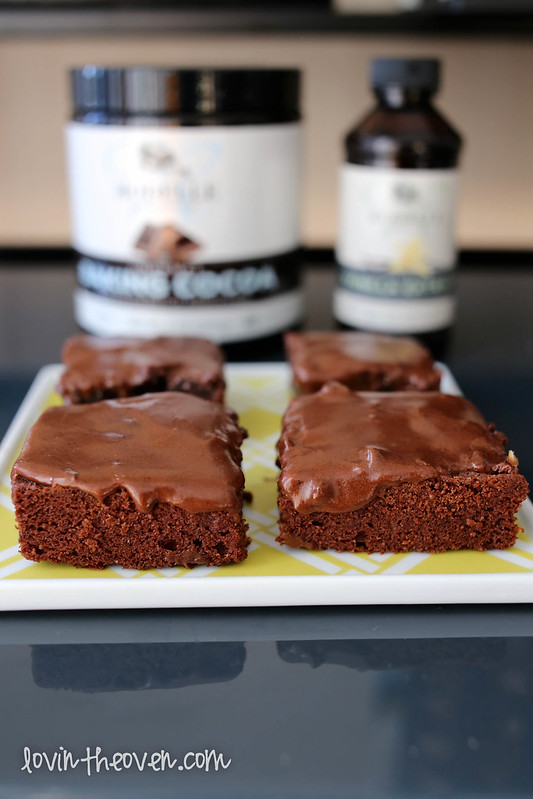
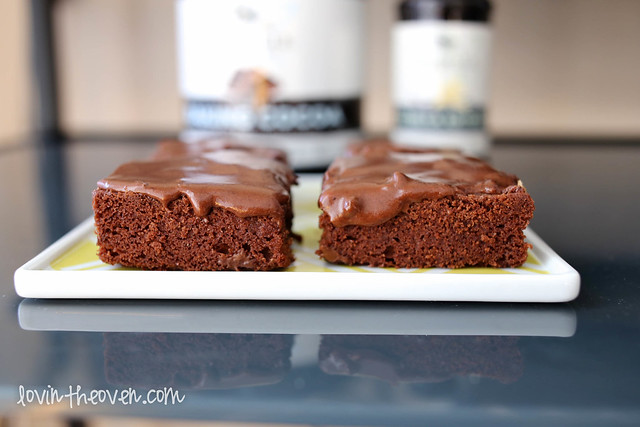
Remember those brownies back in elementary school that you would look forward to after lunch? The ones with the magic frosting that would be firm to the touch, but suddenly melt in your mouth? How did they do that? They were the best for packing in lunch boxes since the top wouldn’t smudge if you stacked them on top of something else.

Well, I’ve just recreated them in my kitchen and I’ve got the recipe to share!

dessert-3

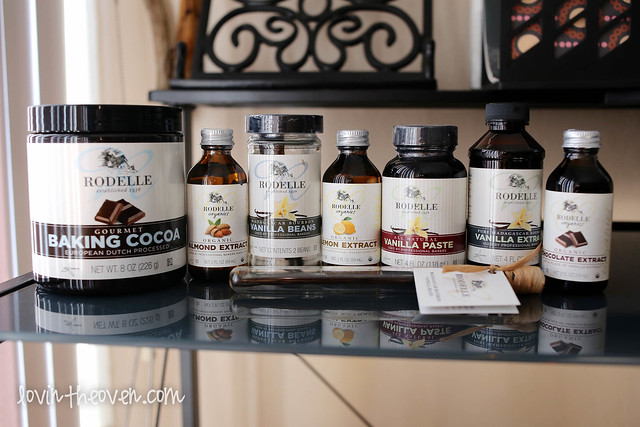
Rodelle sent over some seriously awesome baking ingredients to help with this recipe. I’ve used their gourmet european dutch processed baking cocoa for most of the recipes on my blog for the past two years. Did you know that they sell their cocoa and vanilla beans at Costco? It makes my life so much easier since I go through ingredients quite quickly. Obviously, I need the 25 oz can of baking cocoa rather than the little box at the grocery store.

dessert

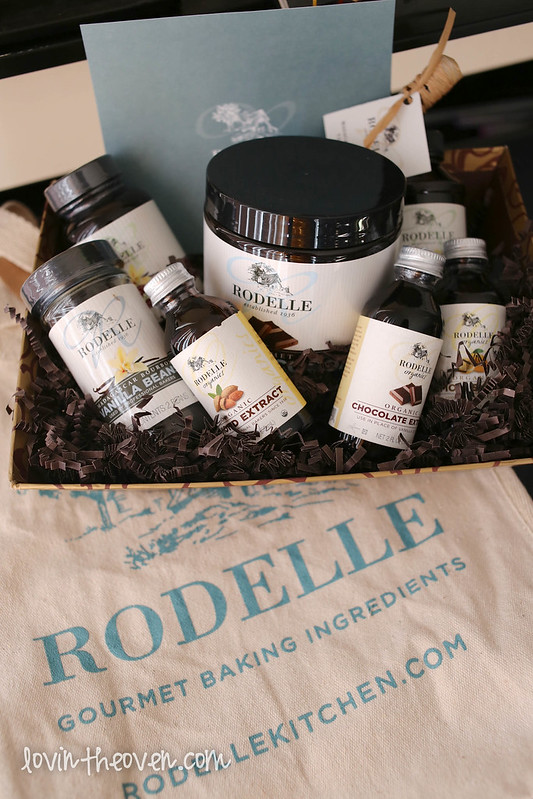
They sure know how to put together a gift basket over there. I’m still swooning over the cute tote!

I could not stop eating this brownie batter. Something about the cocoa, melted butter, and sugar just gave it the perfect texture. It is by far my favorite raw batter to eat. That’s probably not something I should be encouraging…. Don’t eat raw batter, folks.

dessert-8

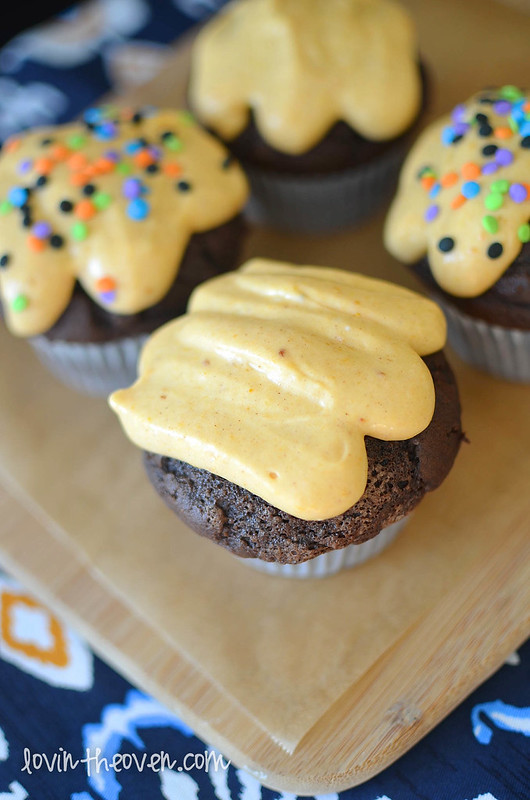
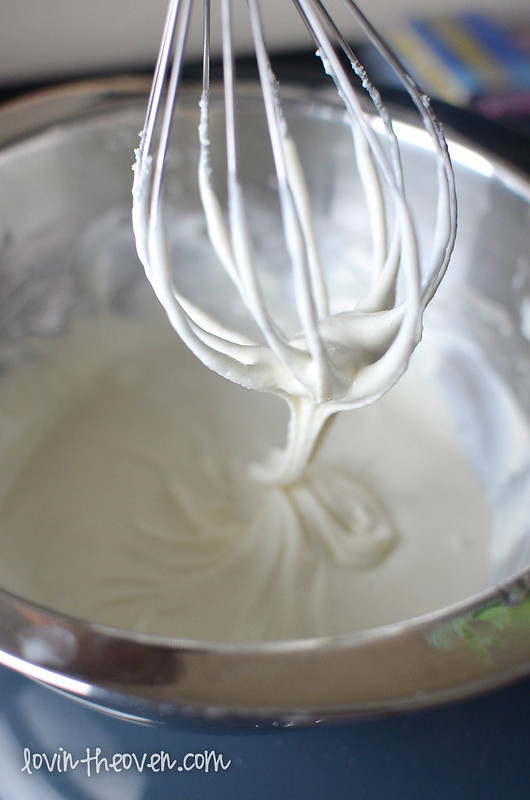
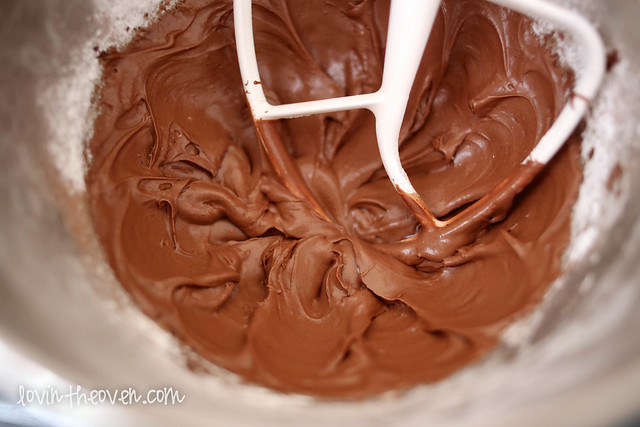
Don’t even get me started on the frosting. When I was whipping it up, it was smooth, creamy, and thick. How in the world does this harden? It looks like regular frosting!

dessert-9

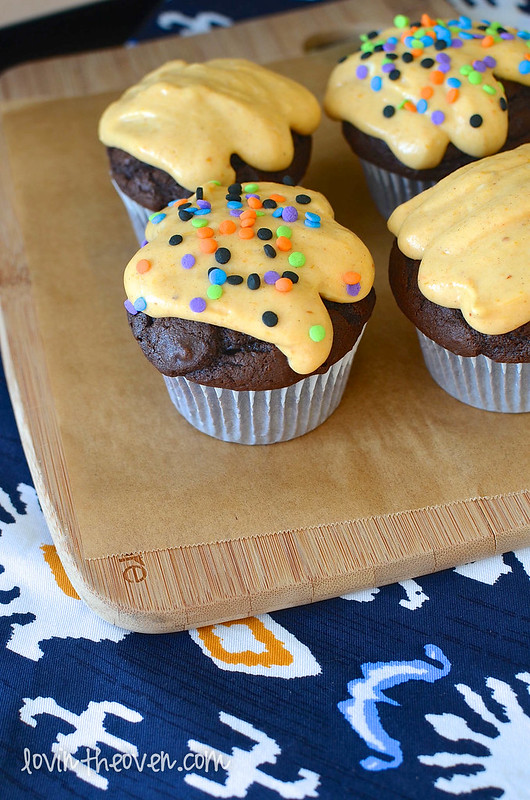
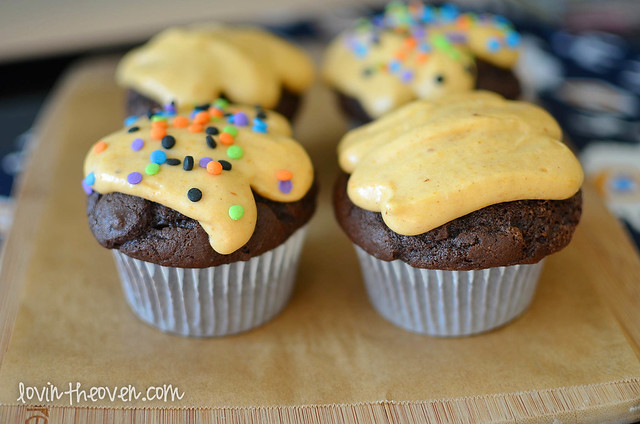
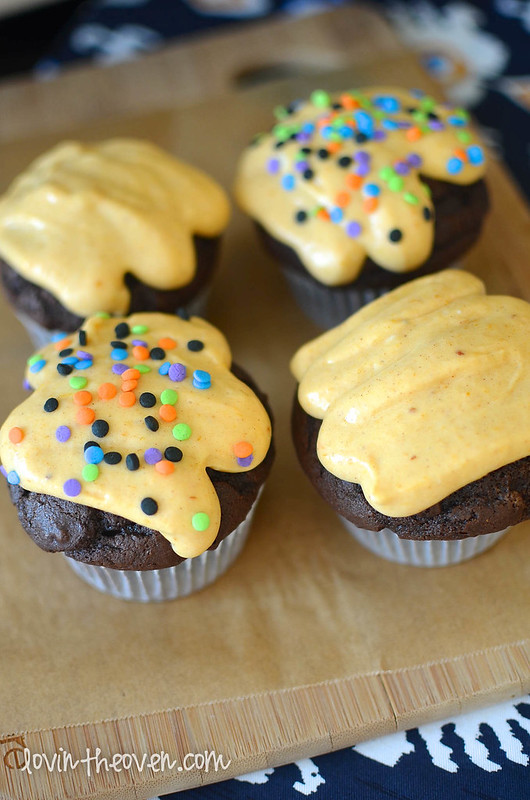
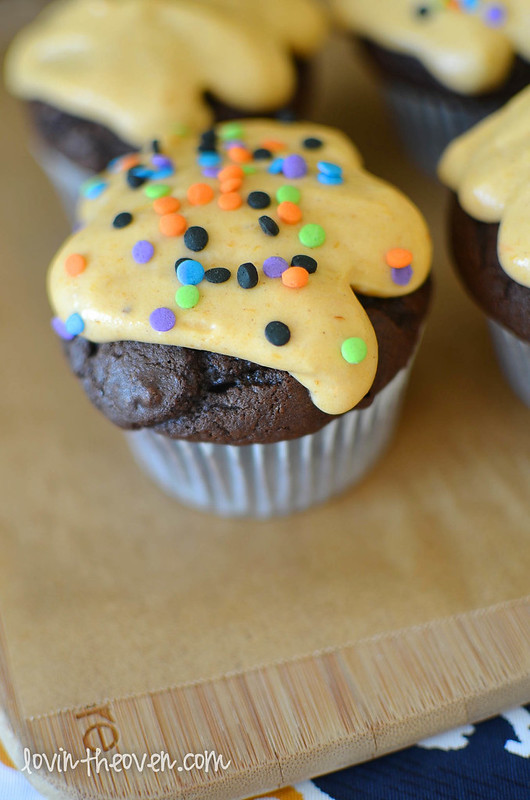
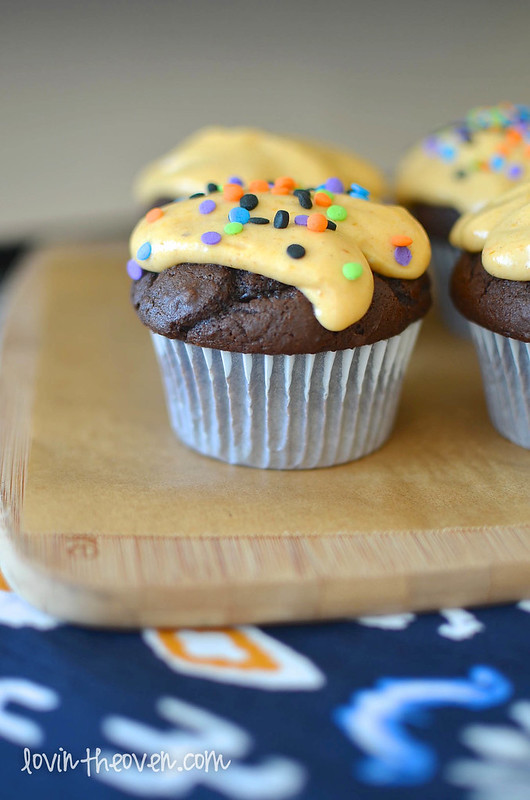
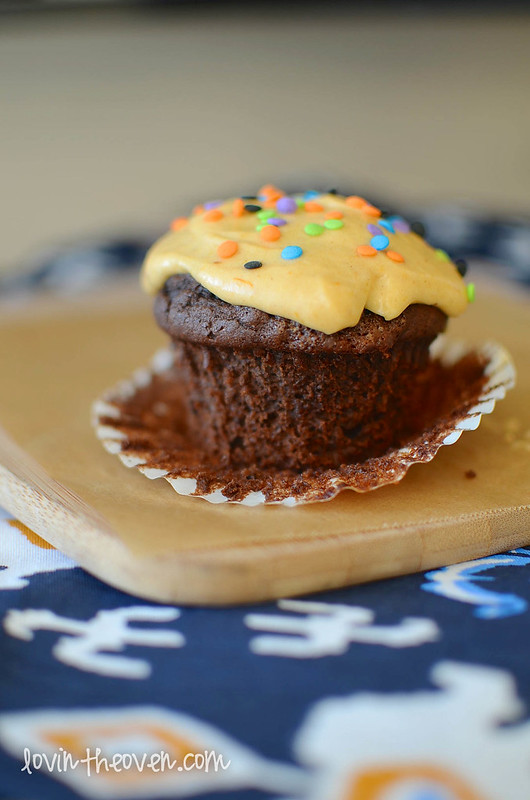
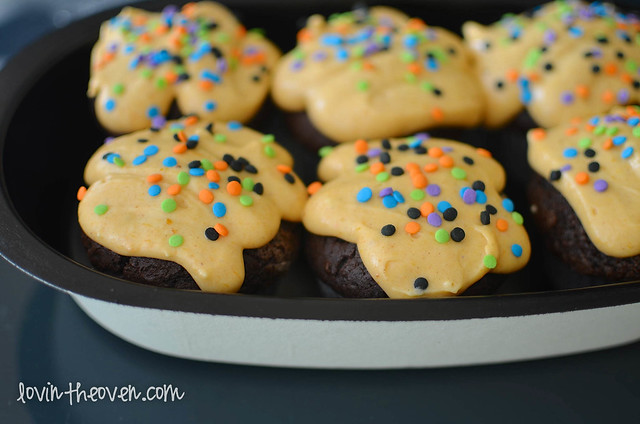
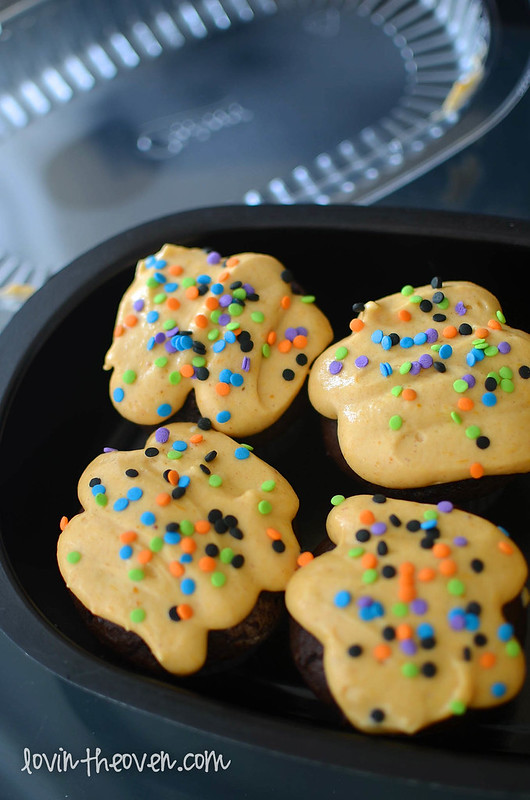
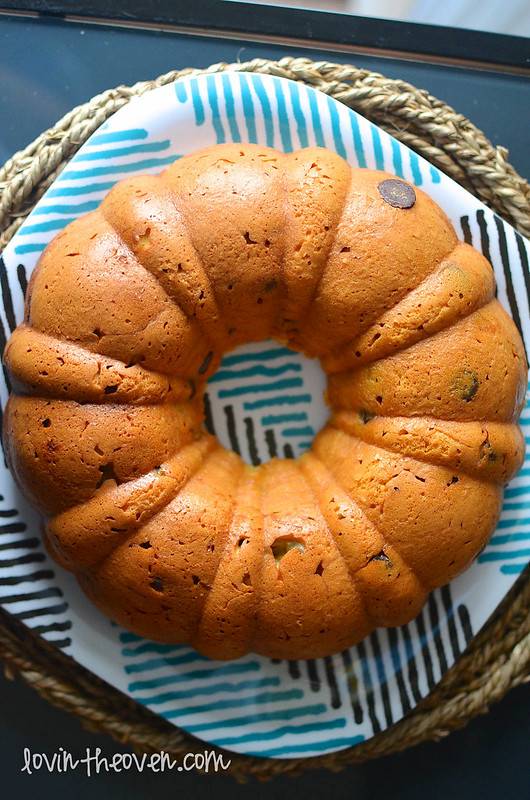
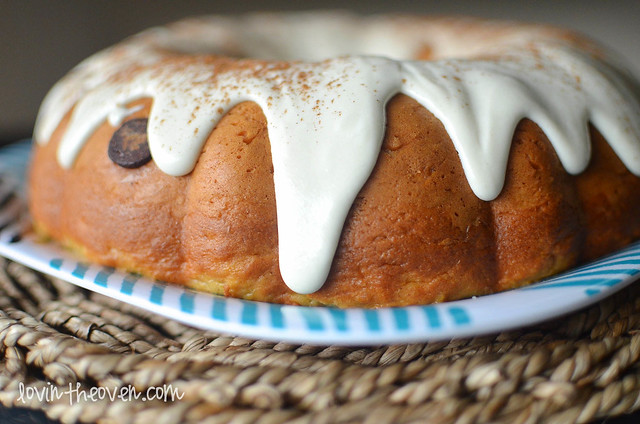
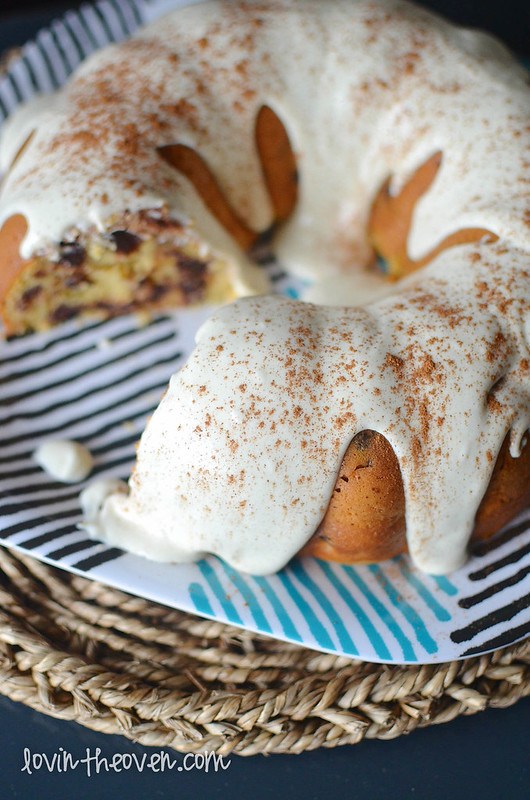
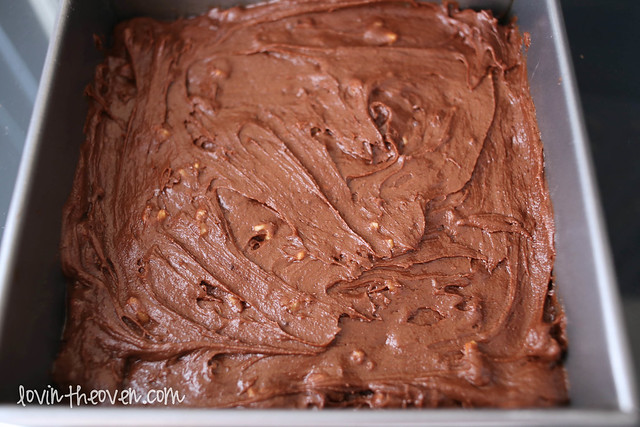
This is what the brownies looked like after two minutes of frosting.

dessert-14

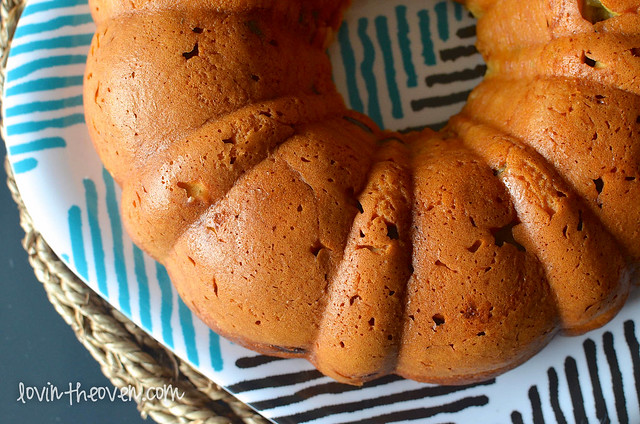
See how it just oozes down the side? The top is already getting the nice shiny layer. If I would have waited ten more minutes, all of the frosting becomes that nice shiny layer.

dessert-15

dessert-16

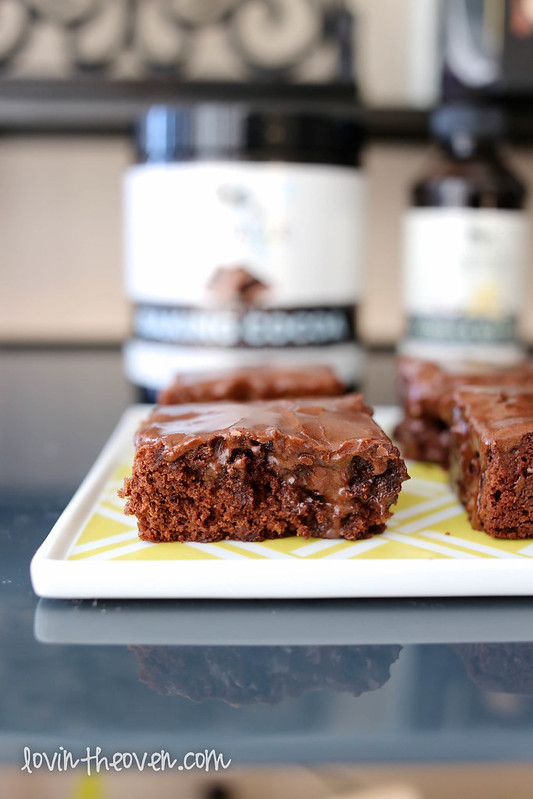
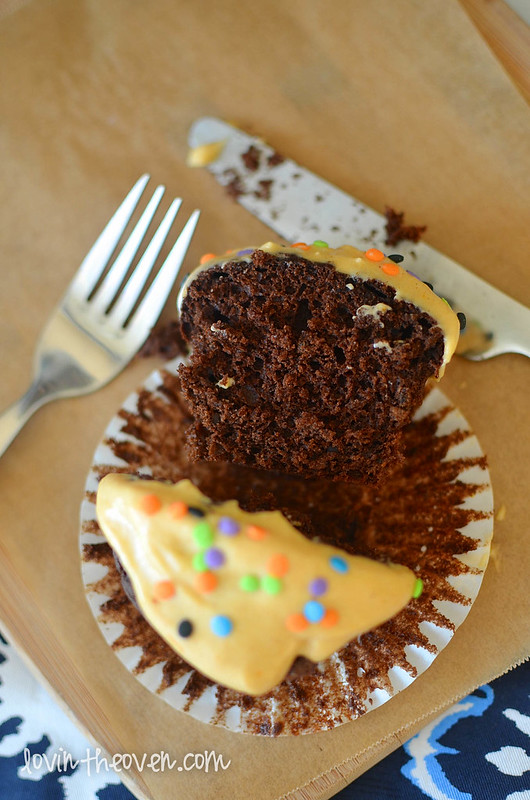
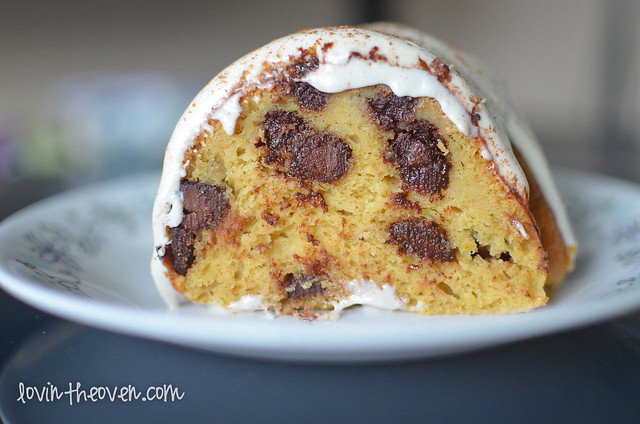
I was trying to debate if I should cut the brownies first prior to frosting them or not. That’s exactly what I ended up doing. The frosting flooded into the cracks, engulfing each brownie piece.

dessert-17

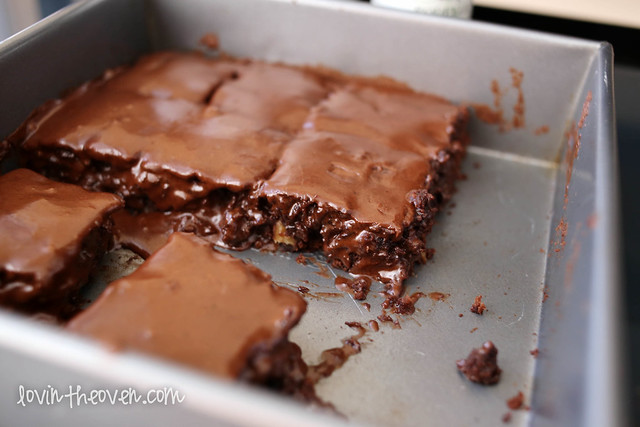
Sometimes the “behind the scenes” picture is just better than the staged one.

Recipe from Saltbox House

Print
Lunch Lady Brownies

Yield: 16 brownies

Ingredients

  • For the brownies:
  • 1/2 cup of unsalted butter, melted
  • 1/4 cup Rodelle's baking cocoa
  • 1 cup of all purpose flour
  • 1 cup of sugar
  • 2 eggs
  • 3 teaspoons Rodelle vanilla extract
  • 1/2 cup of chopped walnuts
  • For the frosting:
  • 2 tablespoons butter, softened
  • 2 tablespoons milk
  • 2 tablespoons Rodelle baking cocoa
  • 1 1/2 cups powdered sugar

Directions

  1. Preheat oven to 350 degrees F. Grease an 8x8 inch pan.
  2. In a large bowl, mix together the melted butter and baking cocoa. Add in the flour and sugar.
  3. Beat in eggs and vanilla until combined. Stir in the walnuts.
  4. Evenly spread the batter into the prepared pan and bake for 25 minutes (no longer!).
  5. When the brownies are done, making the frosting by creaming all ingredients together until smooth. Spread the frosting over the brownies while they are still warm. Let the frosting harden before cutting and serving.
3.1
https://lovintheoven.com/lunch-lady-brownies/

I received product from Rodelle, but the opinions expressed are my own.

Filed Under: bars/brownies, cocoa, dessert, frosting, nuts

Chocolate Pumpkin Cupcakes

October 26, 2013 by kim 1 Comment

chocolatepumpkin-4

Confession: I have been watching this YouTube video on repeat with tears streaming down my face. It’s a Crest commercial for Halloween treats gone wrong and it’s the reason why I love kids so much. They have nothing to hide and will tell you exactly how it is.

chocolatepumpkin-2

I’m sure the kids would enjoy these cupcakes much more than the vegetable treats in the video.

This recipe came from Panera‘s chefs and is inspired by their fall menu. Pumpkin and chocolate— what’s more Halloween than that?

chocolatepumpkin

Have you ever seen a more beautiful naked cupcake than this? They rose so high that I almost felt bad covering up the perfect dome. The higher the cupcake, the less frosting that you have to use. That makes it a little healthier, right?

chocolatepumpkin-3

I kept it simple and frosted the cupcakes with a ziploc bag. It was convenient since the frosting had to sit in the refrigerator for a couple of hours prior to decorating.

chocolatepumpkin-5

Did I mention that this is pumpkin cheesecake frosting? Why didn’t I think of that?

chocolatepumpkin-6

chocolatepumpkin-7

chocolatepumpkin-8

chocolatepumpkin-9

chocolatepumpkin-10

These pictures don’t do the cupcakes justice. I wish you could reach through the screen and feel how moist the cake is. Alright I take that back… that sounds a little weird. There may be a bit of pumpkin in the cake batter, but you don’t really taste it. The dark cocoa that I used was more overpowering. The pumpkin flavor definitely comes through in the frosting, though.

chocolatepumpkin-11

I brought the cupcakes to work with me using a Chinet pan. Their pans always come in handy for me since I deliver baked goods a lot to my friends and coworkers. You can bring food with you anywhere (In my case, it was in the car, walking with luggage, through security, and on an airplane) and not have to worry about bringing the carrier back home.

chocolatepumpkin-12

I was able to celebrate fall and share the cupcakes with my crew. The first officer even said that it was one of the best cupcakes that she had ever tried! Who says you can’t have cupcakes for breakfast on an airplane?

I also used the pan to store the cupcakes in the refrigerator overnight and the pan kept it’s shape and didn’t sag. Sometimes, when you expose carriers to different temperatures, they begin to sag in the middle and lose its shape. This was not the case.

chocolatepumpkin-13

The lids latch on, so I didn’t have to worry about cupcakes flying out through the security line. It makes my life a whole lot easier when I’m not looking like a hot mess running through the airport.

Print
Chocolate Pumpkin Cupcakes

Prep Time: 30 minutes

Cook Time: 25 minutes

Total Time: 3 hours, 55 minutes

Yield: a dozen cupcakes

Serving Size: 12

443

16 g

Having a Halloween party? With real pumpkin in both the chocolate cake and the orange-colored cream cheese frosting, these lightened-up treats will steal the show.

Ingredients

    Frosting:
  • ¼ cup butter, softened
  • 8 ounces (1 cup) reduced-fat cream cheese
  • 3½ cups confectioners’ sugar
  • ¼ cup canned pumpkin puree (not pie filling)
  • ½ teaspoon pumpkin-pie spice
  • 1½ teaspoons vanilla extract
  • Cupcakes:
  • 3 tablespoons butter, softened
  • 1¼ cups sugar
  • 2 eggs, at room temperature
  • ½ cup canned pumpkin puree (not pie filling)
  • 1 teaspoon vanilla extract
  • 1½ cups all-purpose flour
  • ⅔ cup unsweetened cocoa powder
  • 1½ teaspoons pumpkin-pie spice
  • 1½ teaspoons baking powder
  • ¾ teaspoon baking soda
  • ¼ teaspoon salt
  • ⅓ cup low-fat buttermilk
  • 3 tablespoons canola oil

Directions

  1. For the frosting, beat the butter and cream cheese in a large bowl with an electric mixer on medium-low speed until blended, 1 to 2 minutes. Add the confectioners’ sugar and beat until blended, 1 to 2 minutes. Scrape down the inside of the bowl; then add the pumpkin, pumpkin-pie spice, and vanilla extract and beat until blended, 2 minutes more. Spoon the frosting into a pastry bag or zip-top bag, seal the bag, and refrigerate the frosting until it is cold, at least 3 hours or up to 2 days. Makes about 3½ cups.
  2. For the cupcakes, heat the oven to 350°F. Line a 12-cup muffin pan with cupcake papers.
  3. In a large bowl, beat the butter and sugar with an electric mixer on medium speed until sandy in texture, 2 to 3 minutes. Add the eggs, one at a time, beating well after each addition. Beat in the pumpkin puree and vanilla extract.
  4. In a medium bowl, whisk together the flour, cocoa powder, pumpkin-pie spice, baking powder, baking soda, and salt. Add the dry ingredients to the egg mixture alternately with the buttermilk and oil in three additions, beating on low speed after each addition.
  5. Fill the muffin cups with batter and bake until a toothpick inserted in the center of one cupcake comes out clean, 20 to 25 minutes. Cool the cupcakes in the pan on a rack for 10 minutes. Remove them from the pan to cool completely on the rack.
  6. Attach a tip to the pastry bag or snip off a corner from the zip-top bag, and squeeze the frosting onto the cupcakes.

Notes

Recipe from www.panerabread.com

3.1
https://lovintheoven.com/chocolate-pumpkin-cupcakes/

This is a sponsored post, but the opinions expressed are my own.

Filed Under: cocoa, cupcake, dessert, frosting, pumpkin

Pumpkin Cheesecake Pudding Bundt Cake with Dark Chocolate Chips

September 30, 2013 by kim 4 Comments

pumpkin-11

Is it too early for pumpkin desserts yet? It’s pretty much fall, right? I’m always jumping ahead when it comes to pumpkin season. That’s alright because Pillsbury® gave me a little push this year to start my fall baking and I’m all for it.

pumpkin-13

pumpkin-5

I used the pumpkin creme cake mix from their supreme collection to make this bundt cake, pretty much following the directions on the box and adding a few of my own personal touches. Pillsbury also released caramel apple cake mix and perfectly pumpkin cake mix this season, just in case the pumpkin creme doesn’t tickle your fancy.

pumpkin-3

I couldn’t have asked for a more perfect bundt cake. It literally slipped right out of the mold, without leaving a single crumb behind. It’s the little things in life that make me happy.

pumpkin

The package also comes with a vanilla filling that you’re supposed to put in between layers of the cake mix, but I felt like being a little rebel and  put it on top of the cake rather than inside of it.

pumpkin-6

pumpkin-8

I left a piece of the cake on the counter and it was gone when I came home. My DF commented in the car that he loved whatever I made, not exactly knowing what it was composed of. He said that it was a little tangy and when asked, he couldn’t guess the pumpkin flavor. That’s not surprising, though, because he doesn’t eat ANYTHING pumpkin. He claims to despise the fruit.

Thanks, Pillsbury, for proving him wrong!

pumpkin-12

When cut into, you’ll see just how moist the cake really is. The extra box of pudding and greek yogurt that I added in really help. The chocolate chips sink right into the goodness, melting in your mouth to create a whirlwind of goodness.

pumpkin-16

Overall, I love the ease of baking with Pillsbury’s pumpkin creme cake mix. The extra frosting packet was also easy to whip up. I added more water than the directions asked for because I wanted a thinner consistency that would run down the sides of the cake, and that’s exactly what I got.

Print
Pumpkin Cheesecake Pudding Bundt Cake with Dark Chocolate Chips

Ingredients

    For the Cake:
  • 1 package Pillsbury supreme collection pumpkin creme cake mix
  • 1 box (1 oz) cheesecake instant pudding mix
  • 1/2 cup greek yogurt
  • 3 eggs
  • 1/3 cup oil
  • 1 cup water
  • 2 cups dark chocolate chips
  • For the glaze:
  • 1 package of vanilla mix that comes in the box
  • 2 tablespoons plus 2 teaspoons water
  • 2 tablespoons oil
  • cinnamon for dusting, optional

Directions

  1. Preheat oven to 350 degrees. Grease your bundt pan.
  2. Mix all of the ingredients in one bowl for two minutes. Pour evenly into the bundt pan and bake for 40-45 minutes, or until toothpick comes out clean.
  3. For the glaze, whisk all of the ingredients until smooth. Pour over cooled cake and dust with cinnamon, if using.
3.1
https://lovintheoven.com/pumpkin-cheesecake-pudding-bundt-cake-dark-chocolate-chips/

This post was sponsored by Pillsbury, but the opinions expressed are my own. ©/® The J.M. Smucker Company. Pillsbury is a trademark of The Pillsbury Company, LLC, used under license.  

Filed Under: cake, chocolate chip, dessert, frosting, pumpkin

  • « Previous Page
  • 1
  • …
  • 3
  • 4
  • 5
  • 6
  • 7
  • …
  • 21
  • Next Page »

hi! i'm kim-- a girl mom, baker, blogger, and ex-flight attendant. welcome!

Search

  • Facebook
  • Instagram
  • Pinterest
  • Twitter

Categories

RODELLE-BABadge


Categories

  • Facebook
  • Instagram
  • Pinterest
  • Twitter

Copyright © 2026 · Foodie Pro Theme by Shay Bocks · Built on the Genesis Framework · Powered by WordPress