Lovin' From the Oven

  • Home
  • About Me
  • Recipes
  • FAQ
  • My Lifestyle Blog
  • Disclaimer

The Best Dark Chocolate Chip Cranberry Oatmeal Cookies

July 26, 2011 by kim 4 Comments

DSC_7049

DSC_7039

DSC_7051

DSC_7054

One more week. I’ll only be home for once more week before I officially move out a week from today. How crazy is that? I’m excited and nervous at the same time; Excited to be moving in with my DB, in a city we’re both unfamiliar with and nervous to start the whole job application process all over again. Days are flying by with weddings, first birthday parties, and soaking up some valuable time with my friends before I’m gone. If you want to stay posted with my move, check out my other blog: A Pile of Style. I’ll be posting pictures of how I decorated my apartment soon!

I haven’t baked with oatmeal in cookies for a while (thanks to the bf), so I figured that I was long overdue for an oatmeal recipe…. not that oatmeal cookies are my favorite, anyways. I’d take a chocolate chip, snickerdoodle, or sugar cookie over it any day. These were thinner than your normal, hearty oatmeal cookie, but they were still enjoyable. White chocolate does go better with oatmeal cookies than regular chocolate, though. Just sayin’.

This recipe comes from Showfood Chef.

  • 1 cup oatmeal
  • 1 cup flour
  • 1/4 tsp. baking powder
  • 1/4 tsp. baking soda
  • 1/4 tsp. salt
  • 1/4 tsp. cinnamon
  • 1 stick (8 Tbls. butter)
  • 1/2 cup brown sugar
  • 1/2 cup sugar
  • 2 tsp. vanilla
  • 1 egg
  • 1/2 cup dark chocolate chips (I chopped up a bar of dark chocolate)
  • 1/4 cup dried cranberries

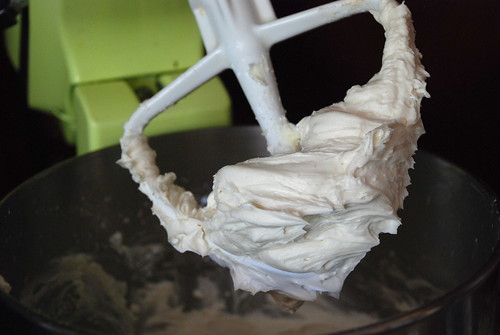
  1. Cream the butter and sugars together. Add the egg and vanilla and beat again until well mixed.
  2. Stir in the flour, baking powder, baking soda, salt, and cinnamon.
  3. Once blended, add the oatmeal, chocolate chips and cranberries until just combined.
  4. Refrigerate the dough for at least two hours.
  5. Preheat the oven to 350.
  6. Scoop spoonfuls of the dough onto a baking sheet and bake for 10-12 minutes.

Filed Under: chocolate chip, cookies, dessert, fruit, oatmeal

Cake Batter Cookies

July 11, 2011 by kim 19 Comments

DSC_4441

DSC_4440

DSC_4443

DSC_4442

DSC_4456

DSC_4417

Things are finally beginning to wind down. Did I tell you that we found an apartment up north? My DB and I took a trip a couple of weeks ago to find a place to stay and I was getting a little worried looking at the open houses. College students sure live… like college students. Just about when I had almost given up hope, we walked into a beautiful, completely remodeled apartment in a homey, cabin-like building that’s conveniently located right next to the school— perfect for the both of us! My DB and I both knew the moment we stepped foot into the living room that this was it. We filled out the application, put the deposit down, and walked away with peace of mind.

Well, that was a couple of weeks ago and I’ll actually be moving everything up this Friday! We’ll be getting away from “carmageddon” with the 405 being closed this weekend. I’m not sure how I feel about the 6 hour drive in a U-Haul truck, but you do what you gotta do.

I was on a cake mix frenzy after making these and still had 3/4 of a box of batter to use. Lucky for me, I stumbled across this recipe from Stephanie Cooks. I loved the idea of replacing some flour with cake mix to make cookies and was intrigued if the cookie still held the funfetti flavor. Sure enough, the cookies still tasted like the cake batter… Just what I wanted! The only thing is that they turned out a bit flat. Perhaps increasing the baking soda and adding a pinch of baking powder would do the trick. I baked half the batch without chocolate chips and the other half with chocolate chips.

Ingredients:

  • 3/4 cup flour
  • 1 1/4 cup funfetti cake mix
  • 1/4 tsp. baking soda
  • 3/4 cup softened butter
  • 1 egg
  • 1 egg yolk
  • 2 tsp. vanilla
  • 1/2 cup sugar
  • 1/2 cup brown sugar
  • 1 cup chocolate chips

Directions:

  1. Cream together the butter and sugars. Mix in the egg yolk, egg, and vanilla until creamy. 
  2. Add in the flour, cake mix, and baking soda.
  3. Stir in the chocolate chips.
  4. Refrigerate for at least an hour.
  5. Preheat oven to 350.
  6. Scoop heaping tablespoons of dough onto cookie sheets. 
  7. Bake for 12-15 minutes, until the edges are golden.

Filed Under: chocolate chip, cookies, dessert

Happy 4th of July:: From Scratch Funfetti Cupcakes & Vanilla Buttercream

July 4, 2011 by kim 4 Comments

DSC_7356

Sprinkles!! Can you guess what I did with them?

DSC_7396

DSC_7378

DSC_7420

Cupcakes, of course!
First, you have to get some festive sprinkles for the holidays (I found these at Homegoods).

DSC_7337

Bake your cupcakes and then whip up some frosting!

DSC_7345

DSC_7346

Here’s how I chose to frost mine: Using an offset spatula, throw a slab of frosting onto your cupcake.

DSC_7351

Then spread it to the rim. Don’t worry if it gets all over the place, you just need to cover your top.

DSC_7353

Holding your offset spatula at an angle against your frosting, spin the cupcake around so you get a slanted side, as so:

DSC_7354

Dump some sprinkles out onto a plate (make sure they don’t jump all over the place!)

DSC_7359

And roll the side of the cupcake in the plate:

DSC_7361

Voi-la! A much easier decorating method than piping (maybe not as pretty, but oh well, they all end up in the same place).

DSC_7367

Peel and eat!

DSC_7423

DSC_7432

DSC_7427

DSC_7409

DSC_7417

DSC_7370

Happy 4th of July, everyone! I’ll be spending mine bbq’ing by the pool in my red, white, and blue. What do you guys have planned?

With any party/get together, I’m expected to bake something. I decided to go all out and do what I hate doing… decorate cupcakes. Plus, I saw these sprinkles at HomeGoods and needed an excuse to buy them. I used jimmies to throw into the batter and nonpareils to decorate the tops. I decorated the cupcakes the lazy way, and provided a step by step on what to do (Is that something you guys would like more of— step by step photos?). Hopefully that helps the decorator haters out there like me!

The cupcake itself was extremely moist and fluffy. It was a little on the sweet side for me, so I’d reduce the amount of sugar next time I make them. The buttercream frosting was actually good— and I don’t normally like buttercream. Though, I must admit that I added probably another 2 tablespoons of milk or so to tone down the powdered sugar taste. Frosting’s forgiving.. add a little more milk and balance out with a little more powdered sugar until you get the taste you desire.

This recipe is slightly adapted from How Sweet It Is, which makes approximately 12 cupcakes. Have a safe 4th, everyone!

  • 1/2 cup softened butter
  • 1 cup sugar
  • 2 eggs
  • 1 tablespoon vanilla extract
  • 1 1/2 cups flour
  • 1 teaspoon baking powder
  • 1/3 cup buttermilk
  • 1/3 cup assorted brightly colored sprinkles + more for top of frosting
  1. Preheat oven to 350 degrees F.
  2. Cream together the butter and sugar. Add eggs and vanilla and beat until combined.
  3. Combine dry ingredients in a bowl. Add half of the dry ingredients, mixing until just combined. Add the milk. Once mixed, add remaining dry ingredients. Fold in assorted sprinkles.
  4. Pour into cupcake tins and fill 2/3 of the way full. Bake for 18-20 minutes. Cool completely before frosting.

Vanilla Buttercream

  • 2 sticks of butter, softened
  • 2 1/2 cups powdered sugar
  • 1 tablespoon vanilla extract
  • 1 tablespoon of milk, if needed
  1. Cream butter until it is completely smooth. 
  2. With the mixer on low speed, slowly add in the powdered sugar, one cup at a time.
  3. Beat in the vanilla for 2-3 minutes.
  4. If the frosting is too thick, add milk 1 teaspoon at a time until the desired consistency is reached. If it’s too thin, add a little more sugar until it thickens.

Filed Under: cupcake, dessert, frosting

  • « Previous Page
  • 1
  • …
  • 87
  • 88
  • 89
  • 90
  • 91
  • …
  • 159
  • Next Page »

hi! i'm kim-- a girl mom, baker, blogger, and ex-flight attendant. welcome!

Search

  • Facebook
  • Instagram
  • Pinterest
  • Twitter

Categories

RODELLE-BABadge


Categories

  • Facebook
  • Instagram
  • Pinterest
  • Twitter

Copyright © 2026 · Foodie Pro Theme by Shay Bocks · Built on the Genesis Framework · Powered by WordPress