Lovin' From the Oven

  • Home
  • About Me
  • Recipes
  • FAQ
  • My Lifestyle Blog
  • Disclaimer

Double Fudge Chocolate Chip Cookie Dough Cookies

October 4, 2012 by kim 6 Comments

DSC_2116

I got to spent my weekend reminiscing about the wonderful high school days. Some people say that college was the best time of their life, but I have to disagree. I loved my high school experience- the good and the bad.

Sure, I may have been a bit… thicker. I may have had stricter parents than most. I may have gone through an awkward “A&F, but only on sale because I can’t afford full price” phase. But I can 100% say that I had and still have the best of friends.

DSC_2140

This past weekend, I spent my time outside all day, in the pool, “peppering,” playing HORSE, and taking in the gorgeous day. After ordering in some pizza, my friends and I played Mario Party volleyball on the good ol’ Gamecube for three hours straight. Before we knew it, it was 1 AM.

That also describes pretty much every day of my high school weekends. It may sound pretty tame to most of you, but that’s just the way I like it.

DSC_2143

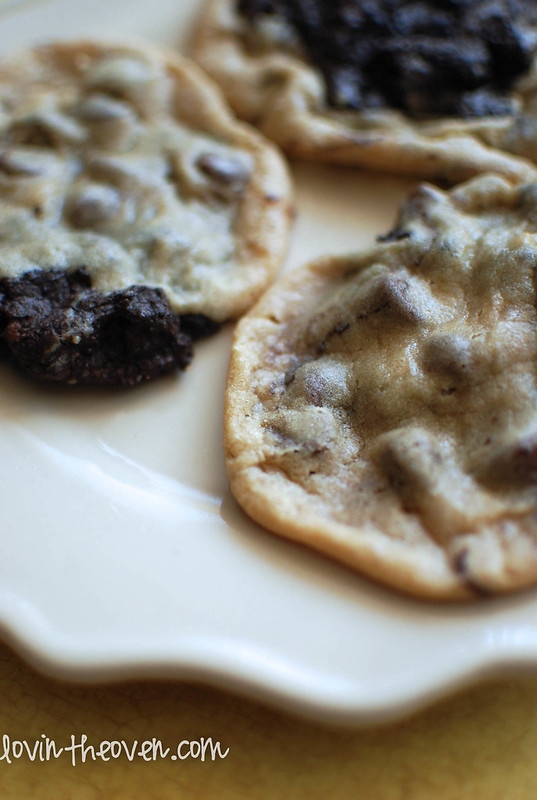
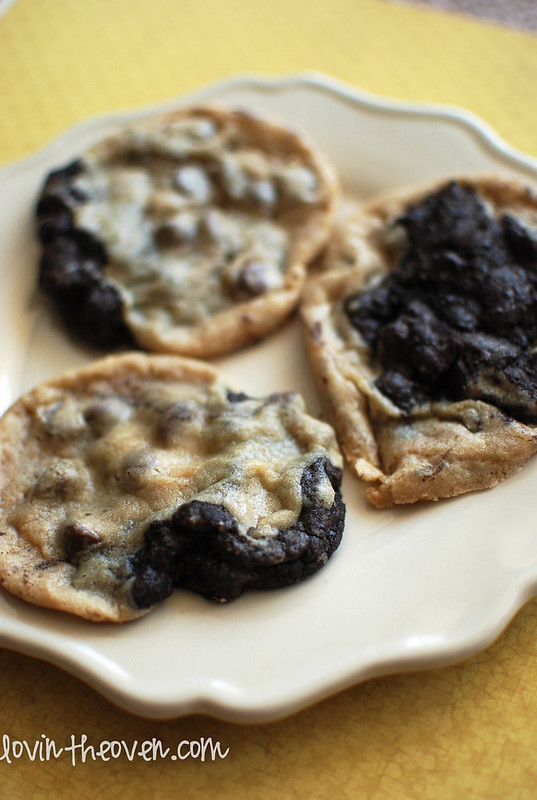
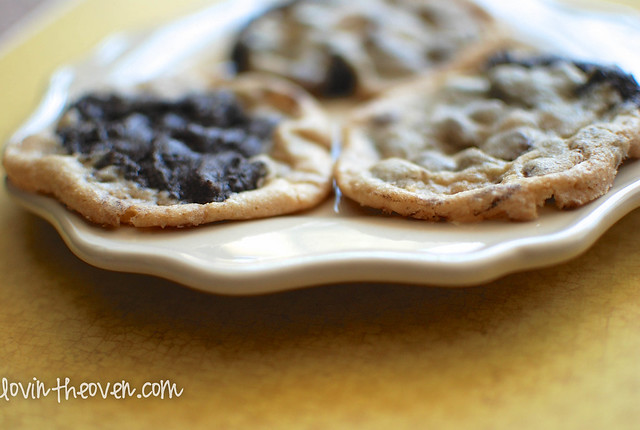
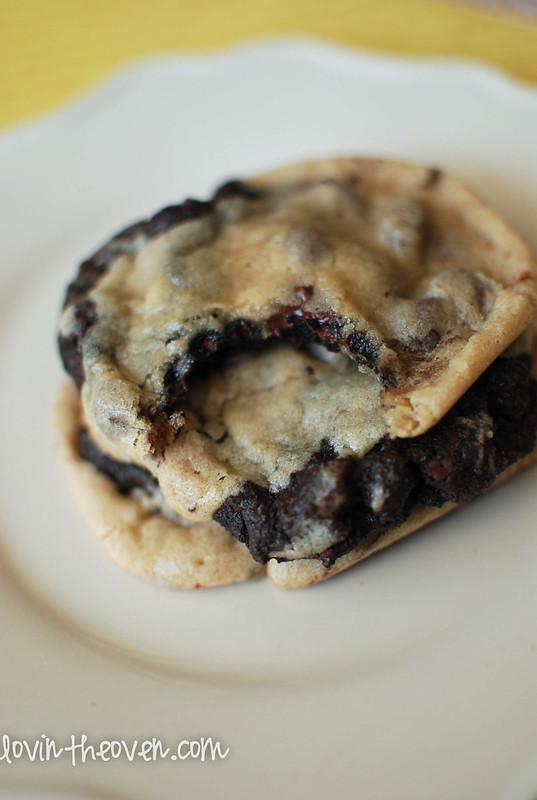
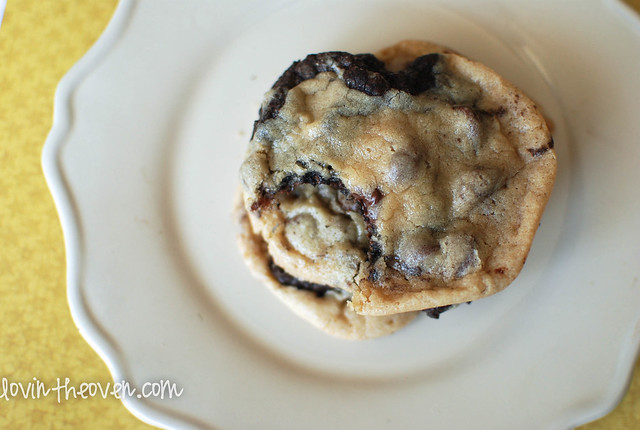
Alright so these aren’t the prettiest cookies on earth. That may or may not be my fault because I didn’t use a scale to measure. I just eyeballed it, like I do with everything else.

I’m guessing my fudge side had more butter/sugar than the other portion because they didn’t spread out as much. The chocolate chip side flattened out like a pancake. Whoops.

DSC_2159

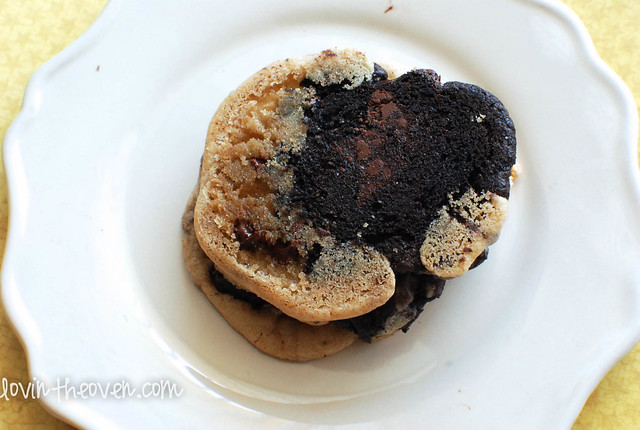
Good thing the cookie dough was delicious, despite it’s shape. They may have failed on my thickness test, but they passed my consistency test with flying colors; Perfectly chewy, just how I like my cookies.

DSC_2170

DSC_2186

How Sweet It Is‘s cookies are much prettier than mine. In fact, hers are perfect. Everything that she bakes or cooks looks beautiful, so I’m not surprised. Seriously, that girl is amazing!

Print
Double Fudge Chocolate Chip Cookie Dough Cookies

Ingredients

  • 1 3/4 cups all-purpose flour
  • 1/4 cup unsweetened cocoa powder
  • 1/2 teaspoons baking soda
  • 1 1/2 sticks (12 tablespoons) of unsalted butter
  • 1 cup brown sugar
  • 1/2 cup sugar
  • 1 egg + 1 egg yolk, at room temperature
  • 2 teaspoons vanilla extract
  • 1 1/2 cups chocolate chips

Directions

  1. Preheat oven to 325 degrees F.
  2. Cream together butter and both sugars. Mix in the eggs and vanilla.
  3. Divide the sugar mixture in half and separate the doughs into two different bowls. Use a scale to measure them exactly (This is the part I failed at).
  4. In one bowl, add 1 cup of flour, 1/4 teaspoon baking soda and a pinch of salt, then mix until a dough forms. Fold in 3/4 cup of the chocolate chips. Set aside.
  5. In the second bowl, add remaining flour and baking soda, cocoa powder and a pinch of salt, mixing until a dough forms. Fold in remaining chocolate chips.
  6. Roll each dough into 24 balls (about an inch thick). Take one chocolate chip half and one double fudge half and merge them together by one end. Place on baking sheet at least 1 1/2 inch apart.
  7. Bake for 10-12 minutes, or until just golden.
3.1
https://lovintheoven.com/double-fudge-chocolate-chip-cookie-dough-cookies/

Filed Under: chocolate chip, cocoa, cookies, dessert

Carmelitas

September 28, 2012 by kim 11 Comments

carmelitas-4

carmelitas-5

We are SO close to the holiday season. Halloween, Thanksgiving, and my favorite… Christmas! Like a previous commenter wrote, are you ready for my 12 days of cookies? Too bad we still have to wait three more months for that. Don’t worry, I have plenty of posts in between to keep you occupied until then.

carmelitas

carmelitas-3

Right now, I’m loving my little “study” dates with my DB. He always has a ton of schoolwork to do and I always have blogging to catch up on, so we make it a point at least once a week to go to a coffee shop and crank it out. Right now, we’re at Panera with my drink of choice in hand: an iced chai tea latte with a hefty sprinkle of cinnamon on top.

carmelitas-6

carmelitas-7

carmelitas-8

These bars are the kind of dessert that you bring to an event when you want to make friends. Everyone will come asking for the recipe. Take my word on it. How can you not love something with caramel oozing out of the sides? Oh lordy.

I brought these into work and they were gone within seconds. Have I told you how my coworkers (and Boalt law students) are my greatest testers? They get everything straight from the kitchen. Thanks for being such great sports, guys! They try everything I bake, no questions asked, and that’s why I love them. Recipe from Lu Lu the Baker.

Print
Carmelitas

Ingredients

  • 32 caramel squares, unwrapped
  • 1/2 cup heavy cream
  • 3/4 cup butter, melted
  • 3/4 cup brown sugar, packed
  • 1 cup flour
  • 1 cup rolled oats
  • 1 teaspoon baking soda
  • 6 ounces semisweet chocolate chips

Directions

  1. Preheat oven to 350 degrees F.
  2. In a saucepan over low heat, melt together the caramels and heavy cream. Stir until completely smooth and set aside.
  3. In another bowl, combine melted butter, brown sugar, flour, oats, and baking soda. Take half of this mixture and press into the bottom of an 8x8 pan. Bake for 10 minutes.
  4. Remove pan from oven and sprinkle chocolate chips over the crust. Carefully pour the caramel mixture over the chocolate chips. Crumble remaining oatmeal mixture over caramel.
  5. Bake for an additional 15-20 minutes, until the edges are lightly browned. Remove from oven and cool completely before cutting.
3.1
https://lovintheoven.com/carmelitas/

Filed Under: bars/brownies, chocolate chip, dessert, oatmeal

Ginger Bars

September 23, 2012 by kim 3 Comments

DSC_2362

DSC_2364

Is it pathetic that I get excited over paper goods? Polka dot envelopes and embossed kraft paper are the keys to my heart.

With my new blog makeover, I was determined to get some fitting business cards to match the new and simplified layout. My previous business cards were freebies from vistaprint. They were perfect for me at the time, but I eventually outgrew them.

DSC_2357

DSC_2359

I have zero skills in photoshop and template design, so I had someone else make a business card that I absolutely loved. With a couple of drafts back and forth changing the fonts, the final draft was finished and off to the printer it went.

DSC_2376

DSC_2383

I got them in the mail yesterday and couldn’t be happier. If you’re following the FB fan page or my Instagram @kimberlywyn, then you’ve already seen them. But if not, here’s the final draft!:

Although with the filter, the lines and fonts look yellow, but they’re really white! What do you think?

These ginger bars make enough to bring to a party. They hold their shape, aren’t crumbly, and don’t fall apart easy. The ginger flavor isn’t as strong as I would have imagined, but that wasn’t a problem for me. I left the bars in for 45 minutes since they weren’t done at 30, but I definitely over baked them. Don’t leave them in for that long! The bars weren’t very sweet, so I added a little dusting of powdered sugar once the bars cooled. Recipe slightly adapted from AllRecipes.

Print
Ginger Bars

Ingredients

  • 1 3/4 cups brown sugar
  • 2/3 cup butter
  • 1/4 cup molasses
  • 2 teaspoons ground ginger
  • 2 eggs
  • 2 teaspoons vanilla extract
  • 2 cups all-purpose flour
  • 1 teaspoon baking powder
  • 1/4 teaspoon baking soda
  • 1 teaspoon salt

Directions

  1. Preheat oven to 350 degrees F. Grease a 9x13-inch baking pan.
  2. Cream together the brown sugar, butter, and molasses. Mix in the ginger, eggs, and vanilla.
  3. Slowly stir in the all-purpose flour, baking powder, baking soda, and salt until just combined.
  4. Pour the batter into the prepared baking pan. Bake for 25 to 30 minutes, or until toothpick comes out clean. Cool completely before cutting.
3.1
https://lovintheoven.com/ginger-bars/

Filed Under: bars/brownies, dessert

  • « Previous Page
  • 1
  • …
  • 69
  • 70
  • 71
  • 72
  • 73
  • …
  • 159
  • Next Page »

hi! i'm kim-- a girl mom, baker, blogger, and ex-flight attendant. welcome!

Search

  • Facebook
  • Instagram
  • Pinterest
  • Twitter

Categories

RODELLE-BABadge


Categories

  • Facebook
  • Instagram
  • Pinterest
  • Twitter

Copyright © 2026 · Foodie Pro Theme by Shay Bocks · Built on the Genesis Framework · Powered by WordPress