Lovin' From the Oven

  • Home
  • About Me
  • Recipes
  • FAQ
  • My Lifestyle Blog
  • Disclaimer

Marshmallow Monster Cookies

June 9, 2011 by kim 10 Comments

IMG_3695

IMG_3699

IMG_3729

IMG_3714

I’ve got a bone to pick with you guys. With summer coming up in full swing, which sunscreen do you guys use? The spray or lotion kind? I’m usually a lotion kind of girl, but we recently bought the aerosol version since it seemed so much easier to apply.

Never again. The bottle lasted my DB and I literally 3 days. Not only that, but it doesn’t quite spread everywhere. We both got burnt with zebra stripes on our backs/arms/legs, despite our efforts of putting it on twice in one afternoon. Ouch. So it’s more expensive, doesn’t last nearly as long, and isn’t quite effective. I definitely won’t be using the aerosol kind anymore. Am I doing something wrong or does it truly suck?

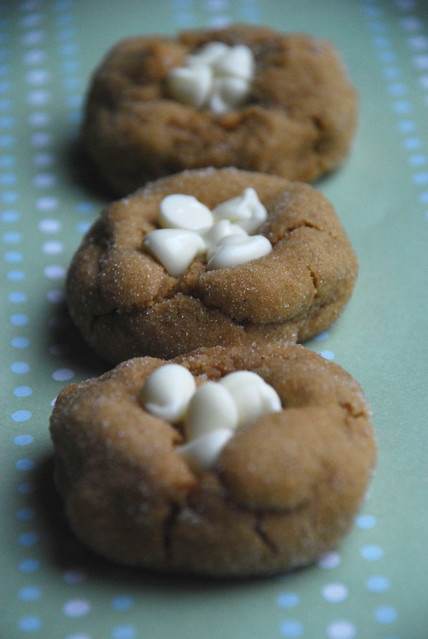
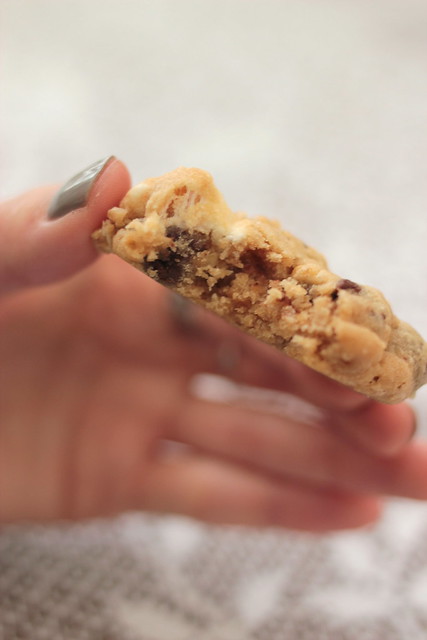
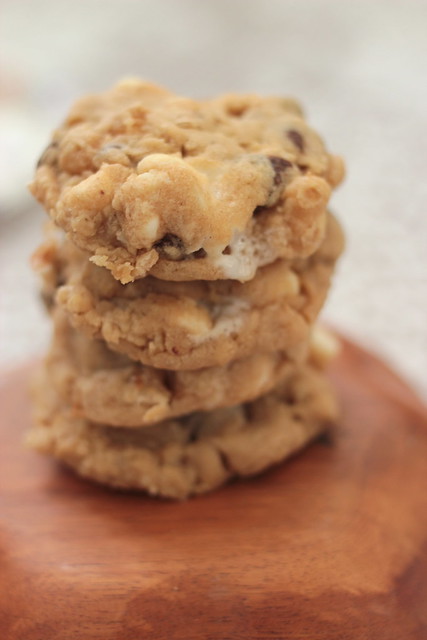
These cookies were wonderful. They were hearty with a good mix of peanut butter, oatmeal, and chocolate, and had a wonderful texture. They were thick and chewy, while the marshmallows were a nice addition to the mix. My DB even ate these and he HATES oatmeal! He barely noticed that they were even there. This recipe is adapted from Pinch of Yum and lives up to the “monster” name!

  • 2 cups all-purpose flour
  • 1/2 teaspoon baking powder
  • 1 teaspoon baking soda
  • pinch of salt
  • 2 sticks unsalted butter, softened
  • 1 cup granulated sugar
  • 1 cup packed light brown sugar
  • 2 large eggs
  • 1 1/2 tablespoon vanilla extract
  • 1/2 cup peanut butter
  • 2 cups quick-cooking oats
  • 1 cup milk chocolate chips
  • 1 cup white chocolate chips
  • 1 cup miniature marshmallows
  1. Preheat the oven to 350 degrees F. 
  2. Stir together the flour, baking powder and baking soda in a large bowl. 
  3. Cream butter and both sugars until fluffy. Beat in the eggs one at a time, then add the vanilla. 
  4. Add the peanut butter and mix until smooth. Mix in the flour mixture until just combined.
  5. Stir the oats and chips into the dough with a wooden spoon.
  6. Drop the dough by heaping tablespoonfuls onto baking sheets, about 3 inches apart. Push in 4-5 marshmallows into each cookie dough ball. Bake for about 8-10 minutes, until golden.

Filed Under: chocolate chip, cookies, dessert, oatmeal, white chocolate

Day 9: Pumpkin Pie Snickerdoodle Bars

December 21, 2010 by kim 17 Comments

DSC_3807

DSC_3796

DSC_3802

DSC_3806

Day 9 of my 12 days of cookies: Pumpkin Pie Snickerdoodle Bars. My mouth salivates just saying the name. Snickerdoodles are just meant to be with pumpkin pie. It’s a match made in heaven. I know this isn’t a cookie, but I’ve always thrown a bar in for the past two years of my 12 days of cookies, so I had to stay true to tradition.
These bars were utterly divine. However, I do have a bone to pick; The snickerdoodle layer didn’t quite bake thoroughly in the middle of the pan even thought the edges were set. When I make them again, I’ll try baking the snickerdoodle layer alone for about 5 minutes or so before throwing on the pumpkin layer.
The white chocolate on top was totally not necessary and didn’t really add much to the bar itself, so you can feel free to omit that if you want.
I’m exhausted from baking already and it’s not even Christmas, yet! Whew! I almost forgot how much work it is to bake non stop all day. I’m spending tonight at home by the fireplace, watching Avatar with the bestie… only to start the whole baking process again in two days! This recipe is from Beantown Baker.

Snickerdoodle layer:

  • 3 cups all-purpose flour
  • 2 teaspoons baking powder
  • 1 teaspoon salt
  • 2 cups packed brown sugar
  • 1 cup butter, at room temperature
  • 2 eggs, at room temperature
  • 1 tablespoon vanilla extract
Pumpkin Pie Layer:
  • 1 cup all-purpose flour
  • 1 cup white sugar
  • 1 stick butter, at room temperature
  • 1 teaspoons baking powder
  • 1 teaspoons salt
  • 1 teaspoon pumpkin pie spice
  • 2 eggs, at room temperature
  • 1 1/2 cups canned pumpkin

Topping

  • 2 tablespoons white sugar
  • 2 teaspoons cinnamon
Drizzle
  • 1 oz white chocolate, chopped
  • 1/4 teaspoon pumpkin pie spice
  1. Preheat oven to 350F.
  2. Lightly grease a 9×13 inch pan.

To make snickerdoodle layer:

  1. Stir together flour, baking powder and salt and set aside. In a large bowl, beat together butter, sugar, egg and vanilla until smooth.
  2. Stir in the flour mixture until well blended. Spread evenly in prepared pan.

To make pumpkin pie filling:

  1. In a mixer bowl, cream together butter and sugar. Add the rest of the ingredients and mix until well combined. Pour over the snickerdoodle layer, smoothing out the top.
  2. Combine white sugar and cinnamon in a little bowl. Evenly sprinkle cinnamon sugar mixture over the top of the batter.
  3. Bake for 33-40 minutes or until a toothpick inserted into the center of the pan comes out clean. Let the bars cool completely. They will deflate a bit and remain a bit pie-like on the top layer. The bars that are closer to the edges of the pan will be more firm.
  4. After the bars are completely cool, place the chopped white chocolate into a bowl or zip-lock bag and melt on low power. When it’s completely melted, add the pumpkin pie spice and mix (or knead if using a zip lock bag). Use a spoon or cut a small corner off the bag and drizzle the melted chocolate over the top of the bars and let it cool and harden.
  5. Store in a covered container.

Filed Under: bars/brownies, dessert, pie, pumpkin, white chocolate

Day 7: White Chocolate Topped Gingerbread Cookies & a Winner

December 18, 2010 by kim 4 Comments

DSC_3735

DSC_3737

DSC_3727

DSC_3737

Day 7 of my 12 days of cookies: White chocolate topped gingerbread cookies. I’m really not a fan of molasses, but these seemed too good not to try. I figured that if anything, the white chocolate on top would distract me for long enough to actually like molasses. Although that wasn’t quite the case, I did get a lot of rave reviews from the work party that I brought them to. One of the girls that hates anything gingerbread was even won over with them. I guess that makes them a winner?
Speaking of winners, I wanted to announce the winner of the last giveaway. It goes to Amanda, who wrote, “Yum yum yum! I love choc chip cookies, but I would also love to try their white choc macadamia nut cookies. Mmmm!” Congratulations! I’ll be emailing you shortly.

This recipe comes from one of my most favorite blogs, Culinary Concoctions by Peabody. I think about 80% of my bookmarks come from her page. She makes the most mouthwatering items! The cookie was sturdy, but soft. The white chocolate on the top added a great touch to balance out the spicy flavor. They kept well for a couple of days in an airtight container.

  • 3 cups flour
  • 2 tsp. ground ginger
  • 1 tsp. cinnamon
  • 1 tsp. baking soda
  • 1/4 tsp. ground nutmeg
  • 1/4 salt
  • 3/4 cup (1 1/2 sticks) unsalted butter, at room temperature
  • 3/4 cup firmly packed brown sugar
  • 1/2 cup molasses
  • 1 egg
  • 1 tsp vanilla extract
  • 1/4 cup granulated sugar
  • 1 cup white chocolate chips
  1. Mix flour, ginger, cinnamon, baking soda, nutmeg and salt in large bowl.
  2. Cream butter and brown sugar in large bowl until light and fluffy.
  3. Add molasses, egg and vanilla; beat well. Gradually beat in flour mixture on low speed until well mixed. Wrap the dough in plastic wrap and refrigerate for at least two hours.
  4. Preheat oven to 350°F. Shape dough into 1-inch balls and roll in granulated sugar. Place 2 inches apart on ungreased baking sheets.
  5. Bake 8 to 10 minutes or until edges of cookies just begin to brown. Immediately press about 5-6 white chocolate chips into center of each cookie. Remove to wire racks; cool completely.

Adapted from McCormick and Company Inc.

Filed Under: cookies, dessert, white chocolate

  • « Previous Page
  • 1
  • …
  • 10
  • 11
  • 12
  • 13
  • 14
  • …
  • 16
  • Next Page »

hi! i'm kim-- a girl mom, baker, blogger, and ex-flight attendant. welcome!

Search

  • Facebook
  • Instagram
  • Pinterest
  • Twitter

Categories

RODELLE-BABadge


Categories

  • Facebook
  • Instagram
  • Pinterest
  • Twitter

Copyright © 2026 · Foodie Pro Theme by Shay Bocks · Built on the Genesis Framework · Powered by WordPress