Lovin' From the Oven

  • Home
  • About Me
  • Recipes
  • FAQ
  • My Lifestyle Blog
  • Disclaimer

Red Velvet Rice Crispy Treats

February 10, 2012 by kim 15 Comments

ricecrispy-4

ricecrispy-2

ricecrispy-3

ricecrispy

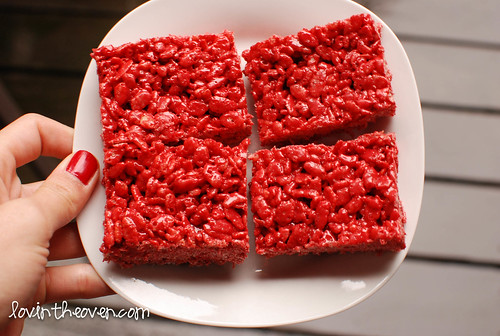
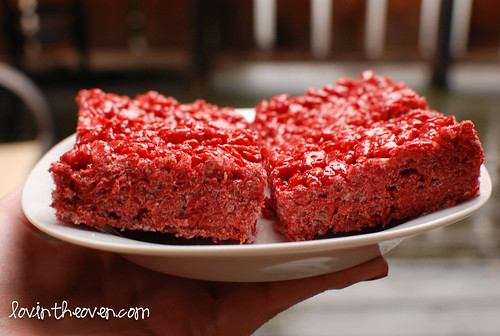
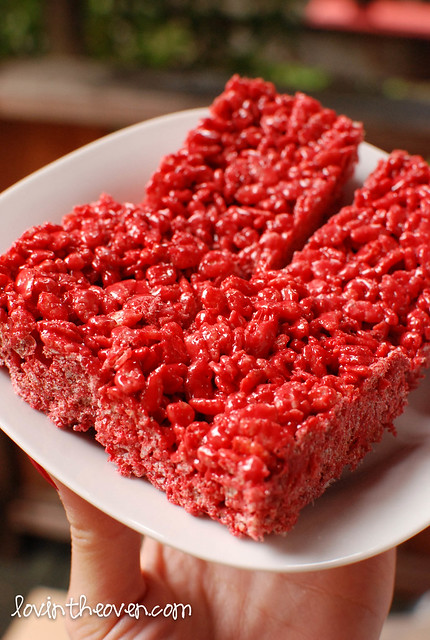
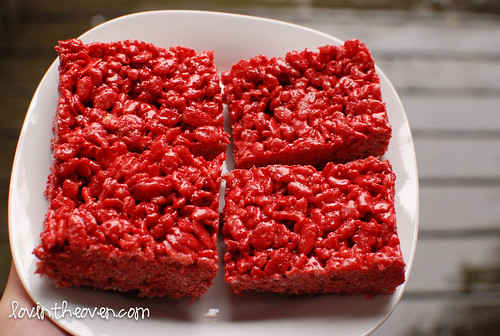
Hi friends! Here’s something red for the Valentine’s day coming up. It’s something really easy for those tight on time. It’s also something that won’t break the piggy bank, but it’s a nice and thoughtful gift for the ones you care about.

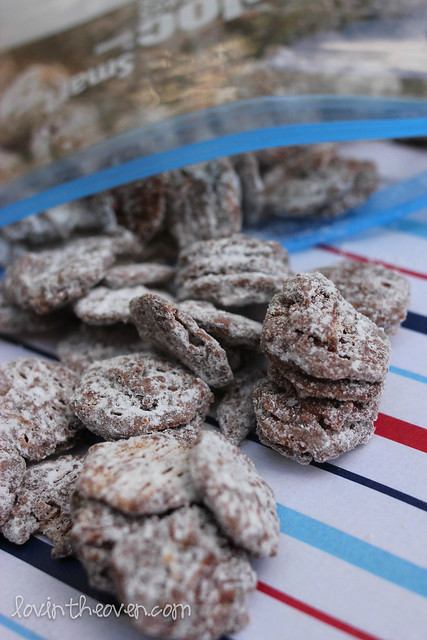
The red velvet flavor wasn’t very strong with 1/2 cup of mix, so I added a bit more to take it up a notch. You could also add heart sprinkles on the top when you’re done to make it even more lovey-dovey, but I’m good with just the redness of the rice crispies.

Happy Valentine’s Day!

Print
Red Velvet Rice Crispy Treats

Ingredients

  • 1 (10.5 oz) bag of mini marshmallows
  • 3 tablespoons butter
  • 1/2 tsp vanilla
  • 1/2 - 3/4 cup red velvet cake mix
  • 6 cups rice crispies cereal
  • sprinkles for topping (optional for that extra pizazz!-- which I didn't add because these babies were just for me)

Directions

  1. Melt butter and mini marshmallows over low heat. When the marshmallows are completely melted, mix in the vanilla and red velvet cake mix.
  2. Remove from heat and carefully stir in the rice crispies until evenly coated.
  3. Pour the batter into a lined or greased 13"x9" pan and press down.
  4. Wait until cooled and cut to serve.
3.1
https://lovintheoven.com/red-velvet-rice-crispy-treats/


Filed Under: bars/brownies, dessert, snack

Nutella Puppy Chow

September 19, 2011 by kim 21 Comments

nutellachexmix

nutellachexmix-5

Here are the only ingredients that you need. The cereal I used can be found at Trader Joe’s.

nutellachexmix-2

nutellachexmix-3

nutellachexmix-4

You know what… I spend a lot more money on groceries than I thought I would. I don’t know if it’s because boys eat a lot more than I expected or if it’s because I get a little too excited when I’m at the grocery store and start throwing unnecessary things in my cart. It probably doesn’t help that I like to have a fully stocked kitchen at all times.

How do you budget? I don’t have a Sunday newspaper anymore like I used to back home, so there goes a majority of my coupon cutting. Sure, you can print out coupons online, but that’s such a pain in the butt!

Until I figure that out, I’ll keep chomping away on my puppy chow. Have you ever heard of puppy chow? I was surprised by the amount of people that didn’t know what it was! I lived off this stuff in middle school, yet my DB had never heard of it in his life.

Traditionally, puppy chow is made with peanut butter instead of Nutella, but this version is just as great (if not better!). I saw this idea from Healthy Tasty Chow and adapted it to my liking/what was on hand in my kitchen. Just keep it stored in an airtight container and you can munch on it for days.

Nutella Puppy Chow
Click Here for a Printable Recipe

Ingredients

  • 1/2 cup butter
  • 1 cup Nutella
  • 1 1/2 cup semisweet chocolate chips
  • 13 cups (more or less) or one 12oz box of hearty wheat/corn/rice cereal like Chex – try to find a hearty version so it doesn’t break down when stirring 
  • 2-3 cups powdered sugar

Directions:

  1. In a pan over medium-low heat, melt the butter and chocolate chips, stirring constantly.
  2. When all is melted and smooth, remove from heat and stir in the Nutella.
  3. Slowly pour the chocolate Nutella mixture over cereal in a large mixing bowl. Wash your hands and use them to stir everything together until fairly evenly coated.  
  4. Wash those hands again and add the cereal to a gallon sized ziploc bag.
  5. Pour in the powdered sugar and shake, starting with 1/2 cup at a time. You want to make sure everything’s coated, but not too sweet!

Filed Under: chocolate chip, dessert, snack

Buttermilk Biscuits

April 4, 2011 by kim 12 Comments

IMG_4256

IMG_4267

First of all, thanks for all your suggestions on what to do with a carton of buttermilk over on my Facebook Fan Page! I ended up making one of the more popular suggestions, buttermilk biscuits. I was so excited with how they turned out that I even made a video. What got over me? I have no idea. So here it is, my very first video (nothing special, it’s just shot using my webcam so don’t get too excited). After watching it, I realized I may or may not have biscuit batter in my hair. But hey, that’s life.

Scary, right? Let’s stick to pictures… This is the dough after it’s been sitting in the fridge for a day.
IMG_4022

And this is how I chose to splat them on the baking sheet.
IMG_4239

Melted a bit of butter…
IMG_4234

I brushed the butter on prior to making in one batch, and after they were baked in another.
IMG_4246

IMG_4258

IMG_4266

IMG_4262

Look at that gorgeous center!
IMG_4264

IMG_4270

So here’s the recipe, courtesy of Melissa and dedicated to Sarah (“my favorite Southern friend”). 🙂 Thanks again, readers!

Makes approximately 2 dozen large biscuits.

  • ‎1 package yeast
  • 1/4 cup warm water
  • 4 teaspoons baking powder
  • 1/2 teaspoon baking soda
  • 2 teaspoons salt
  • 1/2 cup vegetable oil
  • 2 1/2 cups buttermilk
  • 1/2 cup sugar
  • 5 1/4 cup flour
  1. Dissolve the yeast in the warm water and set aside.
  2. In a separate bowl, mix together the baking powder, baking soda, salt, vegetable oil, buttermilk, sugar, and flour.
  3. Add in the yeast mixture. Mix until well combined.
  4. Keep in refrigerator and pinch off as much as you need. It can be rolled out or dropped onto greased cookie sheet.
  5. Bake at 450 degrees for 10 minutes or until brown.
*It gets better each day it sits in the refrigerator. (Melissa’s note that I whole heartedly agree with!)

I chose to brush mine with melted butter. I tried putting the butter on pre baking and post baking. In my opinion, they turned out better when the butter is brushed on post baking. Also, the dough is very, very sticky to work with. Don’t believe me? See for yourself:

IMG_4166

“Splatting” them on the baking sheet was wayyyyy easier than rolling it out, but if you’re feeling courageous, I say go for it. Looks can be deceiving, though. It actually washes off your hands quite easily under warm water. I only know that because I had to wash one hand using that one hand so that I could take this picture.

P.S. I’ll be heading to San Fran/Berkeley for this weekend. Does anyone have any food suggestions that I must check out? Thanks in advance!

Filed Under: bread, breakfast, comfort food, snack

  • « Previous Page
  • 1
  • …
  • 8
  • 9
  • 10
  • 11
  • Next Page »

hi! i'm kim-- a girl mom, baker, blogger, and ex-flight attendant. welcome!

Search

  • Facebook
  • Instagram
  • Pinterest
  • Twitter

Categories

RODELLE-BABadge


Categories

  • Facebook
  • Instagram
  • Pinterest
  • Twitter

Copyright © 2026 · Foodie Pro Theme by Shay Bocks · Built on the Genesis Framework · Powered by WordPress