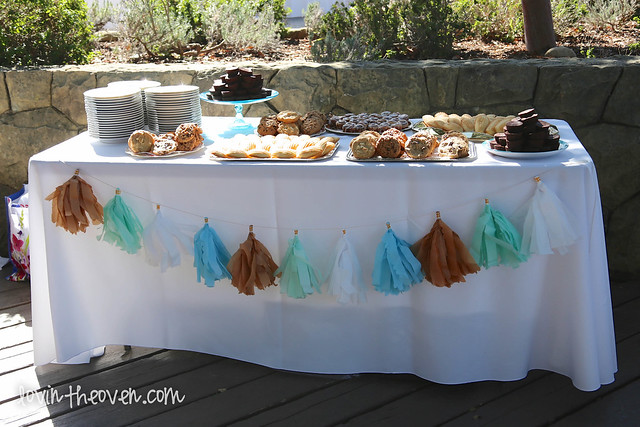
For my sister’s wedding back in February, I was in charge of setting up and decorating her dessert table and gifts table. Her wedding took a lot of manual labor from everyone and it turned out wonderful in the end despite all the stress that came from it in the beginning.
I wanted to make something simple for the front of the tables that was easy to carry and not very fragile (we had to lug all of our goods to Santa Barbara, which is about an hour and a half drive from our house). A tassel garland banner was perfect!
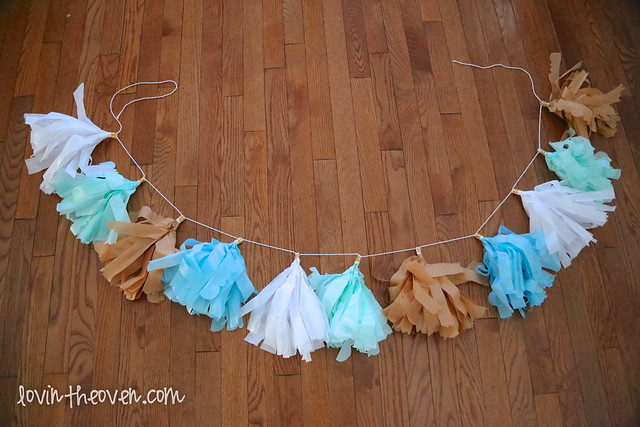
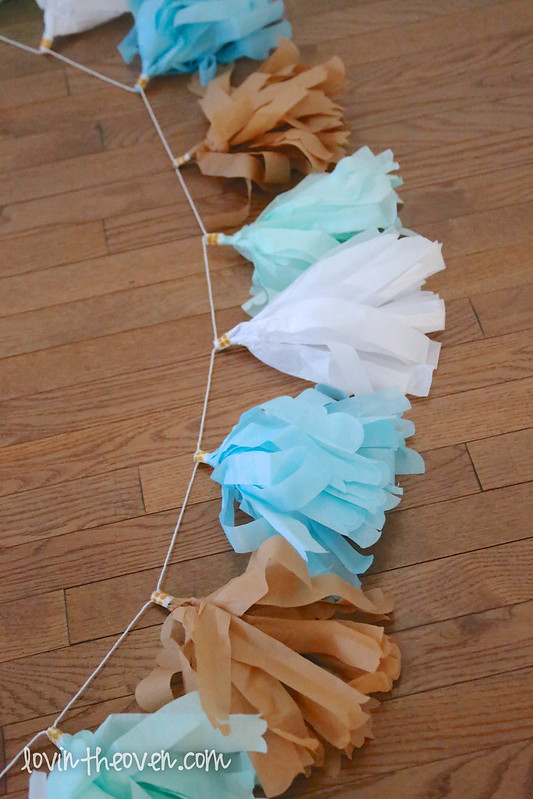
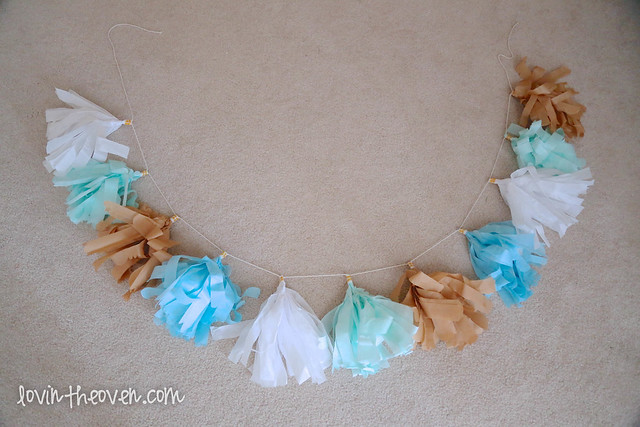
You can mix and match colors to create the perfect combination for your event. It’s definitely a bit time consuming, but the end result is impressive. Did I mention it’s extremely cheap to make?
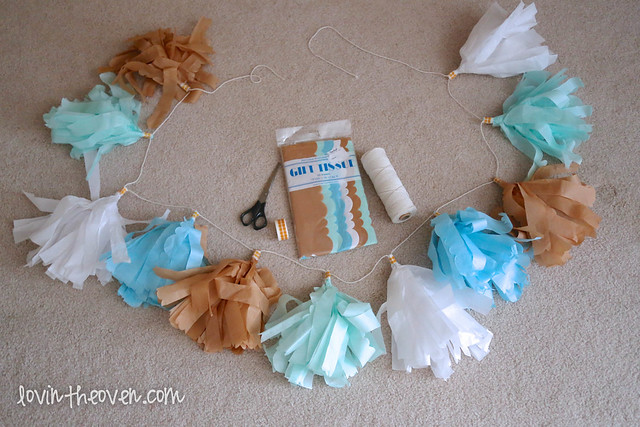
All you need are scissors, tissue paper in whatever colors you plan on using, twine, and some washi tape. Total cost of this project? $8 for the materials, which is enough to make five banners plus some in my case. That’s about $1.60 for each garland banner long enough for a six feet rectangle table. Actually, it’s even less since I had a TON of twine leftover.
Bottom line? It’s a steal.
I happened to stumble across a pack of tissue paper at Marshall’s that had all of the colors that I needed. It had scalloped edges, but that’s not necessary for this project. Regular tissue paper works just fine, if not better. The way to read the pictures are from top to bottom, left to right. Let’s start!
1. First, cut your twine to your desired length. Set aside. (not pictured)
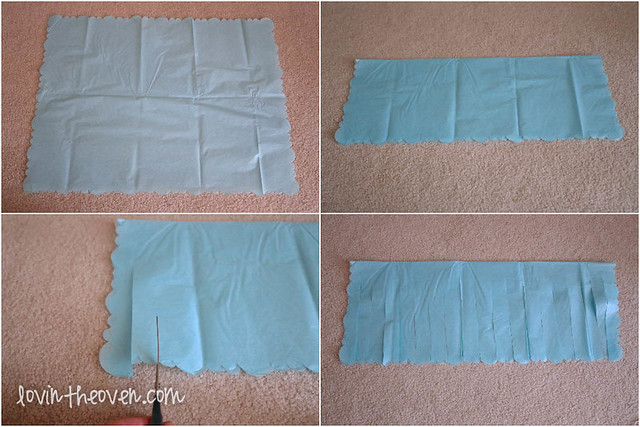
2. Lay out your tissue paper nice and flat.
3. Fold it in half horizontally.
4. Using your scissors, cut 1 inch strips from the bottom (you can do thinner strips if you want skinnier tassels) toward the fold. Make sure to stop cutting about two inches from the top.
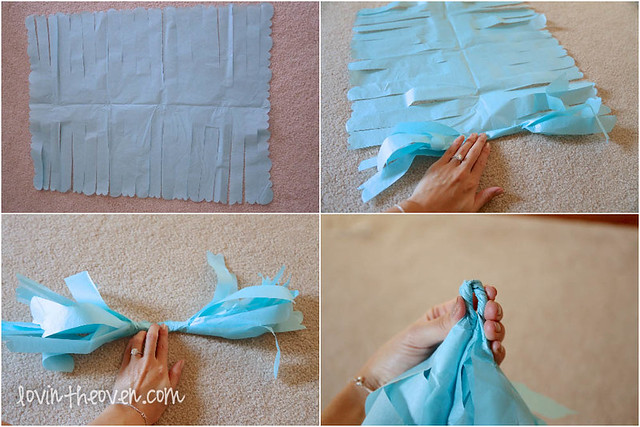
5. After you’ve finished cutting your strips, unfold the tissue paper and lay it out flat once again.
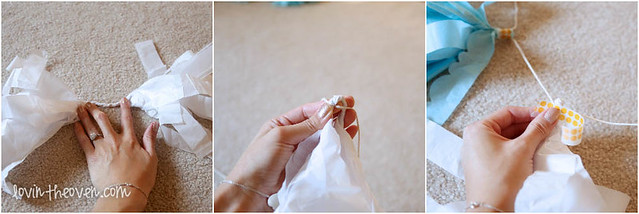
6. Turn the tissue paper so that the uncut center is perpendicular to you. Start rolling the paper in the center until you’ve rolled the entire tissue paper, with the cut edges on the end.
7. Twist the middle and fold it in half.
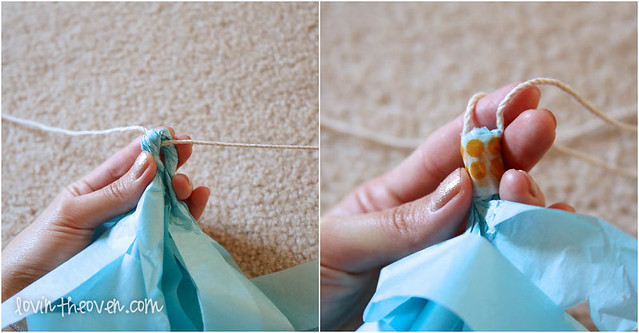
8. Place the twine through the twist that you’ve just created.
9. Wrap a piece of washi tape around the center of the tissue paper to keep it intact.
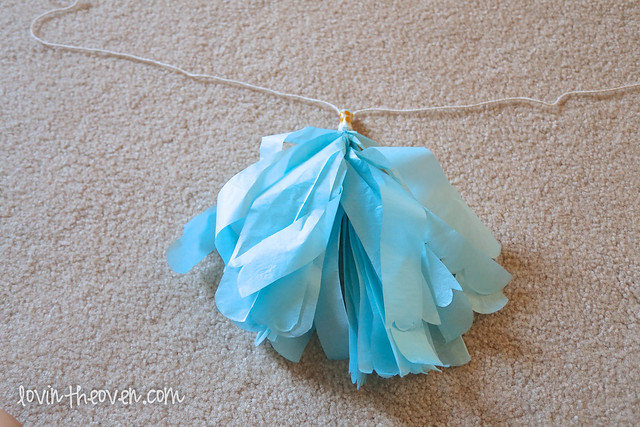
10. Carefully fluff out the tassel ends until you get your desired look.
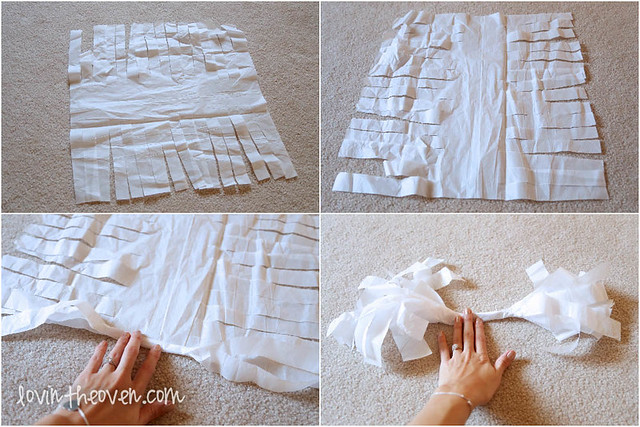
That’s it! Repeat steps 1-10 about a million times until your garland is full. Make sure to evenly space the tassels apart so you get a uniform look. Here, I’ll show you again how to do it:


Ta-da! Now keep going!
Happy tassel garland making!
This is really cool! i’m planning a wedding right now so it was nice to see this post. these look really nice and easy to make. thanks for sharing!
did you do any other diy for the wedding?