Like I said in my previous post, this post has nothing to do with cooking, so look away if you’re not interested. After posting a picture on my Instagram about my recent knitting obsession, I had a couple of people ask me about knitting with the loom. There are tons of tutorials online to learn how to knit using sticks, but not as many using a knitting loom. Since I had a camera and was starting a new project, I figured I’d make my own tutorial if anyone else wanted to learn the easier way to knit.
First, here’s what you need:
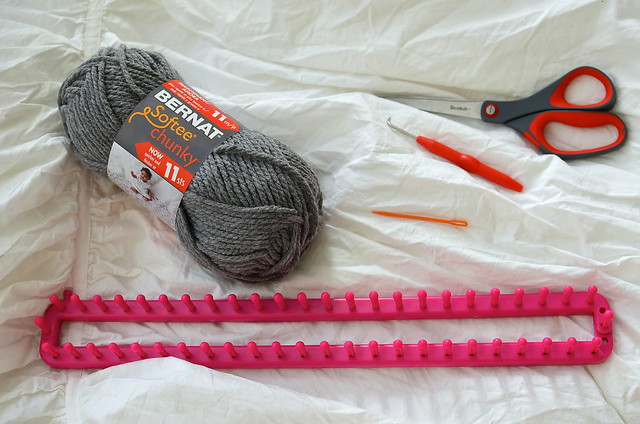
- knitting loom
- loom hook
- yarn needle
- scissors
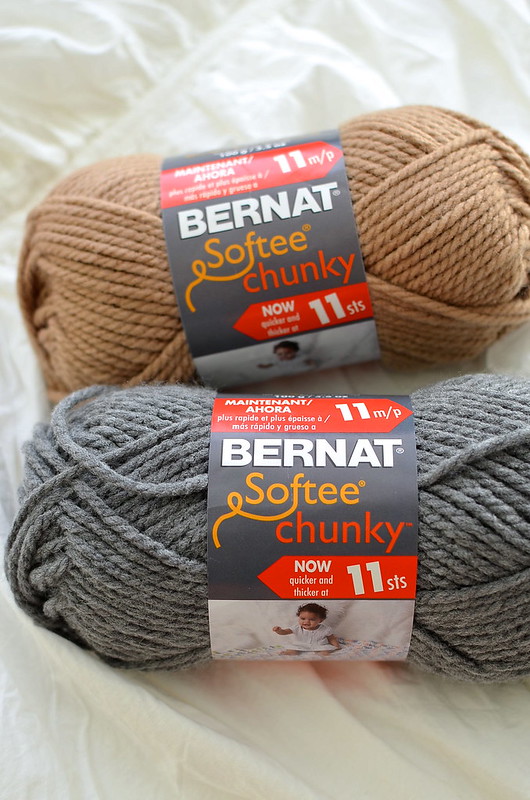
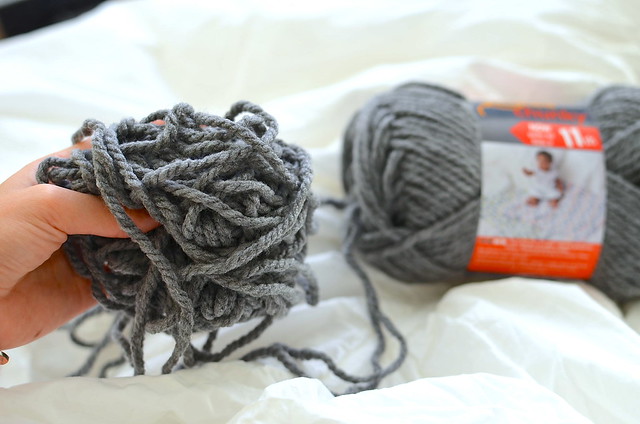
- yarn (If you want a chunkier scarf, use a thicker yarn. My favorite is by Bernat: “Softee chunkee.” I used two skeins for this project.)
- crochet hook in a size K (I forgot to include this in the picture. Also, it’s not necessary but it makes your life a whole lot easier when casting off at the end.)
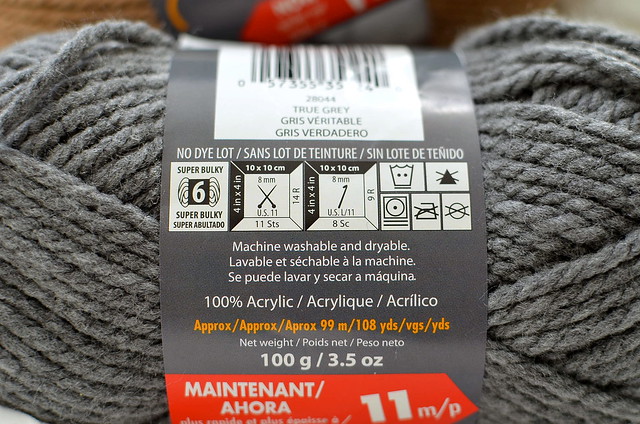
Here are the details of my yarn if you’re into that kind of thing. I don’t really bother with specifics. If it looks and feels right, use it.
Did you know about this trick? In order to get the end of the yarn, stick your hand into the left side of the yarn ball and pull out the little bundle you feel.

Voi-la! You’ve got an end of the yarn without dismantling the entire thing. I may or may not have taken too big of a handful in this picture. Oh well, you’re going to use it anyways.
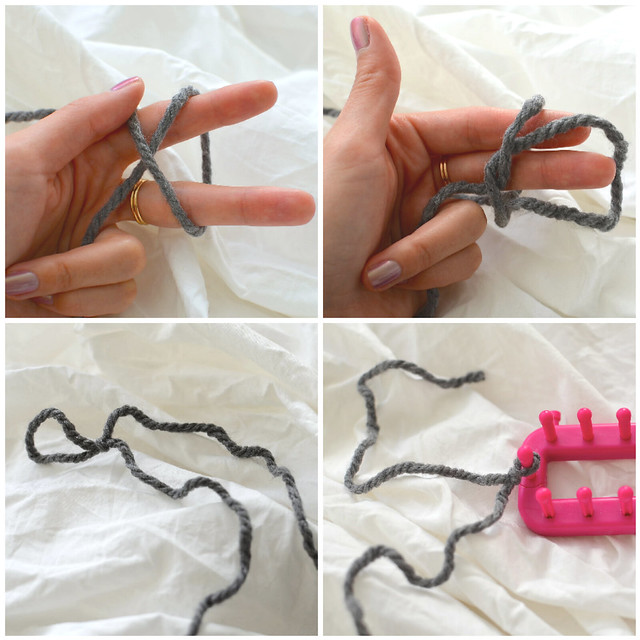
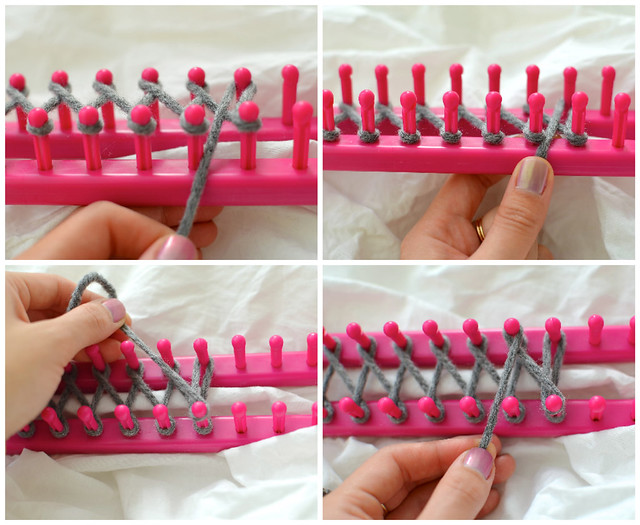
Start out by making a slip knot with about five inches at the end. Then, stick your slip knot onto the end prong of your loom.
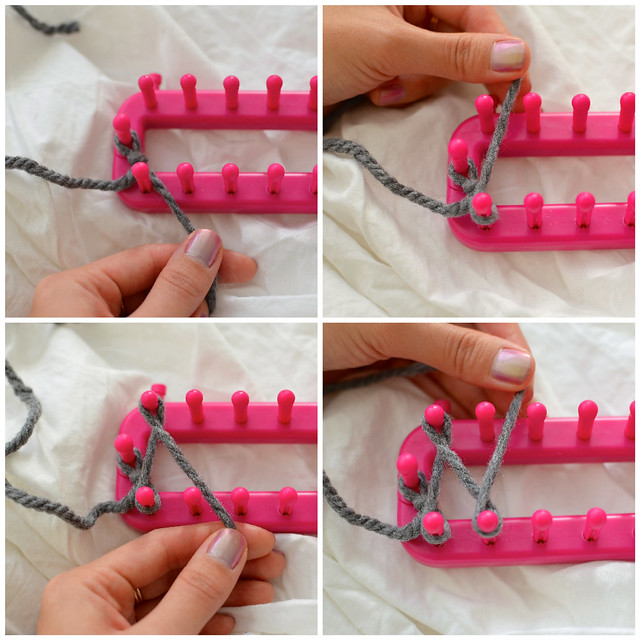
Let’s number our prongs. All the ones closest to you at the bottom will be odd numbers and the top row will be even numbers.
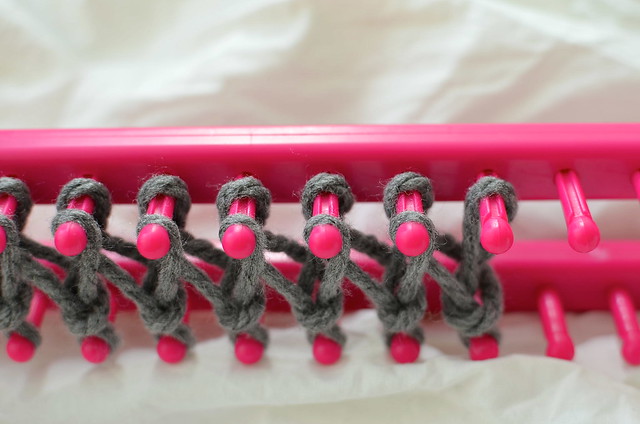
Now grab your string that’s attached to the ball of yarn and put it in between prongs 1 and 3. Wrap it clockwise around prong 1 and bring it up in between prongs 2 and 4.
Wrap it counterclockwise around prong 2 and bring it down in between prongs 2 and 4. Repeat this figure 8 pattern until you get to the desired width of your scarf. For this one, I used 13 prongs.
Once you get to your last even prong, bring it back in between the last two odd prongs you used.
Tip: There’s no need to make the string as tight as humanly possible. Actually, don’t even do that. I did that the first time and the middle of my loom started caving in the middle. No bueno. Nice and easy wins the race.
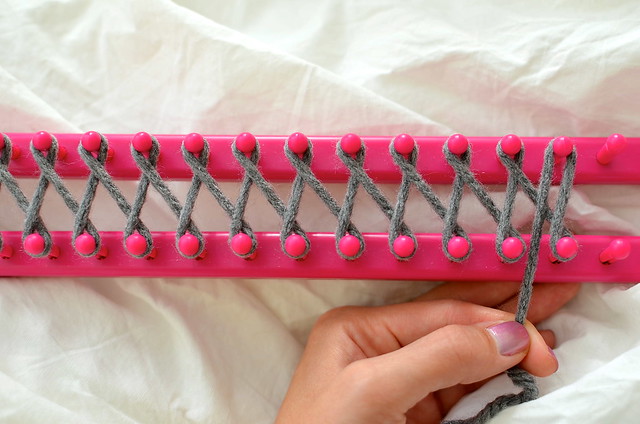
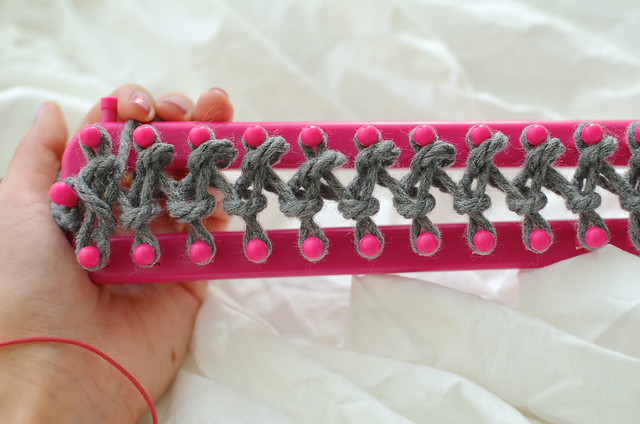
Push all the yarn loops on the pegs to the bottom. Then, continue wrapping your string again, now going from the right end of the loom to your left.
Wrap the string counterclockwise against the last odd peg and then bring it in between the 2nd and 3rd to last even pegs. Your last even peg will only have one layer. Continue the figure 8 pattern all the way to the where you began.
It helps me to remember which way to wrap the string by thinking of climbing up a ladder. Use the string to “climb” up your loom.
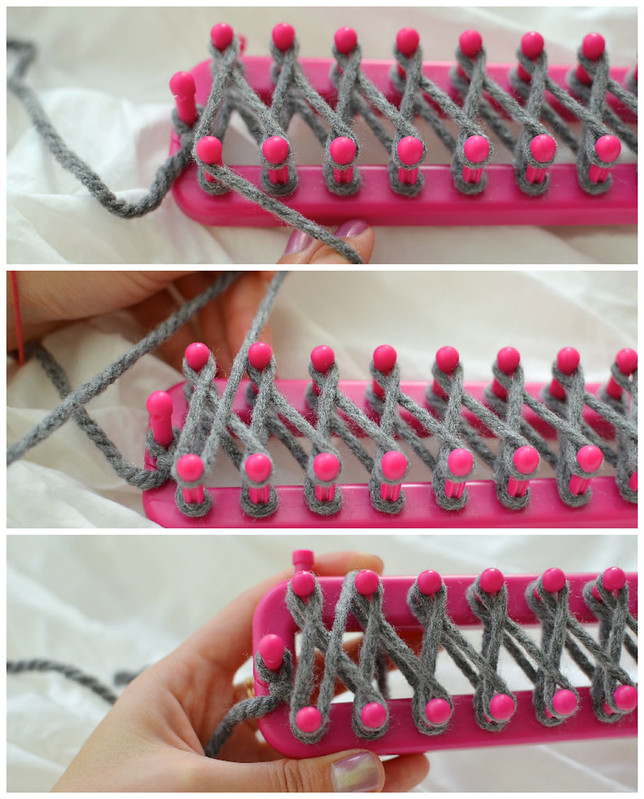
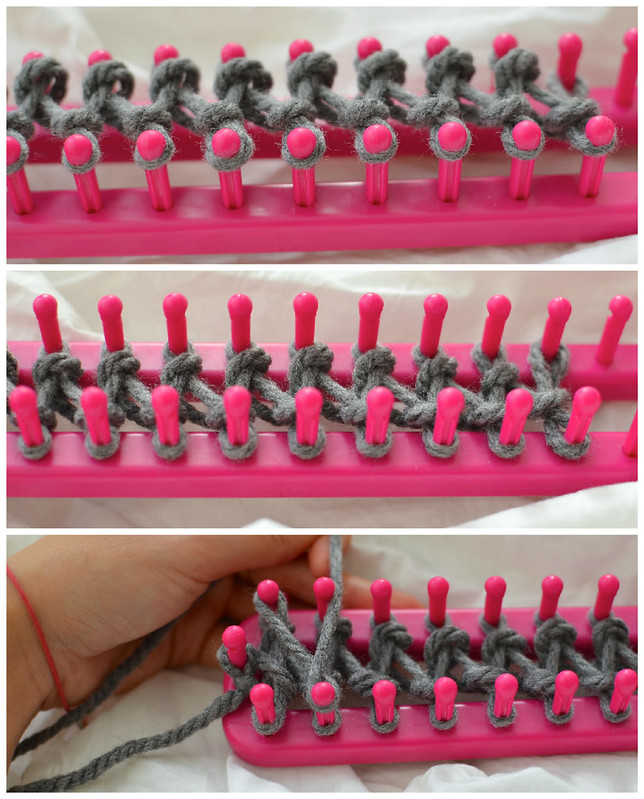
Once you get back to the end, wrap the string between pegs 2 and 4 and hold it there, as pictured.
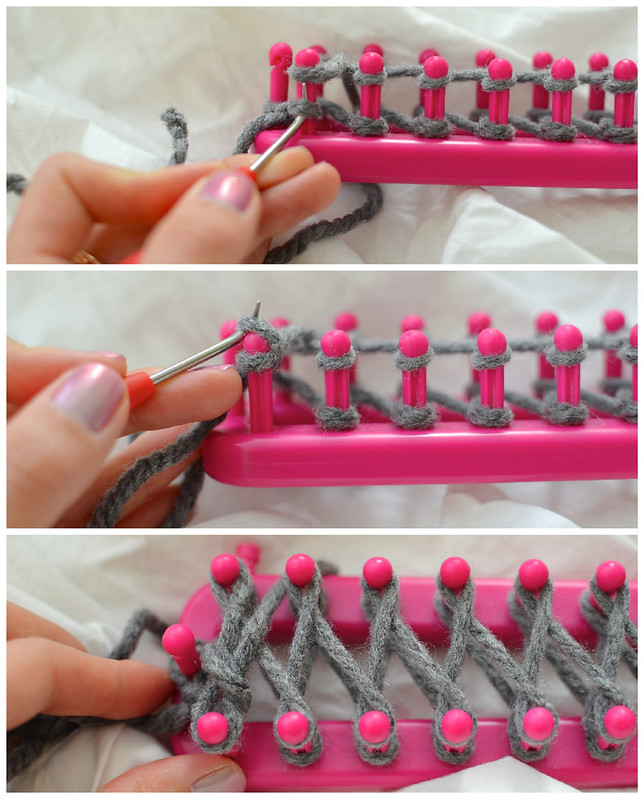
It’s time to bust out your loom hook. Starting from left to right,take the bottom yarn loop and bring it over the top one, completely taking the bottom loop off of the peg.
Continue this process for every peg, except for the your last even peg (since it only has one loop).
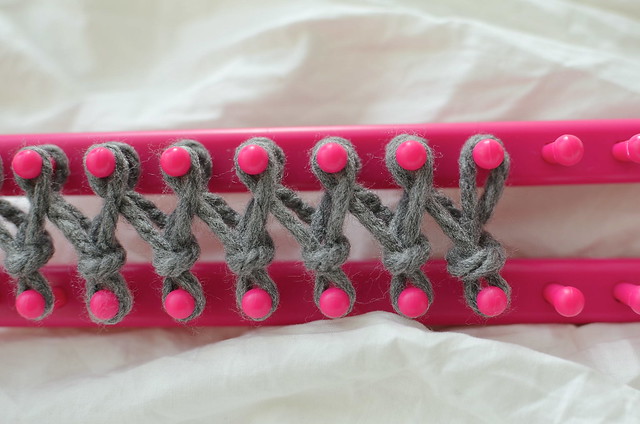
This is what your loom should look like after taking off the bottom layer of yarn loops.
Now that you’re left with one layer of yarn loops at the top, push them all to the bottom again. Repeat this process again and again until you get your desired length. Remember, there will always be one peg with only one yarn loop when you go to hook them, so don’t freak out. Leave that single yarn loop alone!
Don’t forget to remove your slip knot from the peg after doing a couple of rows.
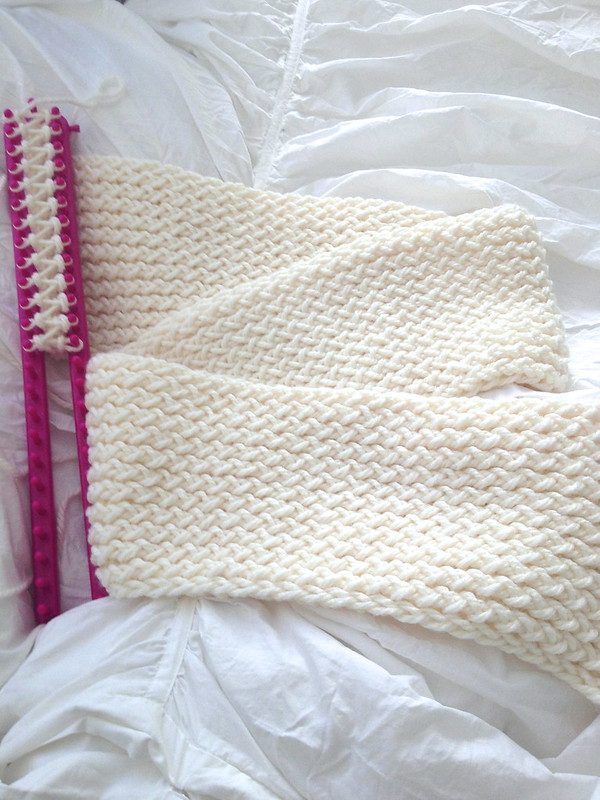
It takes a bit of time, but you’ll eventually see progress if you keep working at it. The thicker the yarn, the faster the scarf will be done. As for how to cast off when you’re finished, this YouTube video will show you better than any picture could explain.
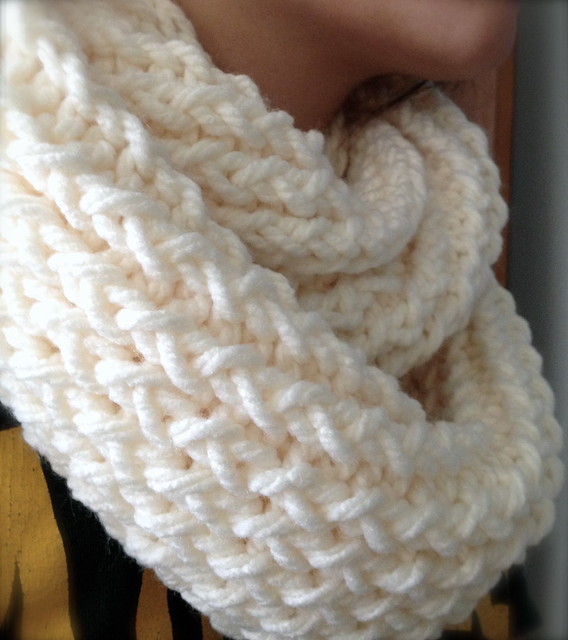
Attach both ends together using a flat seam and your knitting needle. Congratulations! You just made an infinity scarf.